
Configure channels
Any time you add channels to your Xperience by Kentico application, deployed in SaaS, you need to configure them in the Xperience Portal as well.
Our initial deployment contains two channels; Dancing Goat Pages (webpage channel) and Dancing Goat Emails (email channel). Let’s look at setting each of them up in cloud.
Configure the website channel
At this point you can access your Xperience administration in your QA environment, but you have to add a website channel domains in the Xperience Portal to expose the live site.
Add the website channel in Xperience Portal
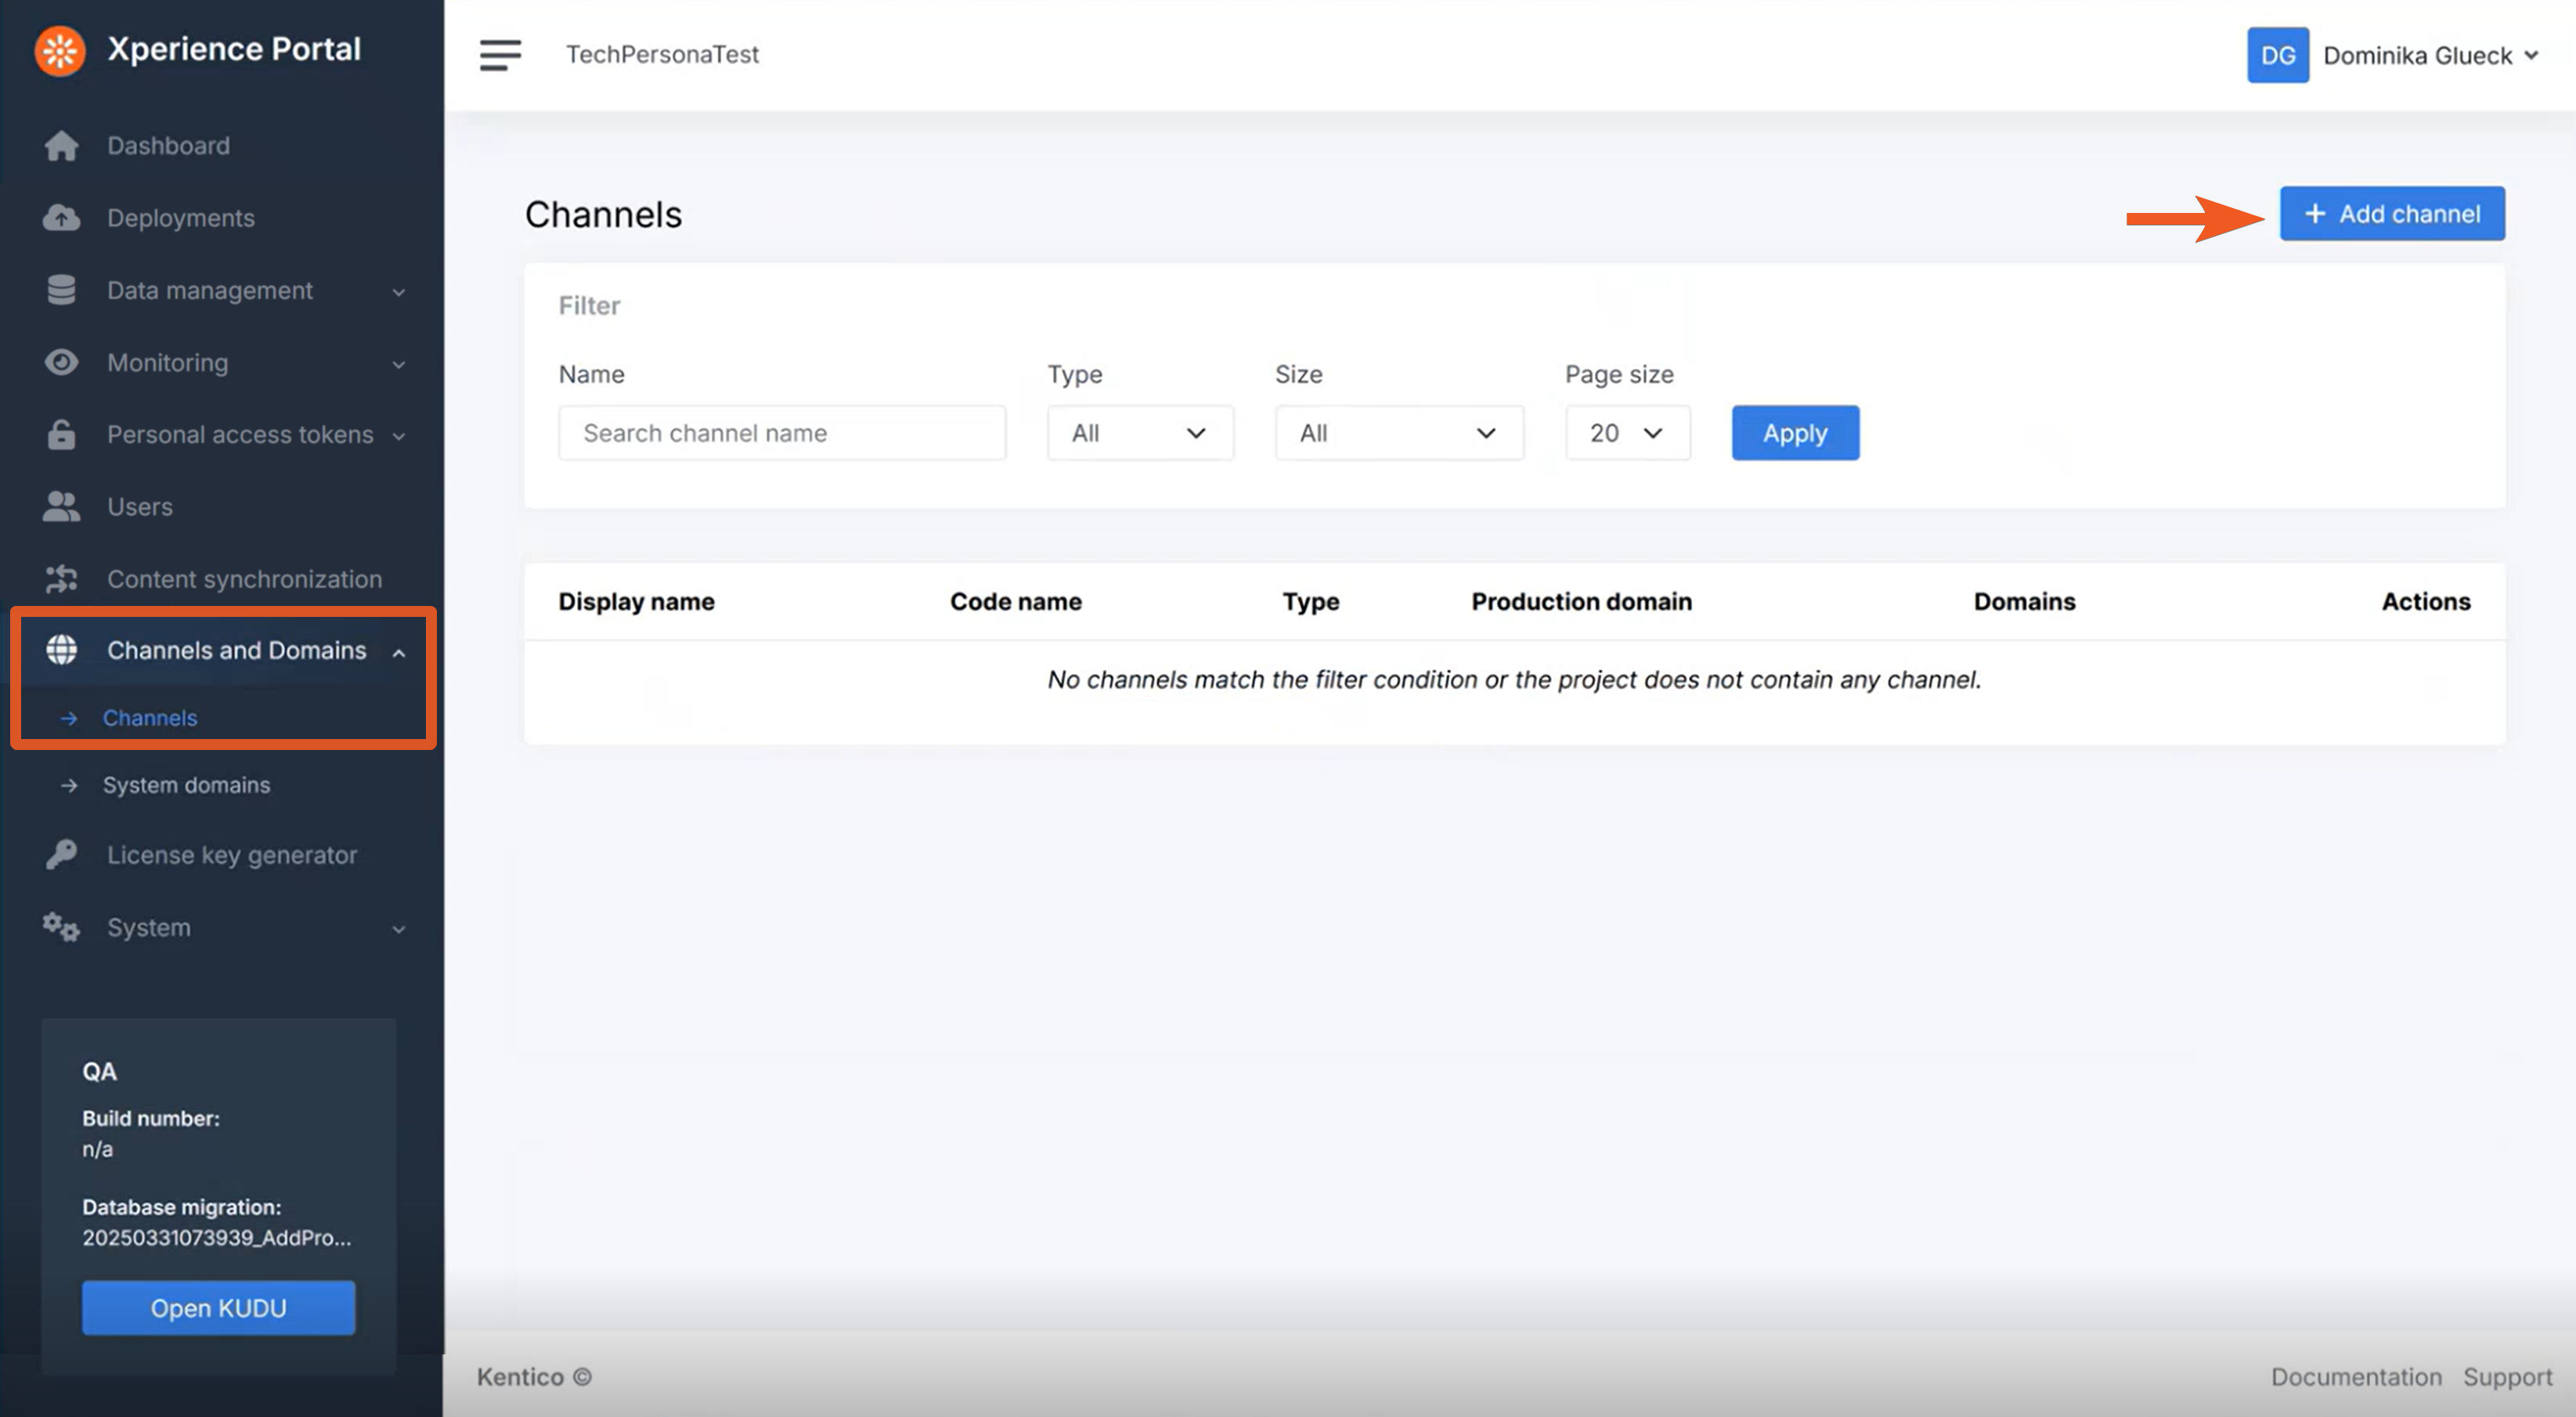
In your Xperience Portal, under your current Dancing Goat project, navigate to Channels and Domains → Channels.
Click Add channel.
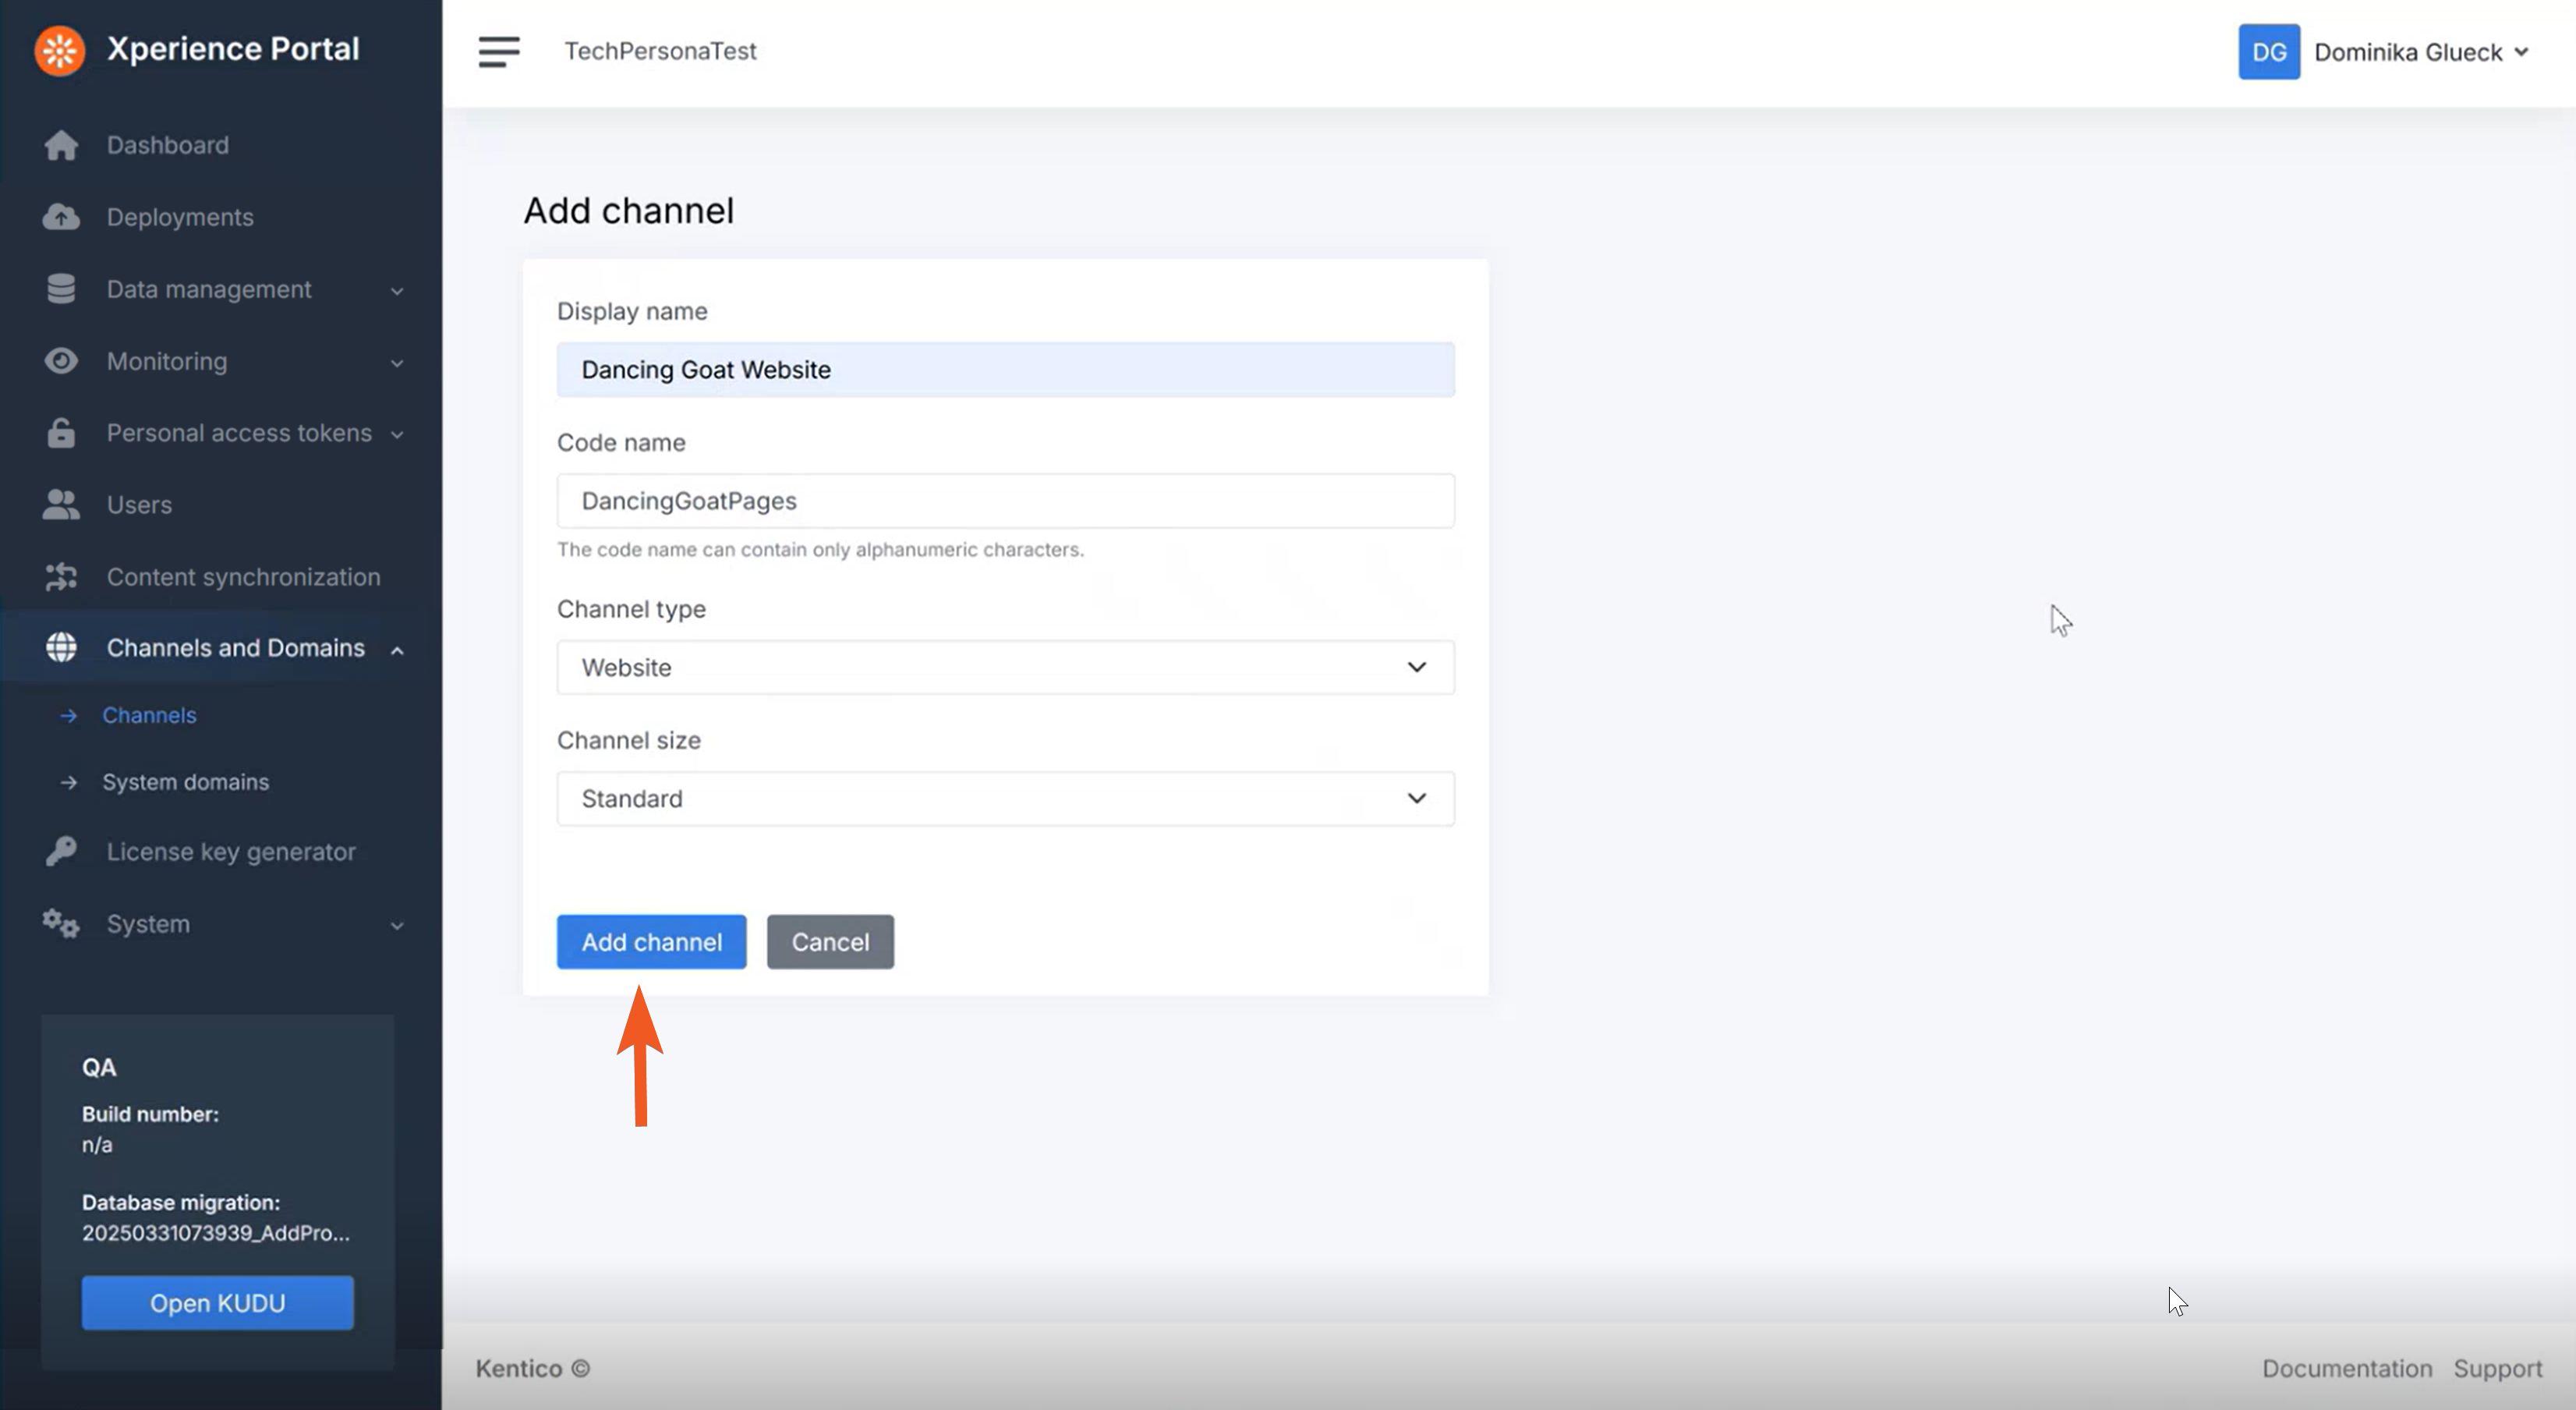
Next, fill out the channel data:
- Display name: Dancing Goat Website
- Code name: DancingGoatPages
- Channel type: Website
- Channel size: Standard
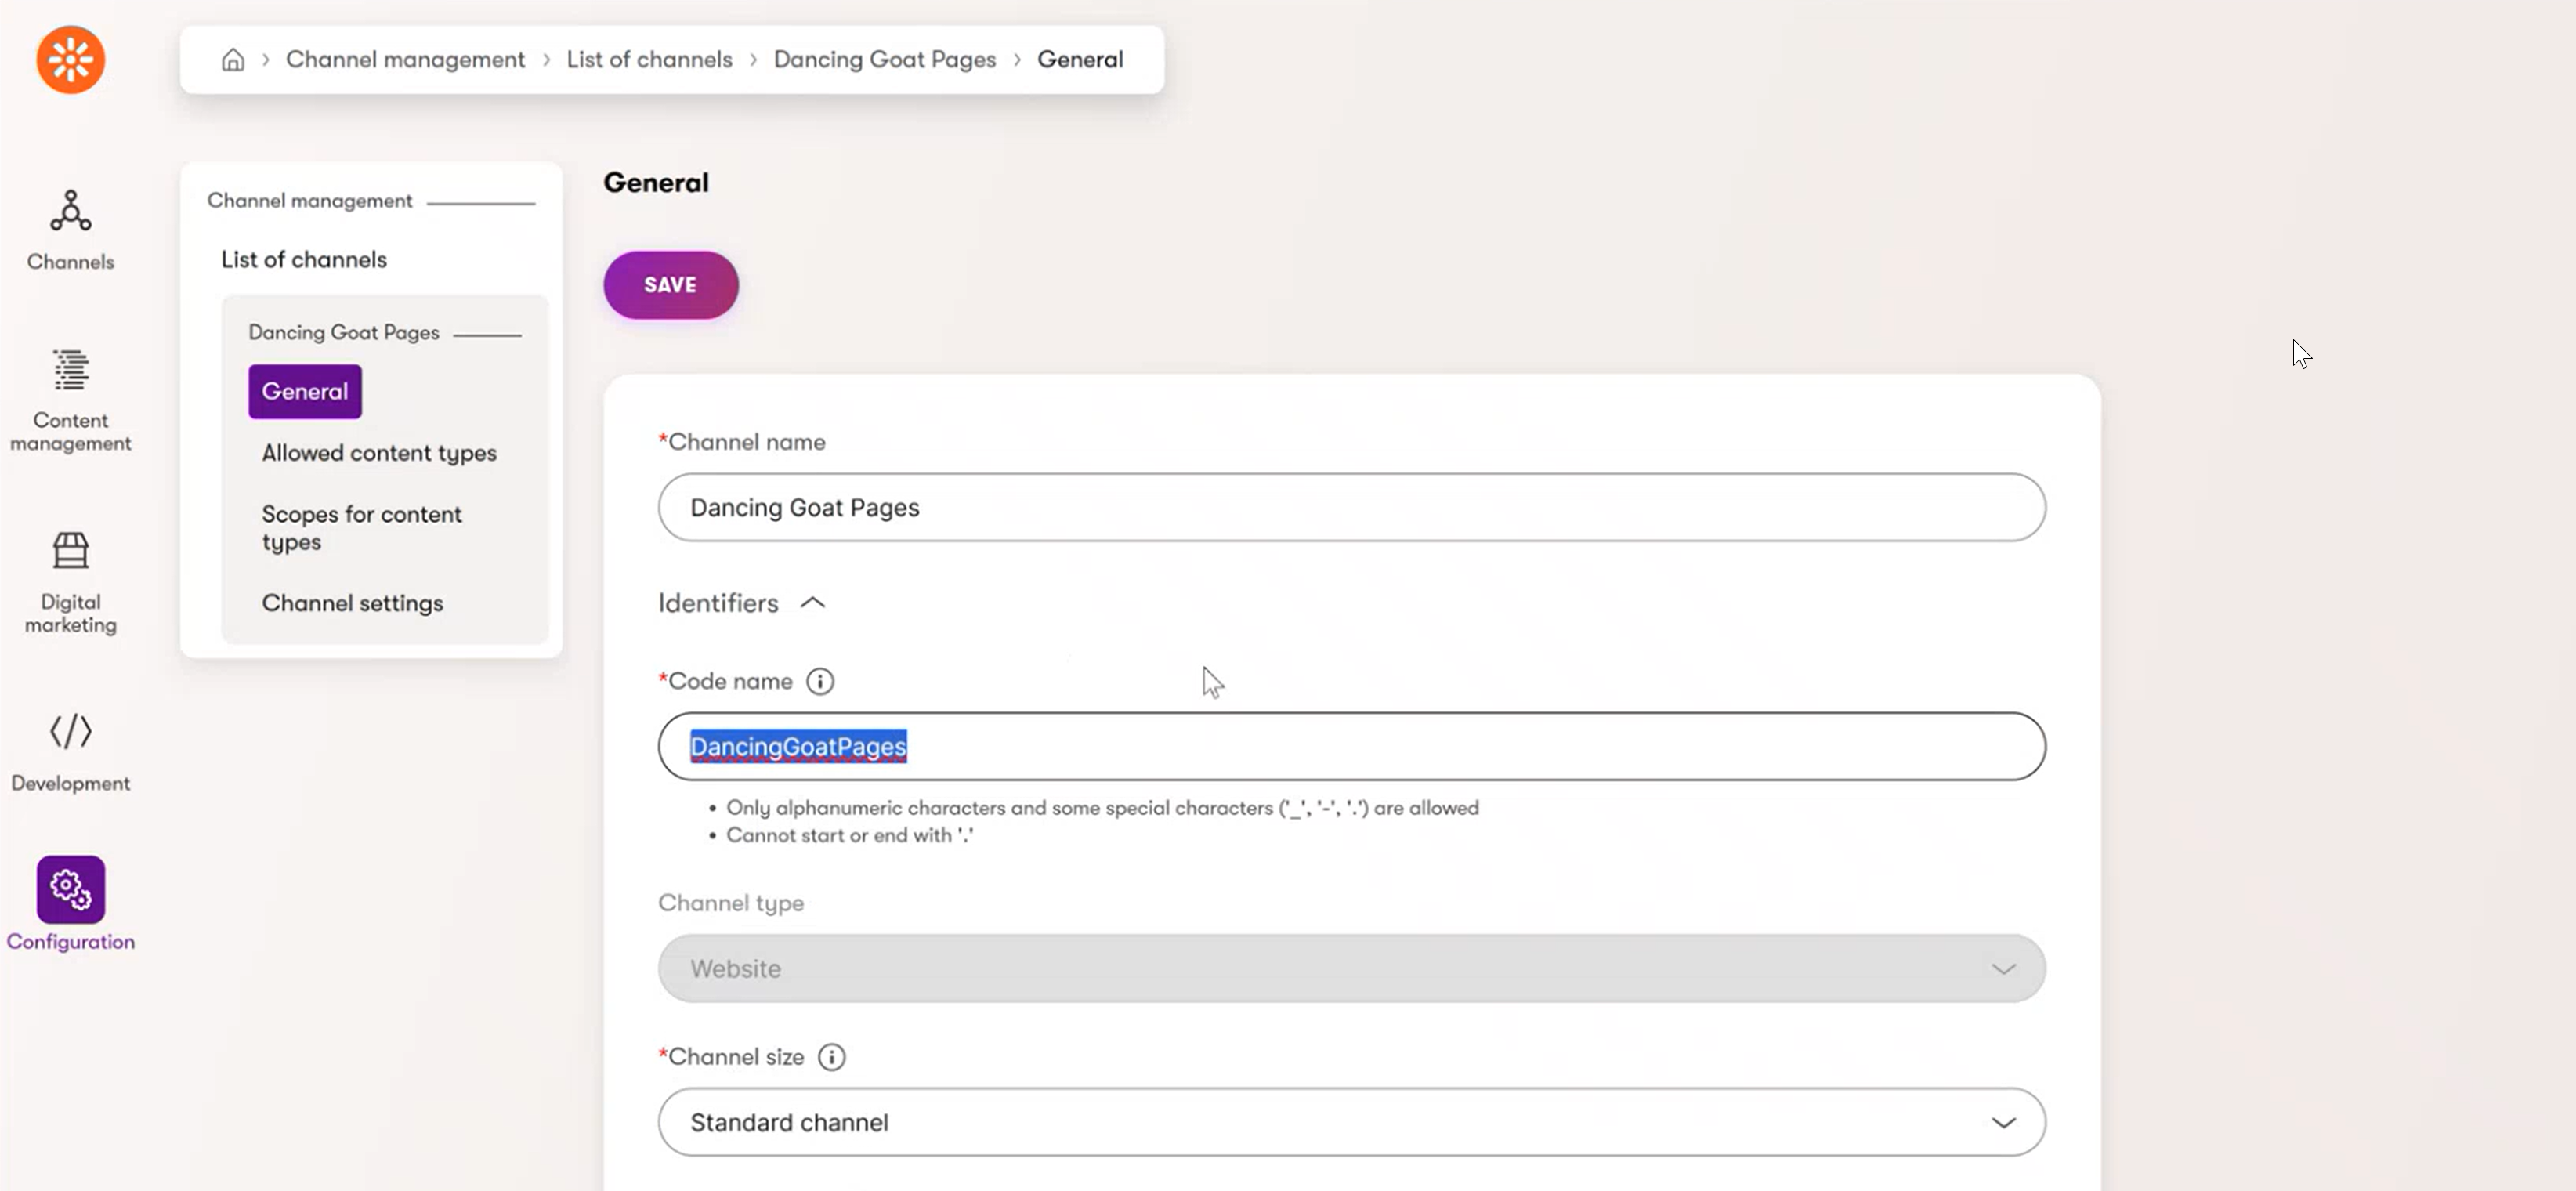
The Code name, Channel type and Channel size must match the values in the Channel management application in the Xperience administration:
After you confirm, you should see your channel being created in the Channels page in the Xperience Portal.
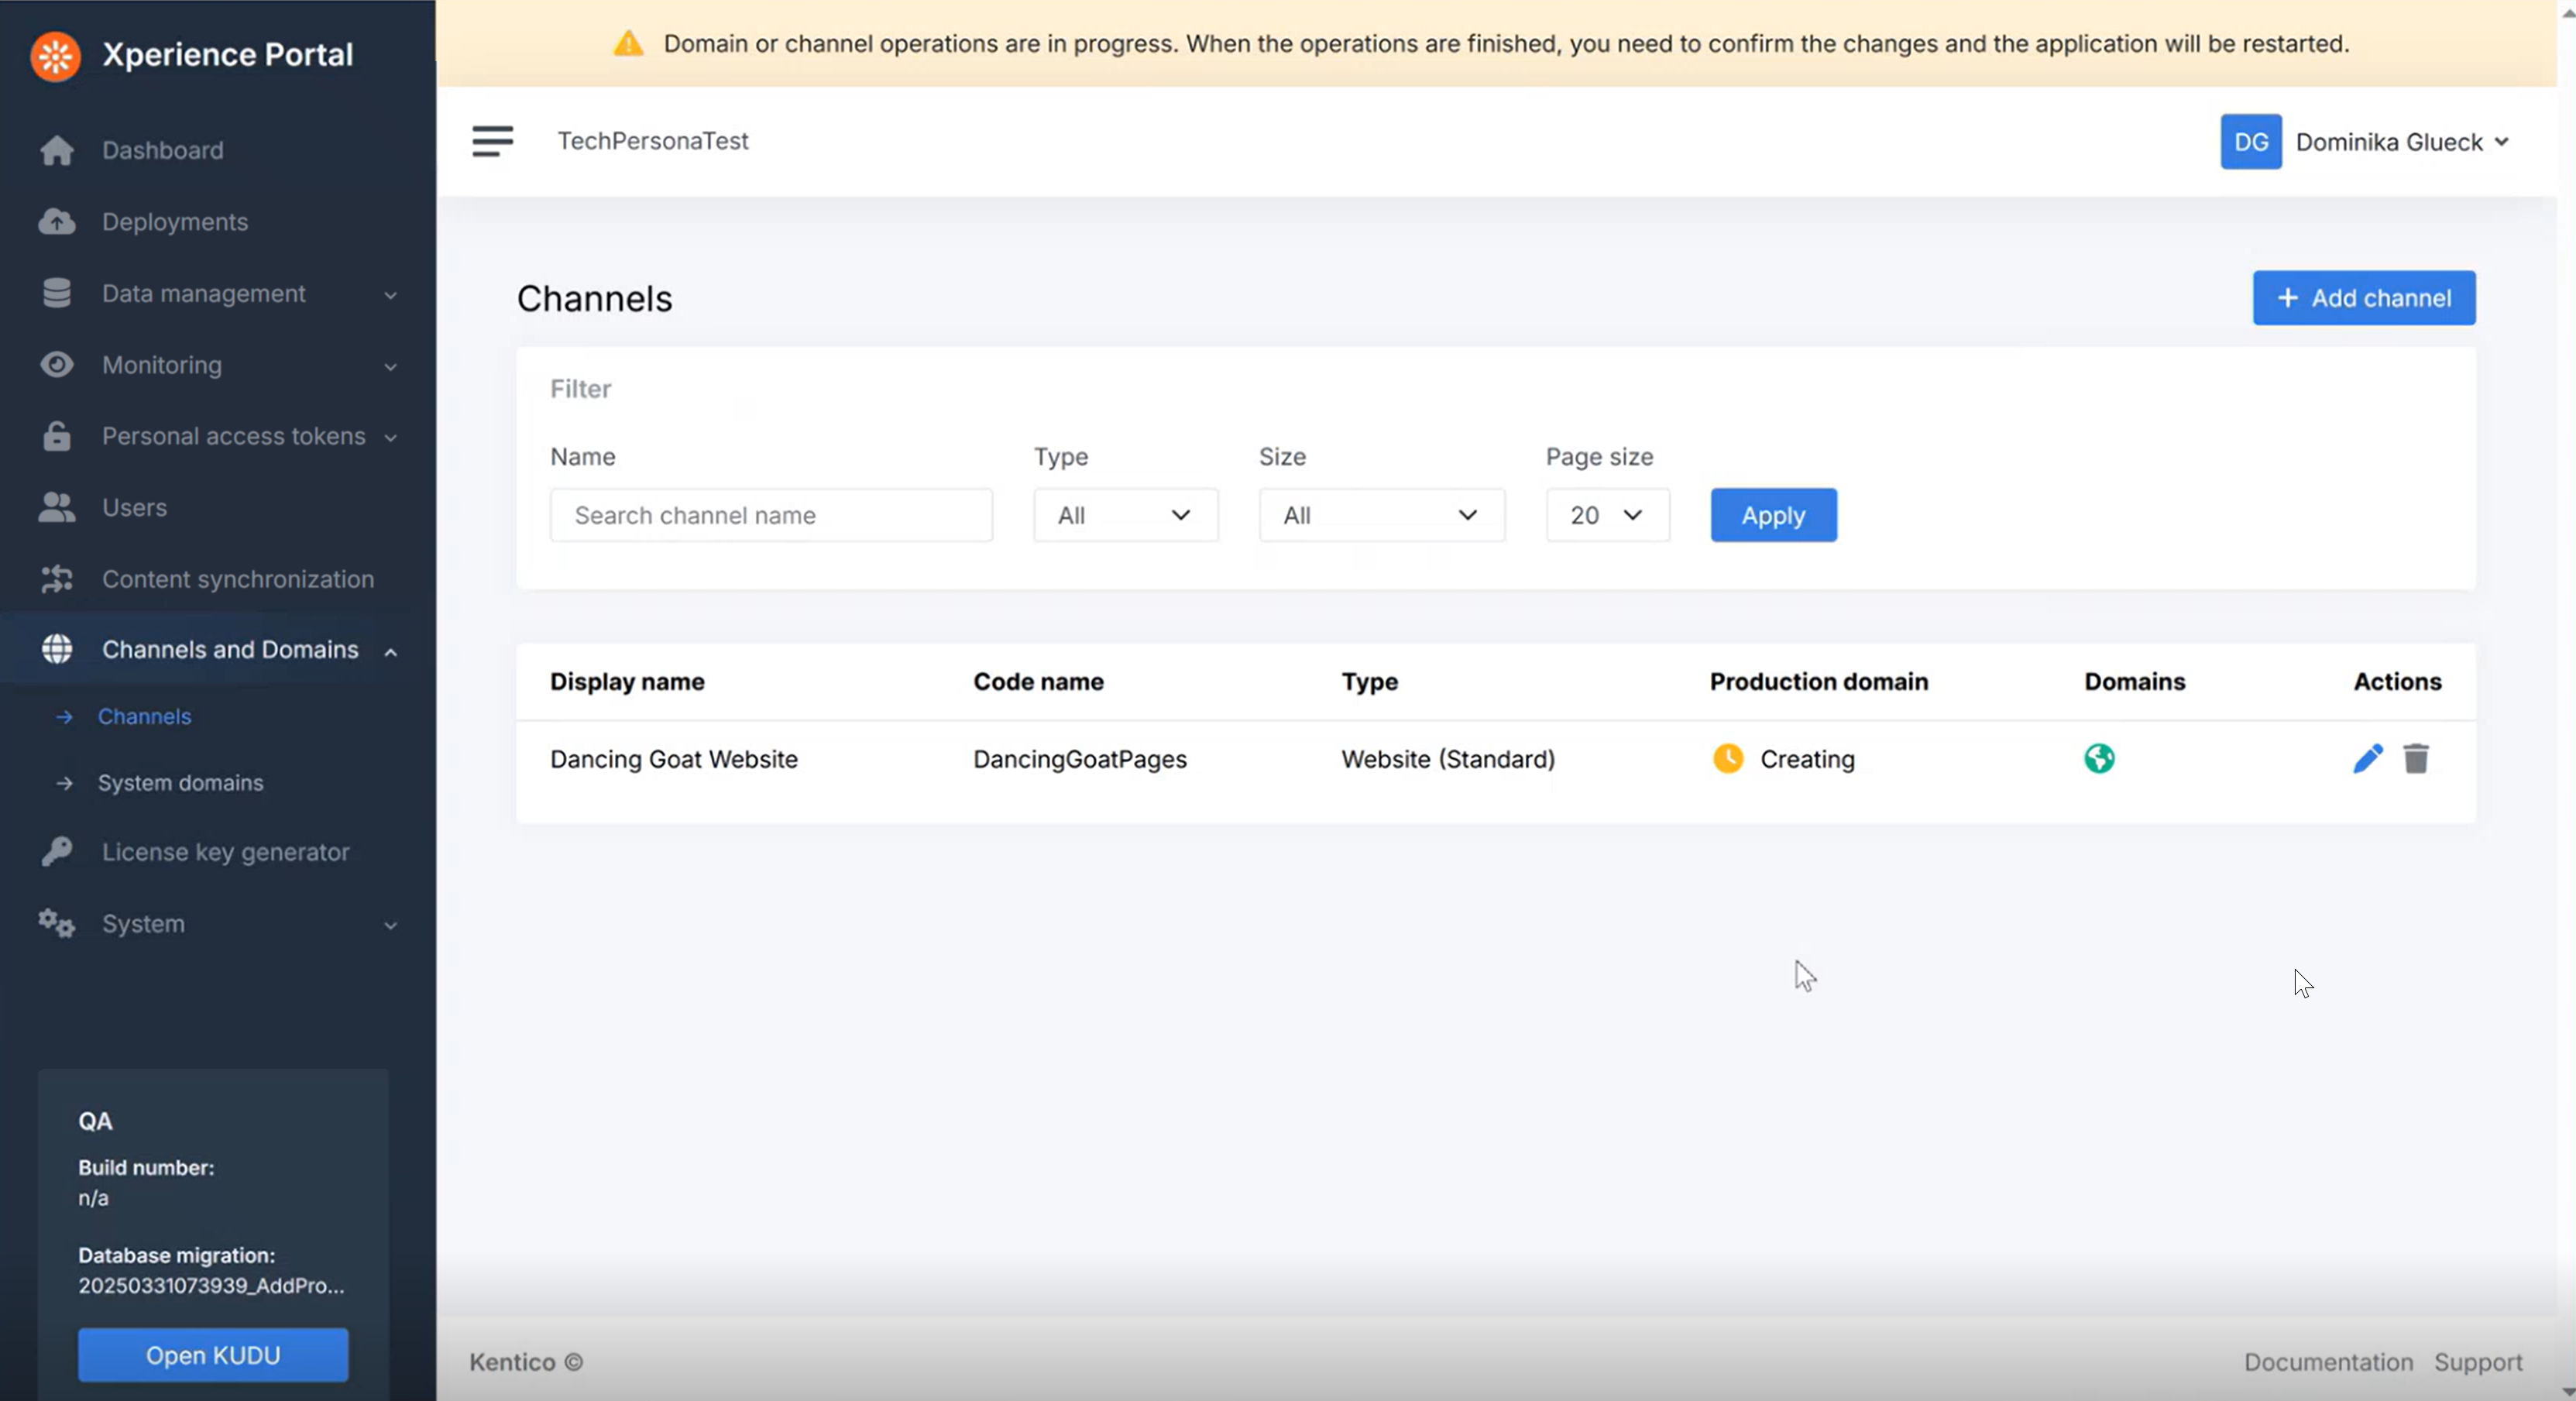
During this time you can still add more channels or adjust channels configuration if you wish.
Notice the yellow warning message at the top of the screen:
Domain or channel operations are in progress. When the operations are finished, you need to confirm the changes and the application will be restarted.
A small caveat here: To actually confirm the changes as the message describes, you may need to refresh the page manually. We recommend trying to refresh after a few minutes have passed, until you see a change.
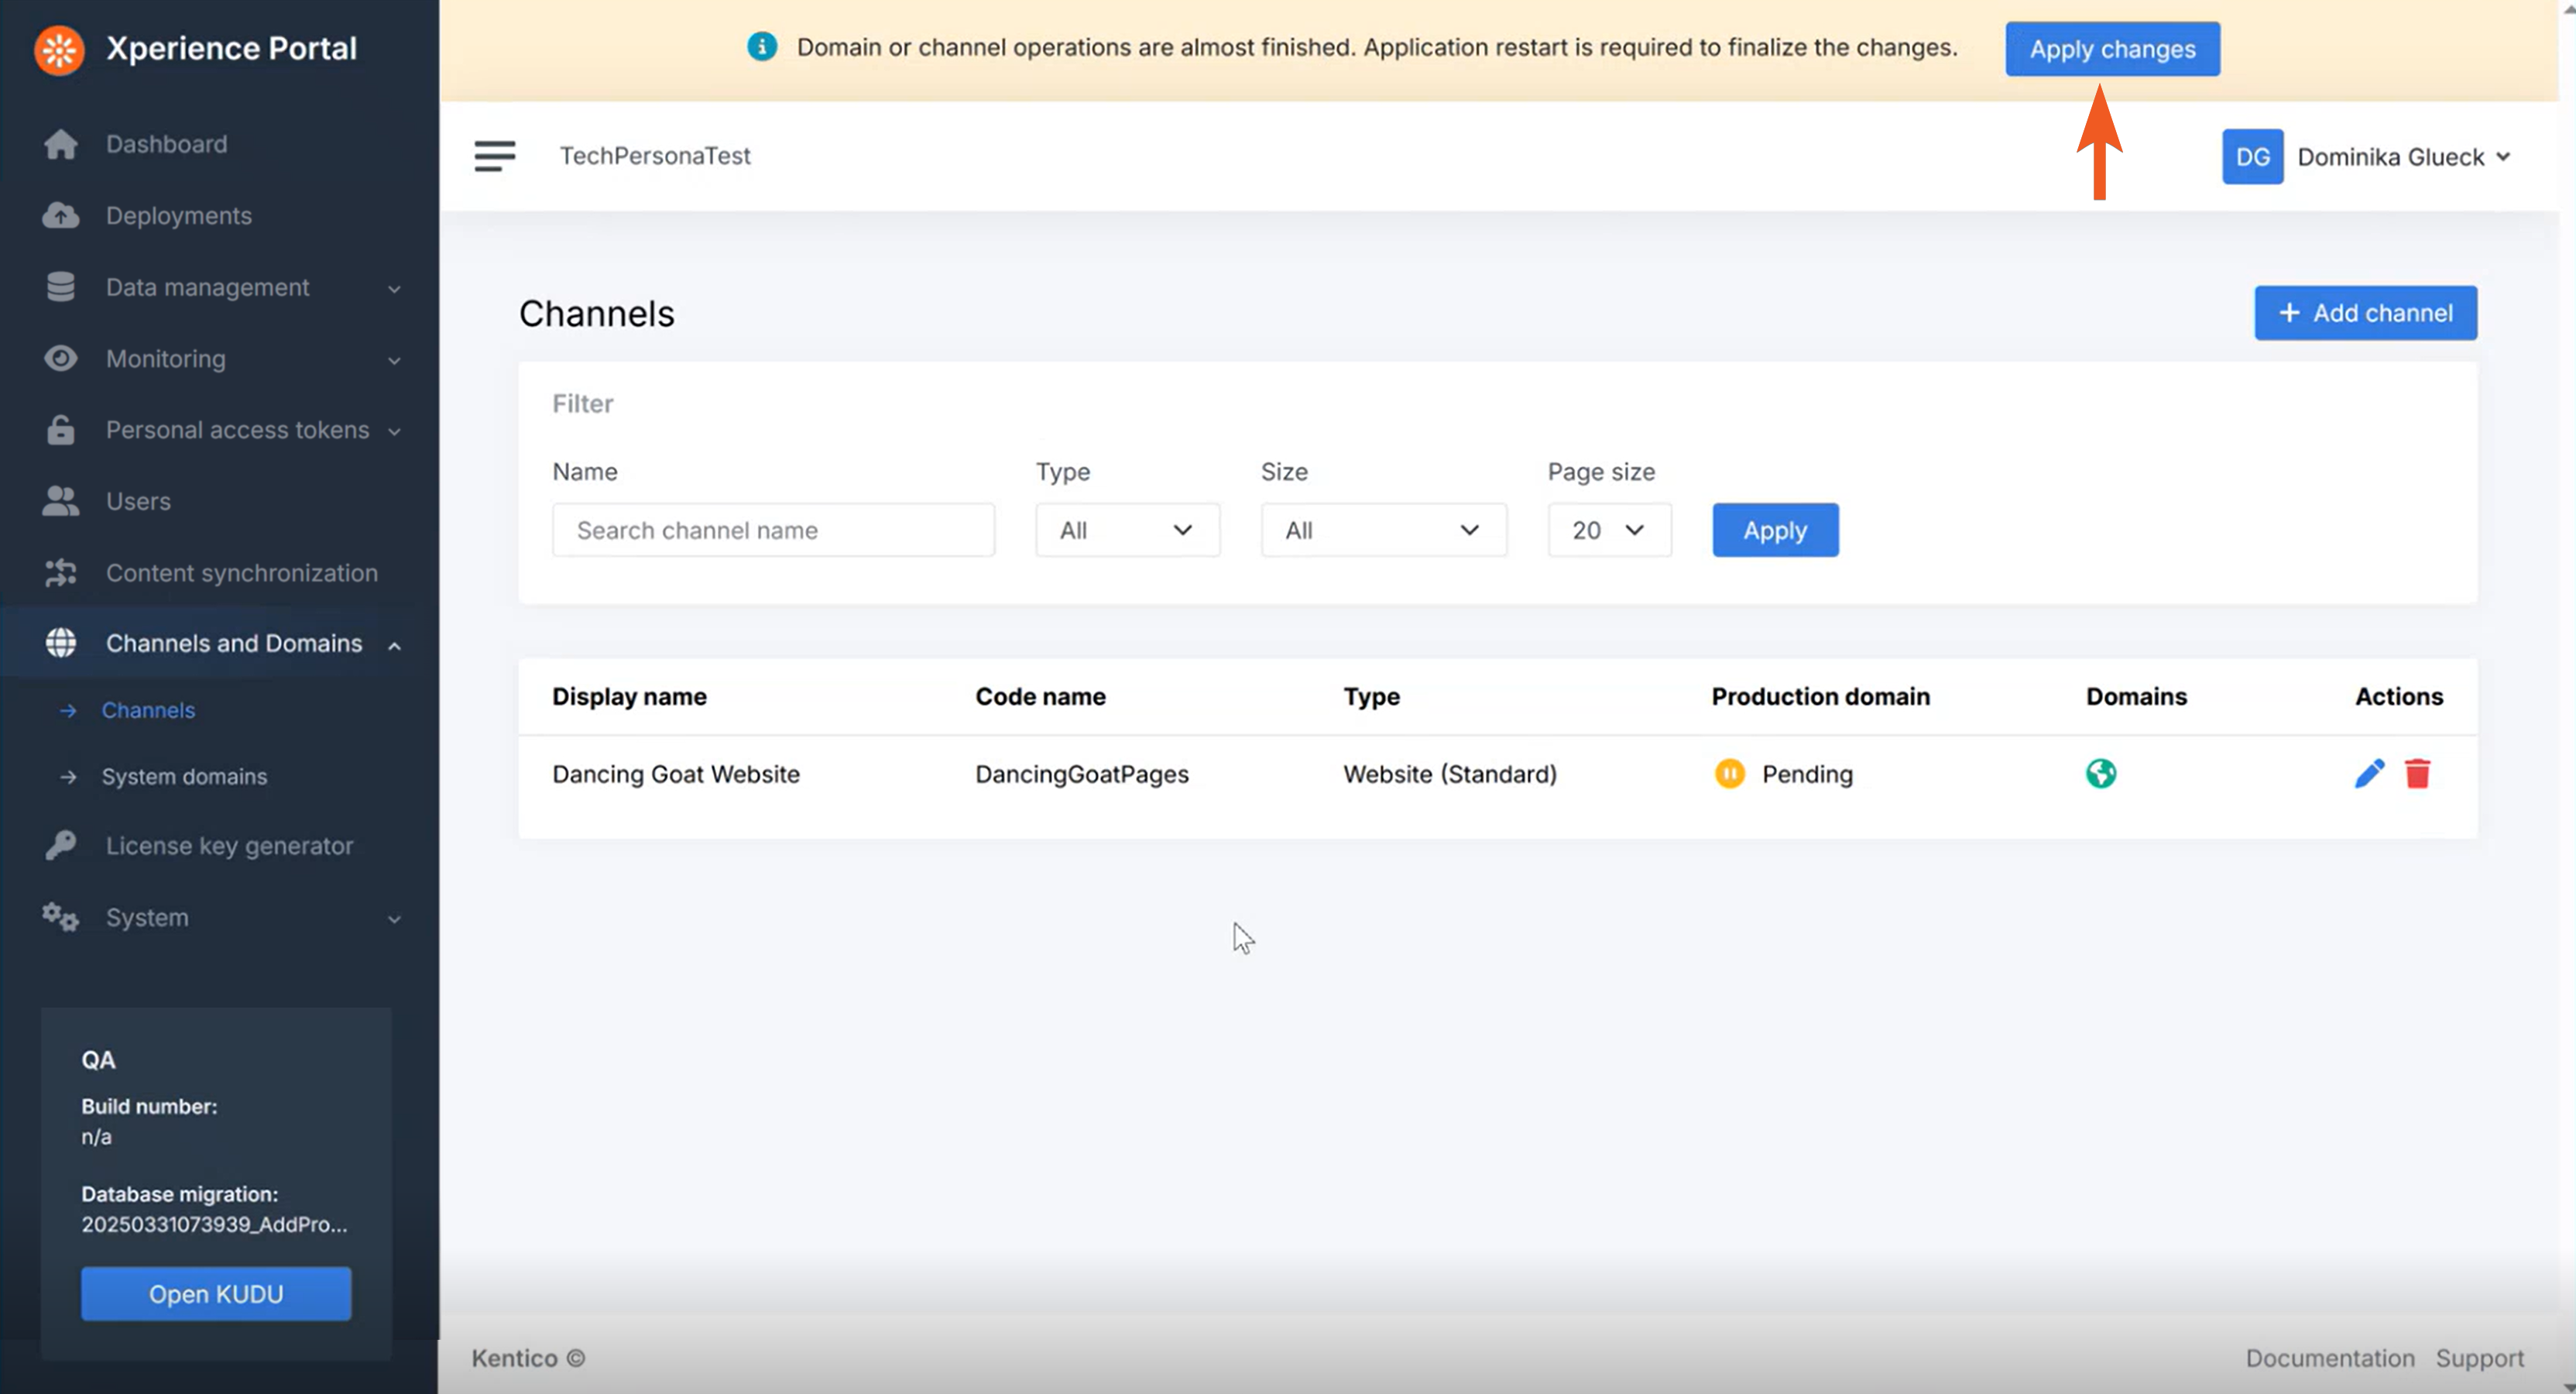
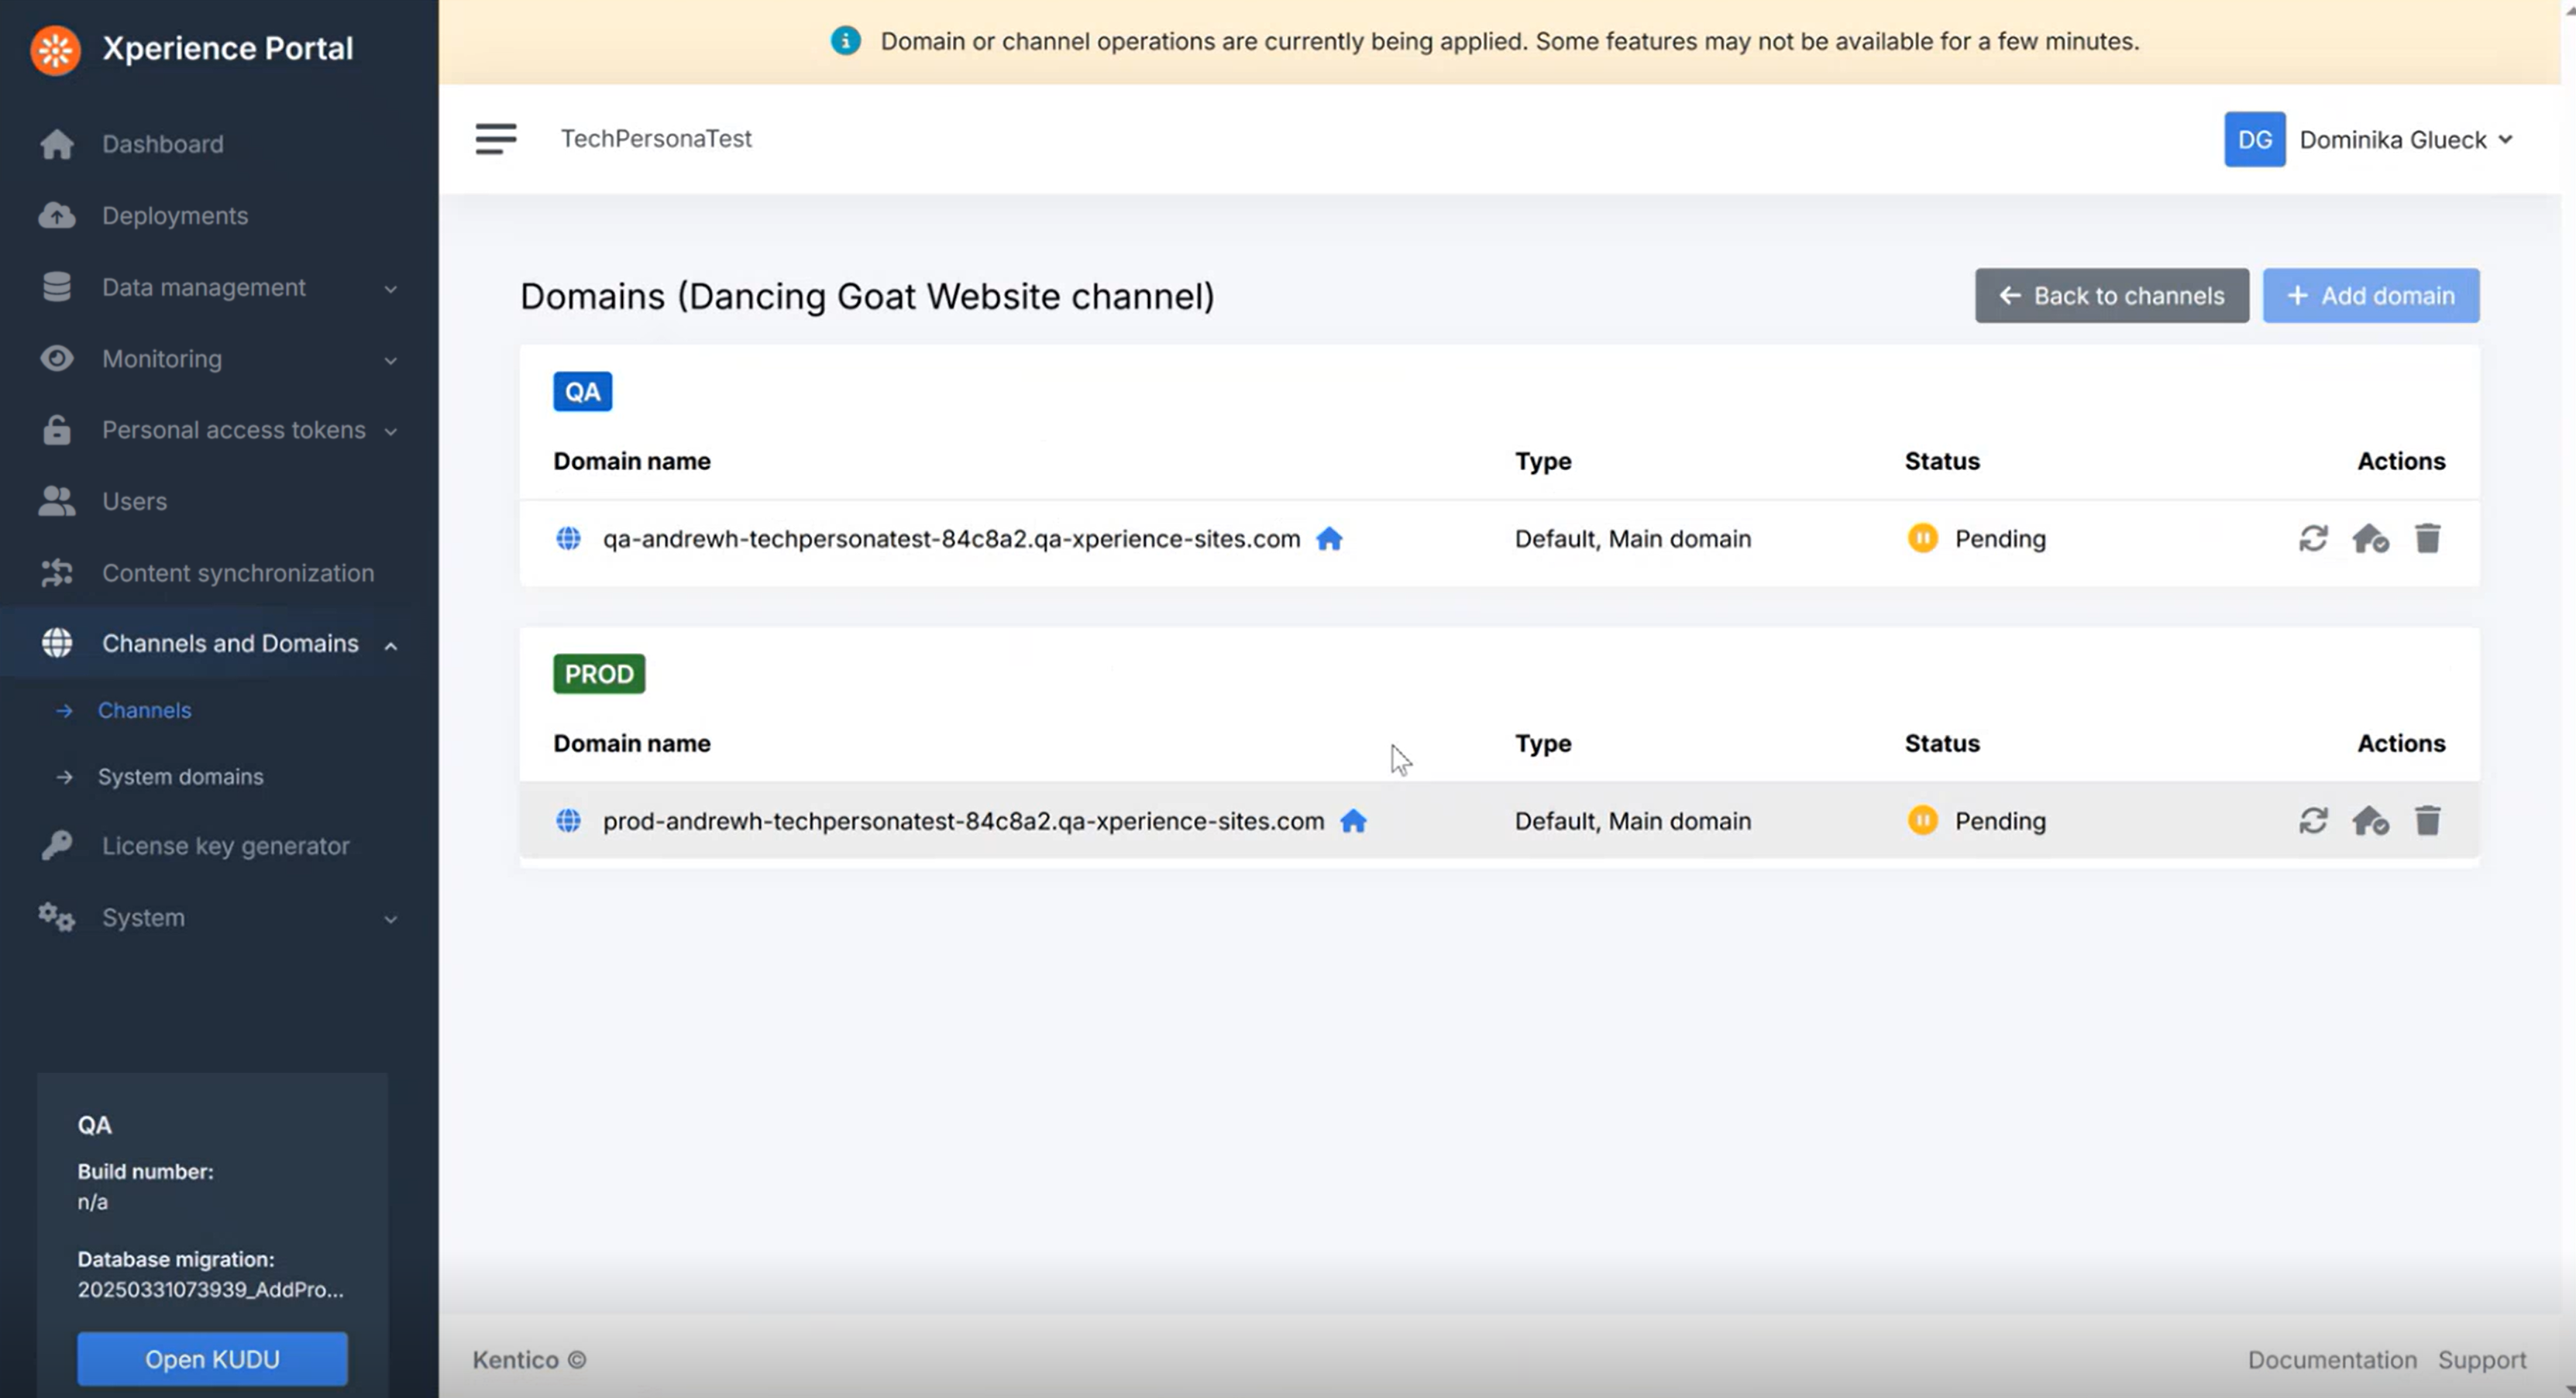
After the channel operations have finished, you’ll see your channel’s Production domain as Pending and the message up top changes to:
Domain and channel operations are almost finished. Application restart is required to finalize the changes.
Click the Apply changes button in the message. This is the confirmation previous message was referring to.
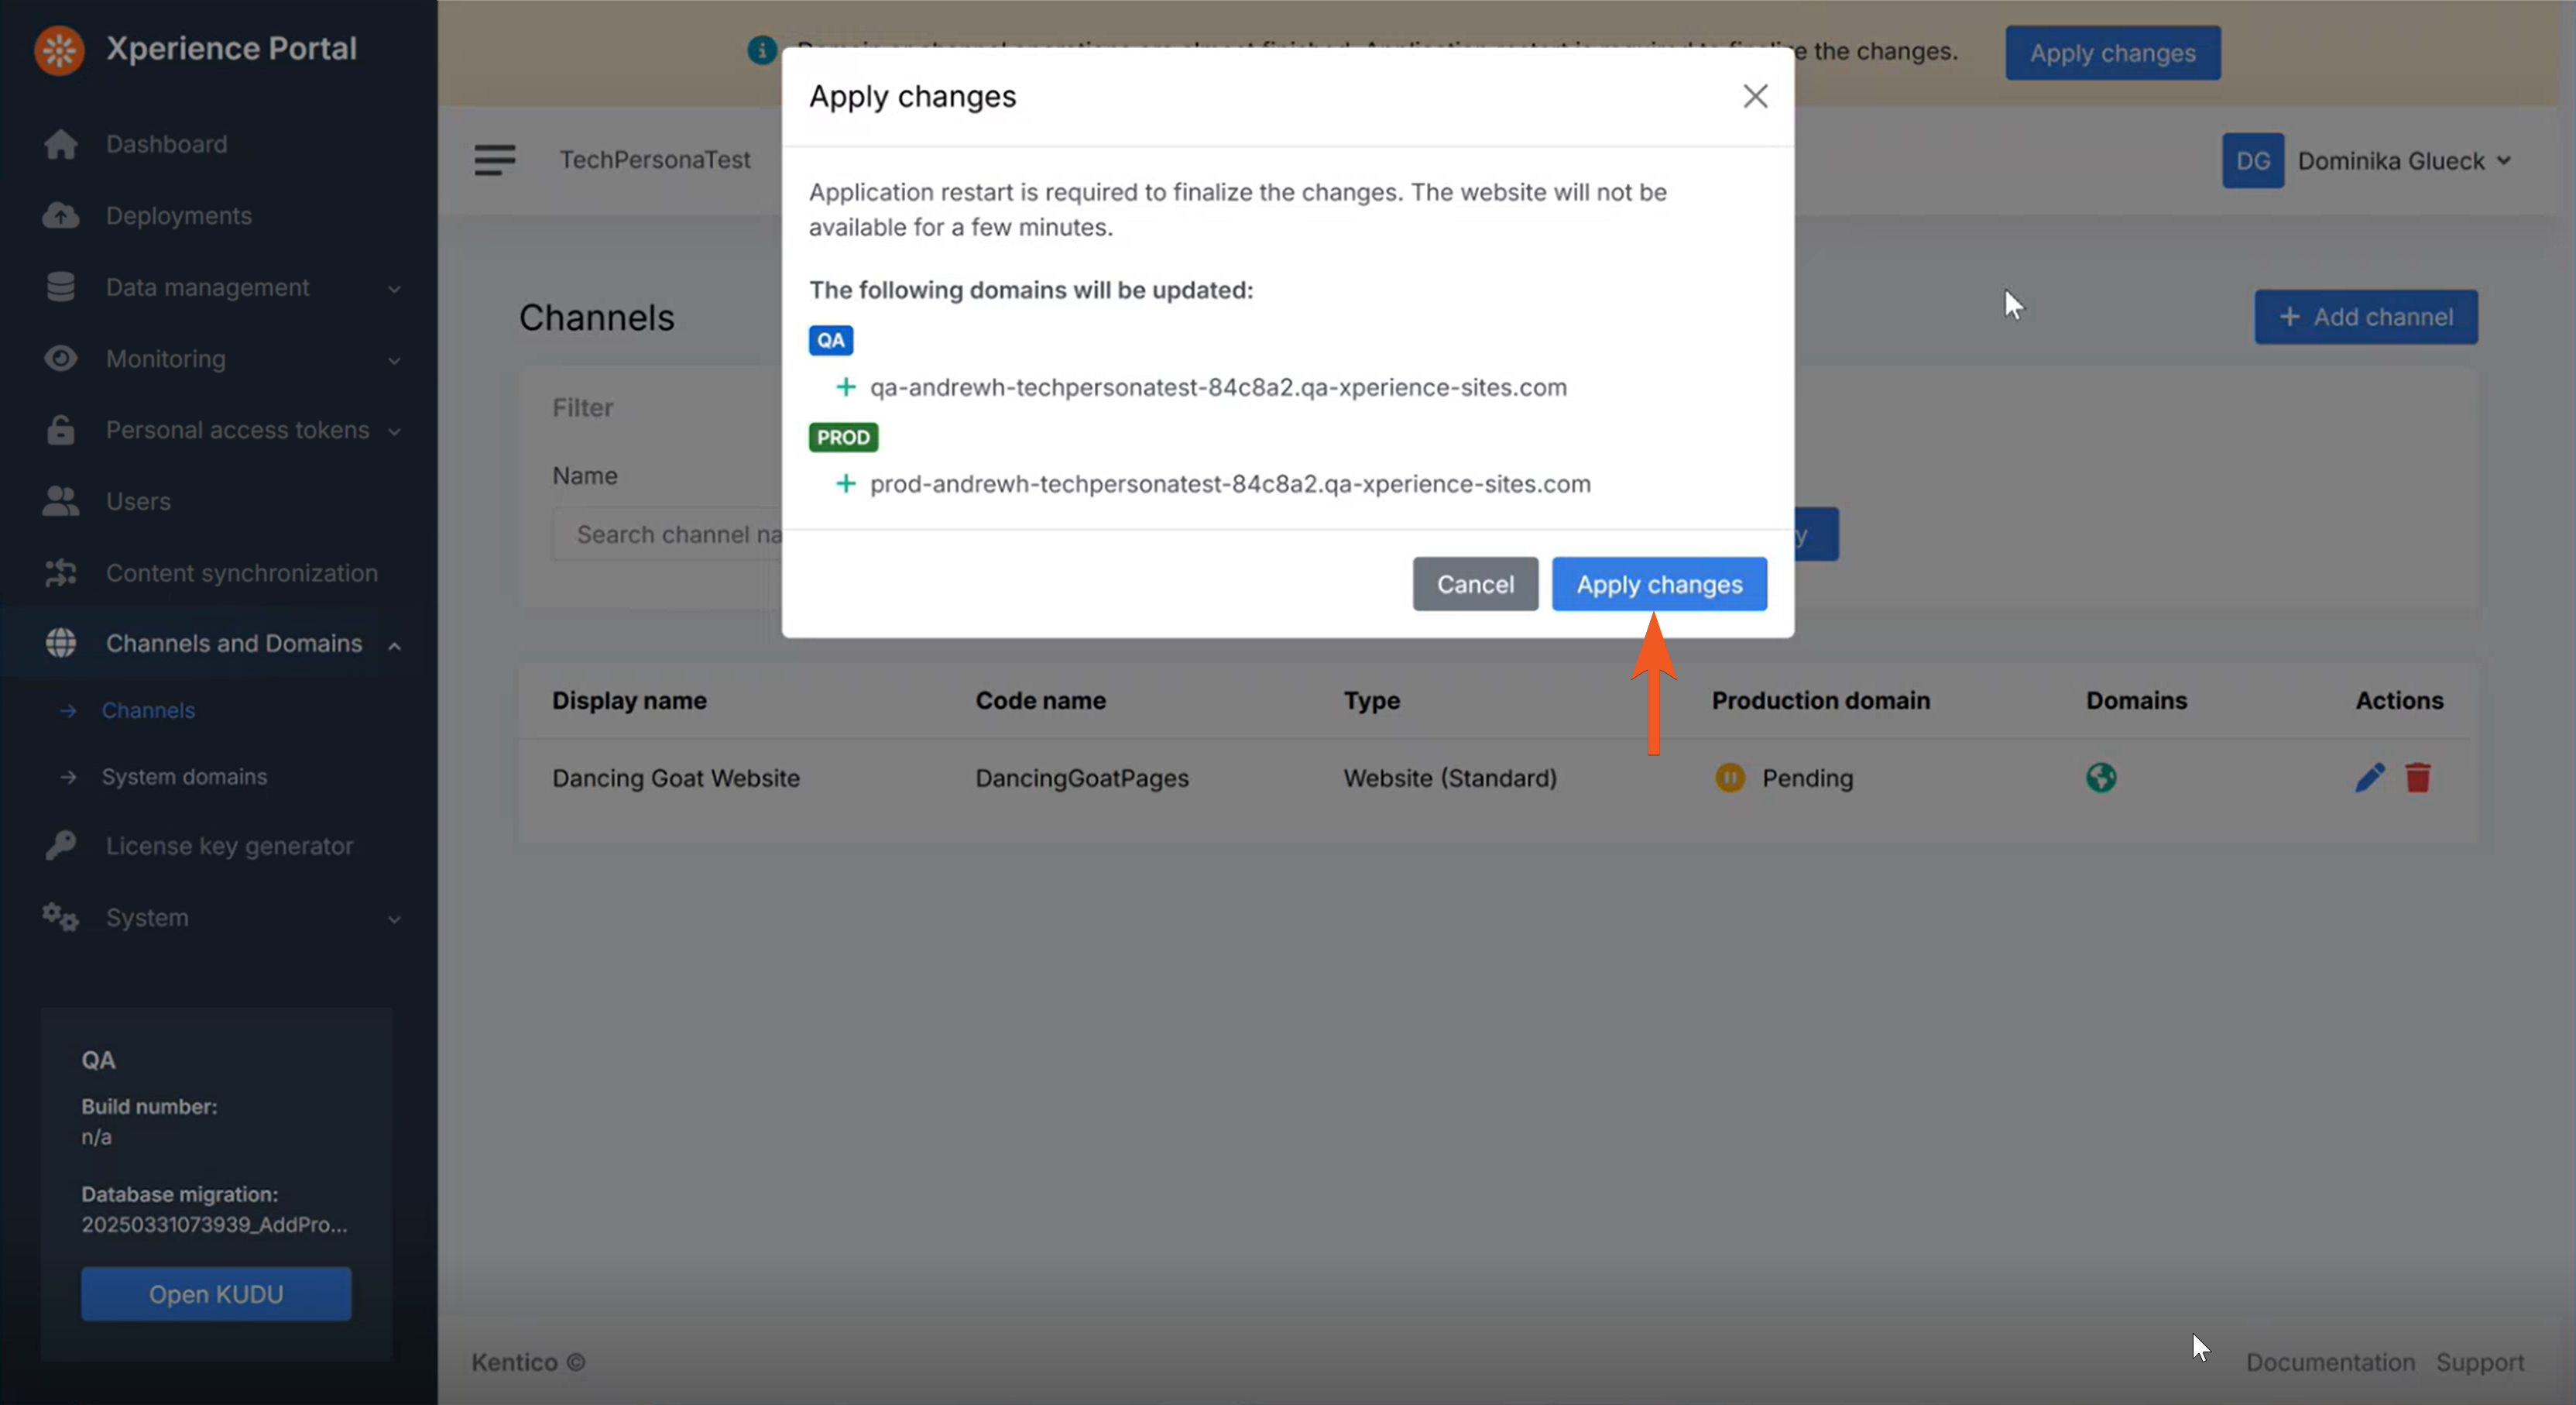
You will see another pop-up message warning you that during the restart, the channels will not be available. It also shows you what the default generated domain will be for your channel on each environment.
Click Apply changes.
The process will now take a few minutes. The system should navigate you to the Dashboard screen in the meantime, still showing the warning message about channel features not being available.
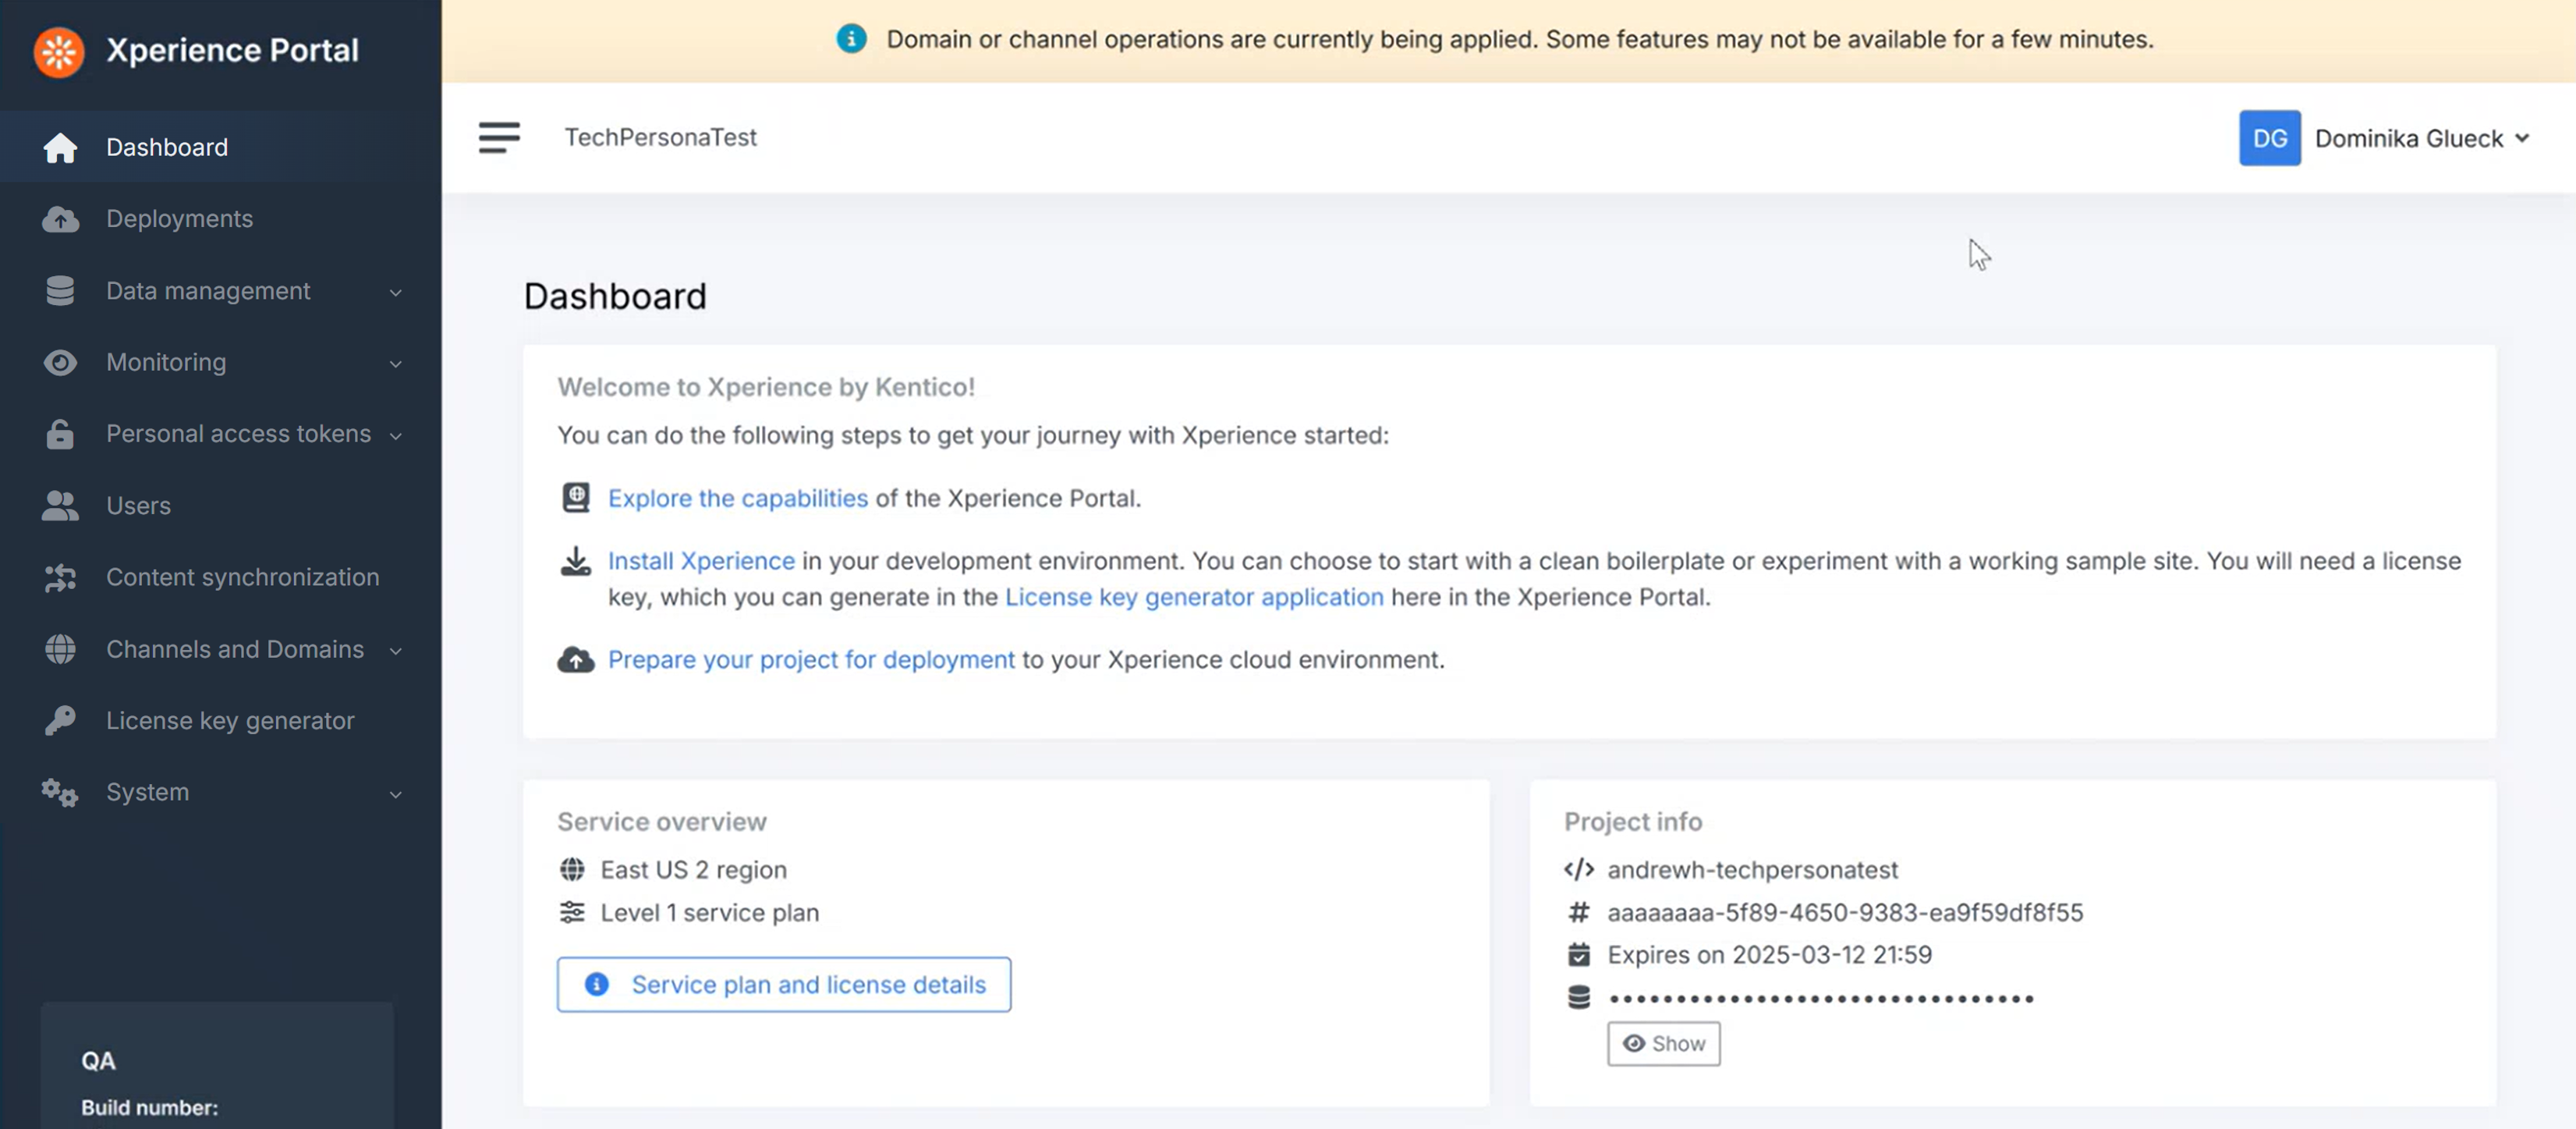
You may have to manually refresh the page again to see the updated UI when the process is finished.
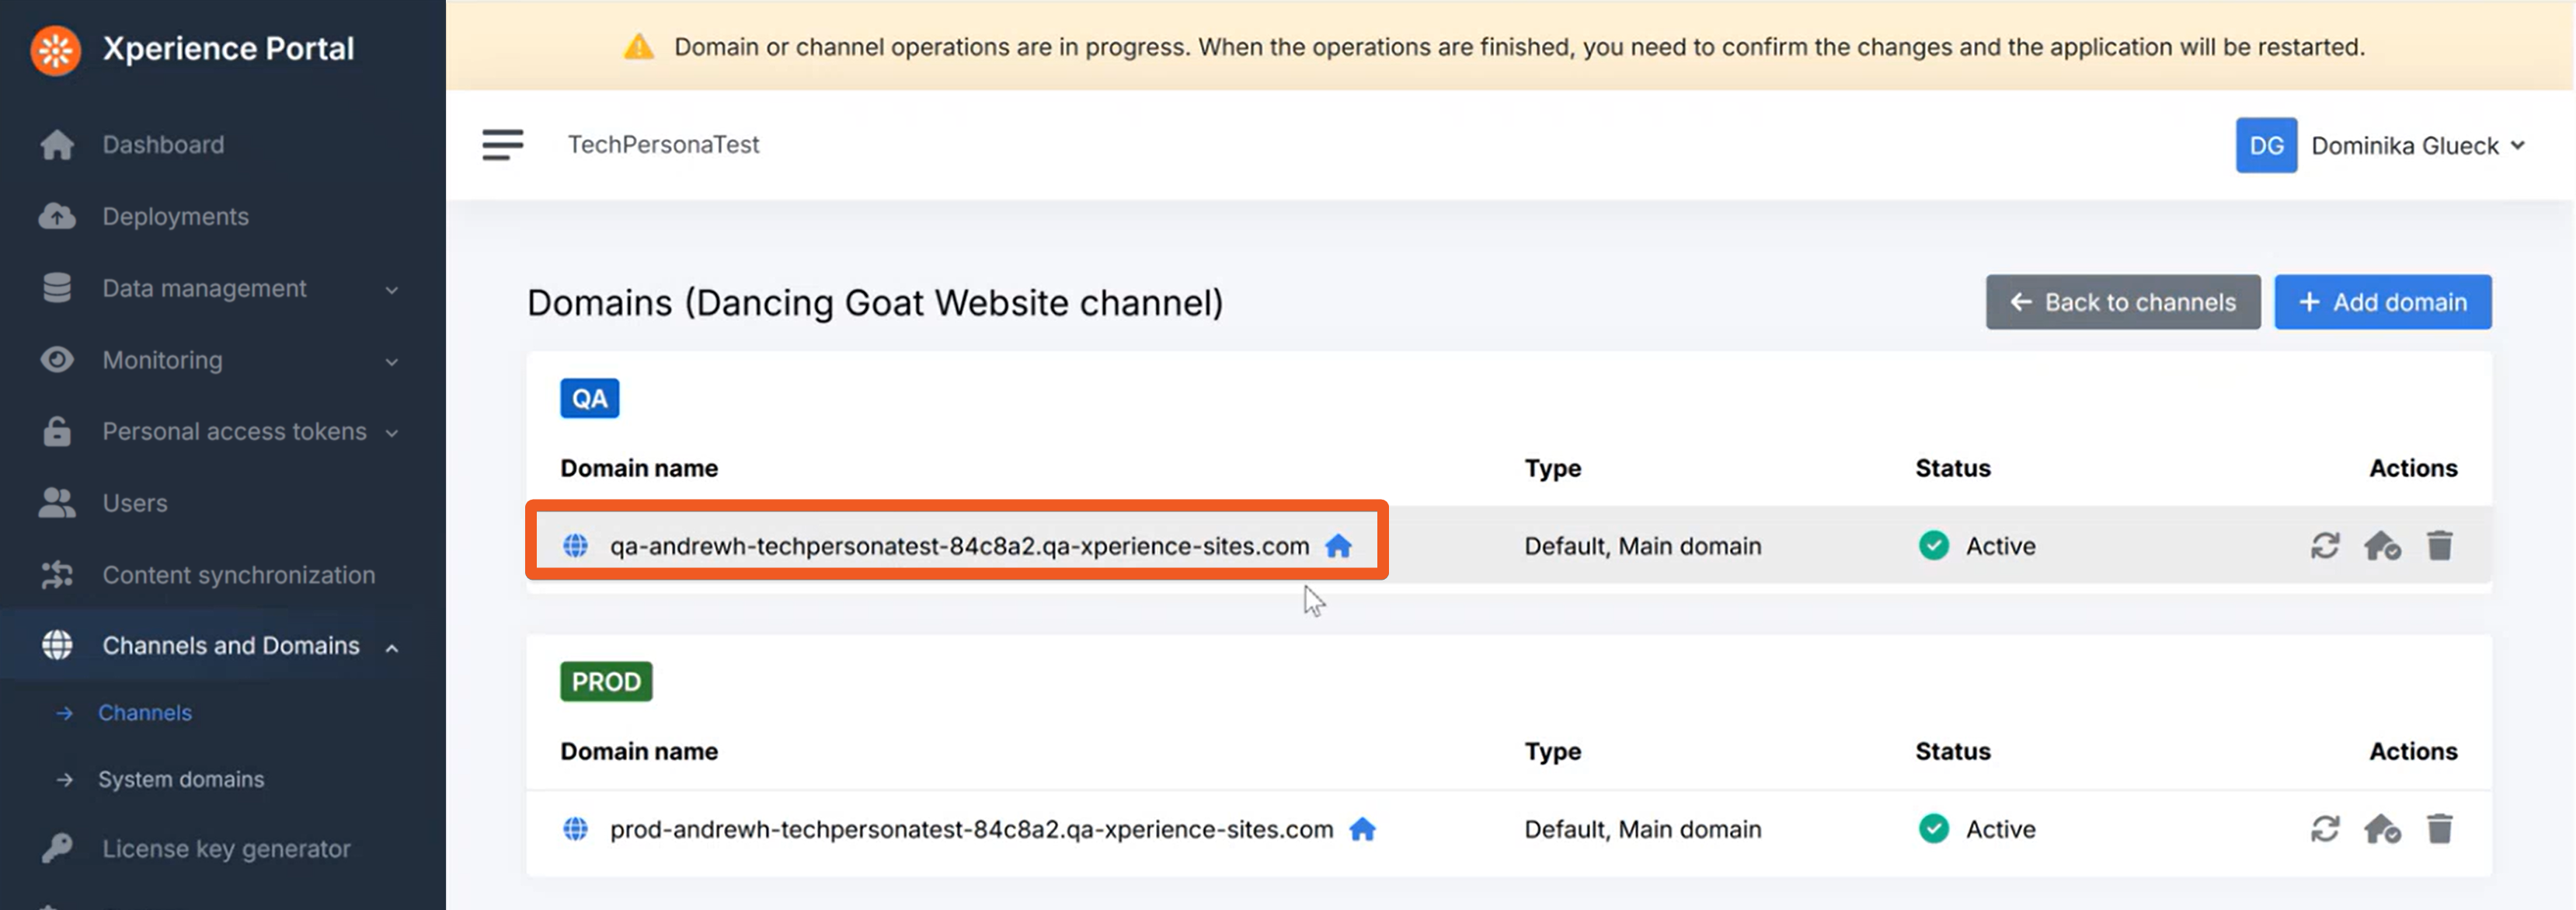
While you wait, navigate to your channel’s domains by clicking the globe icon on the Pending channel in your Channels and Domains → Channels screen:
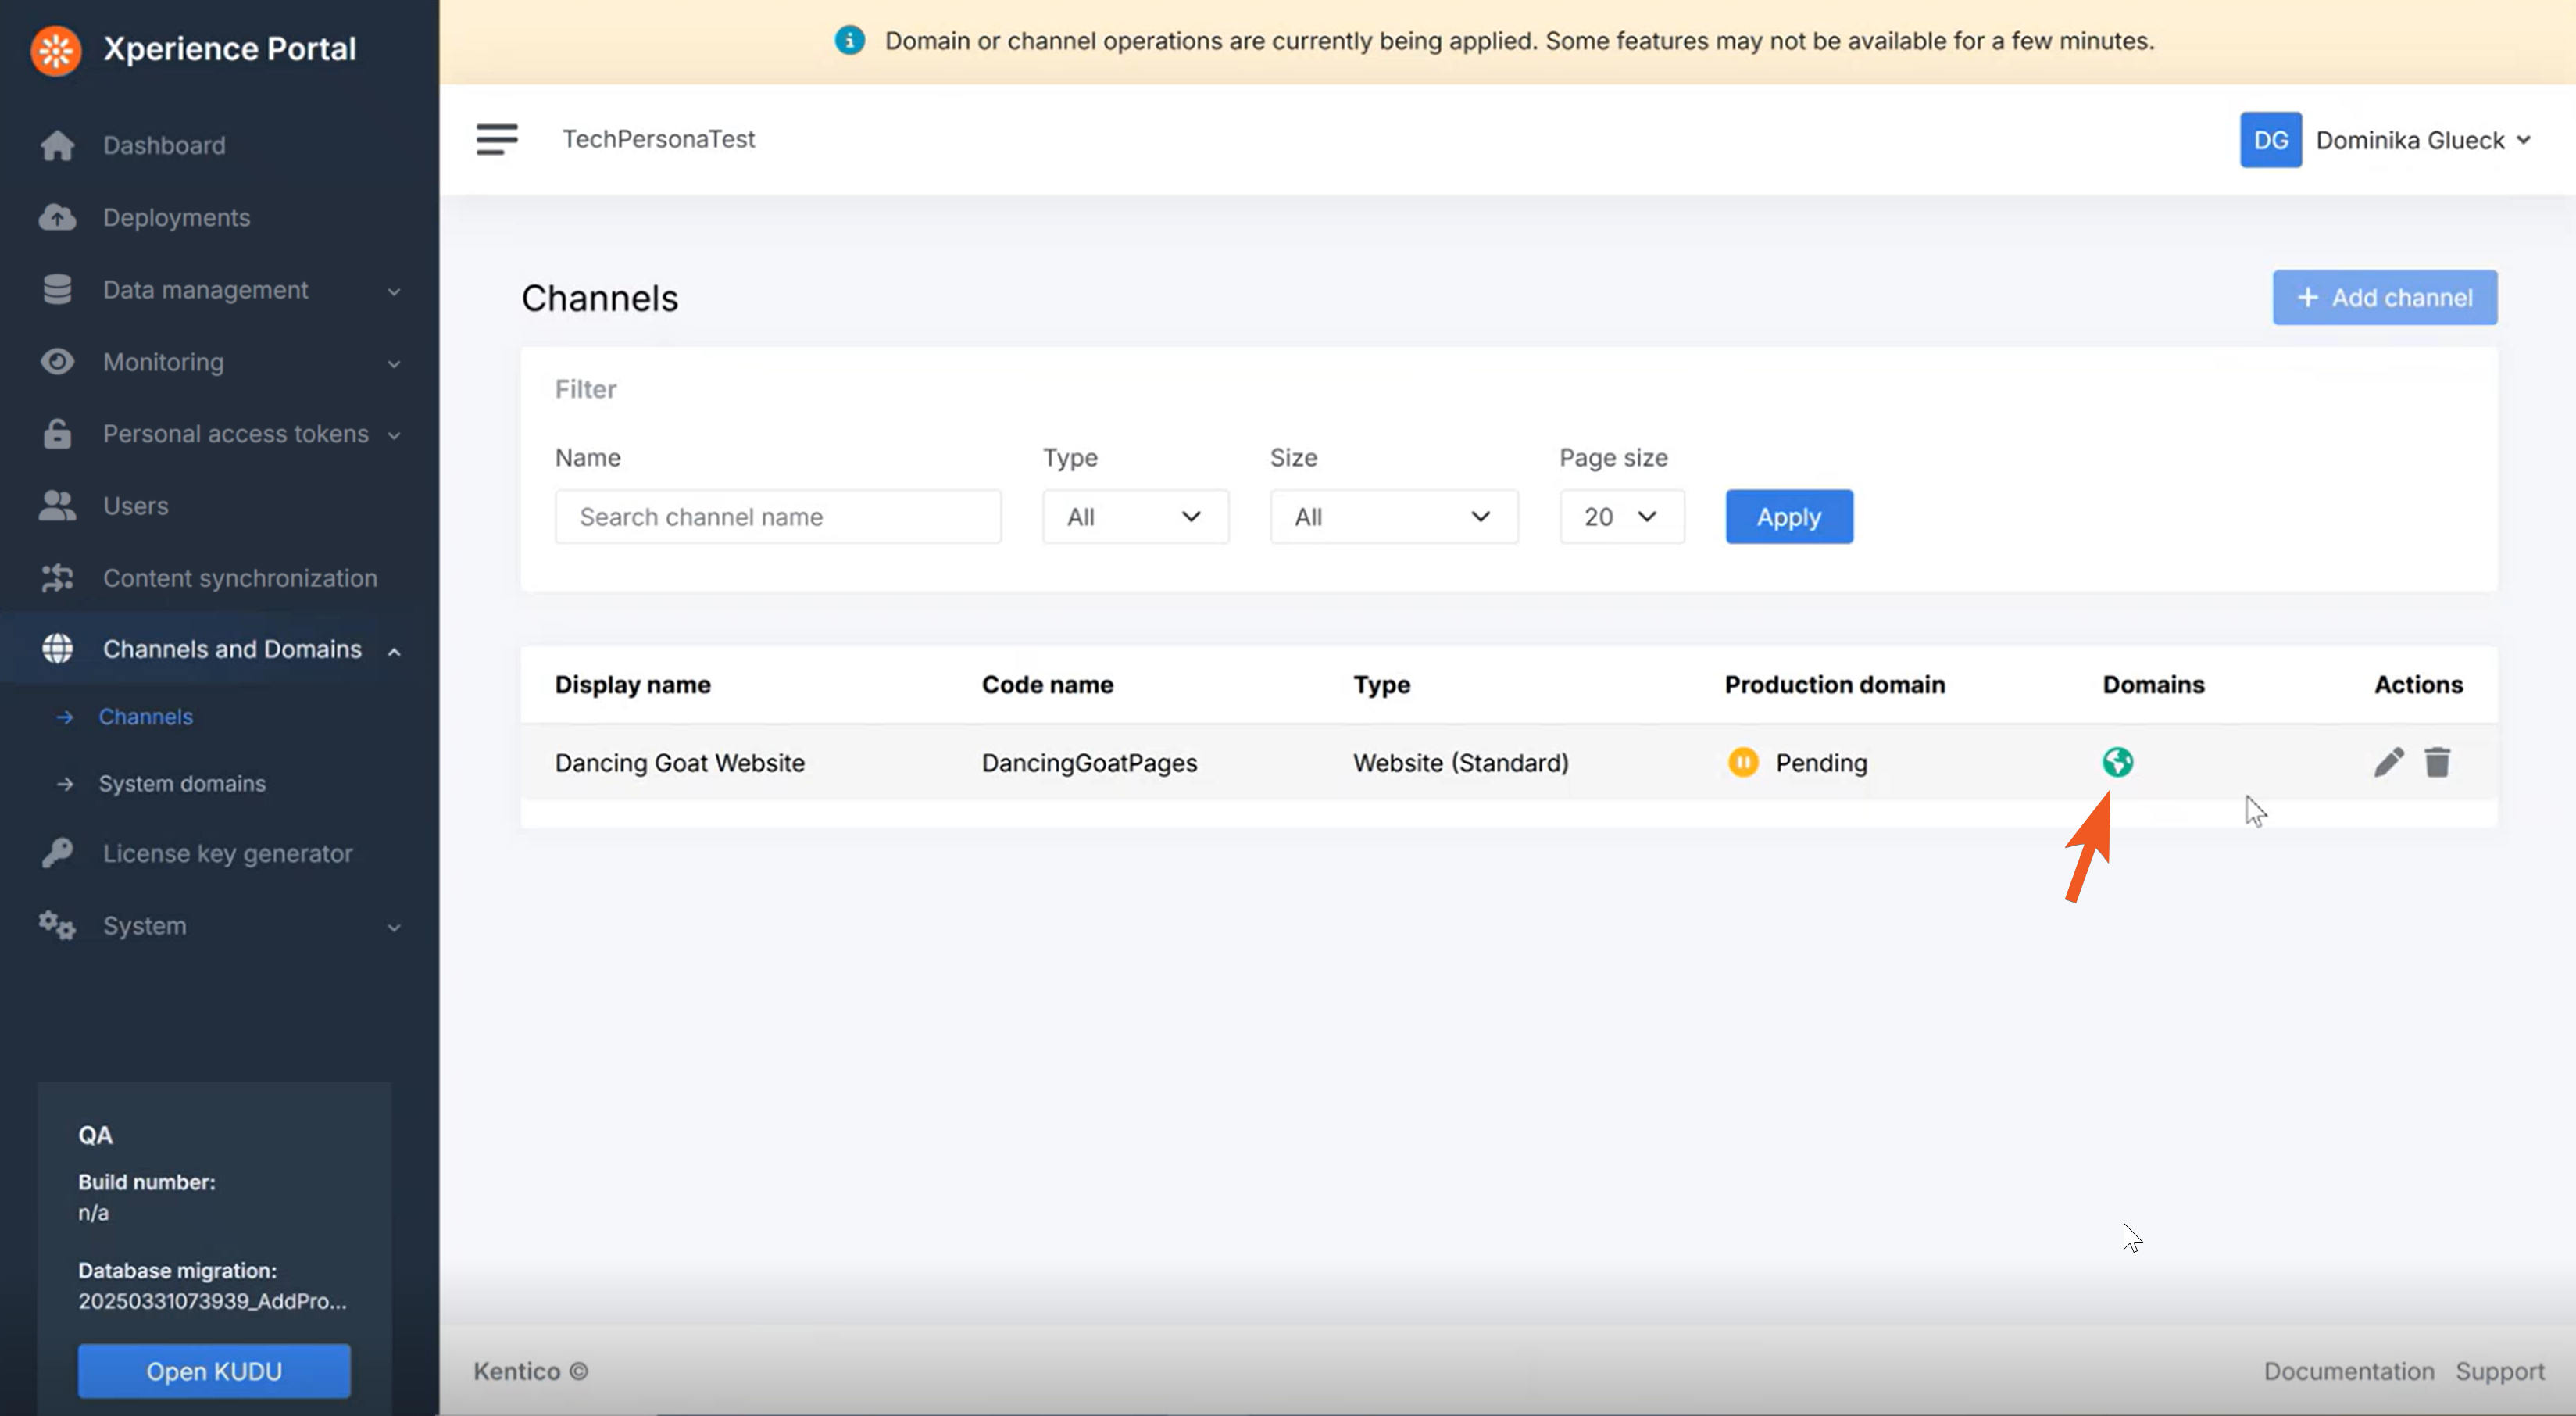
You will see your default generated domain for each of your environments. For now, we have only created one, so it automatically also becomes the main domain for both environments.
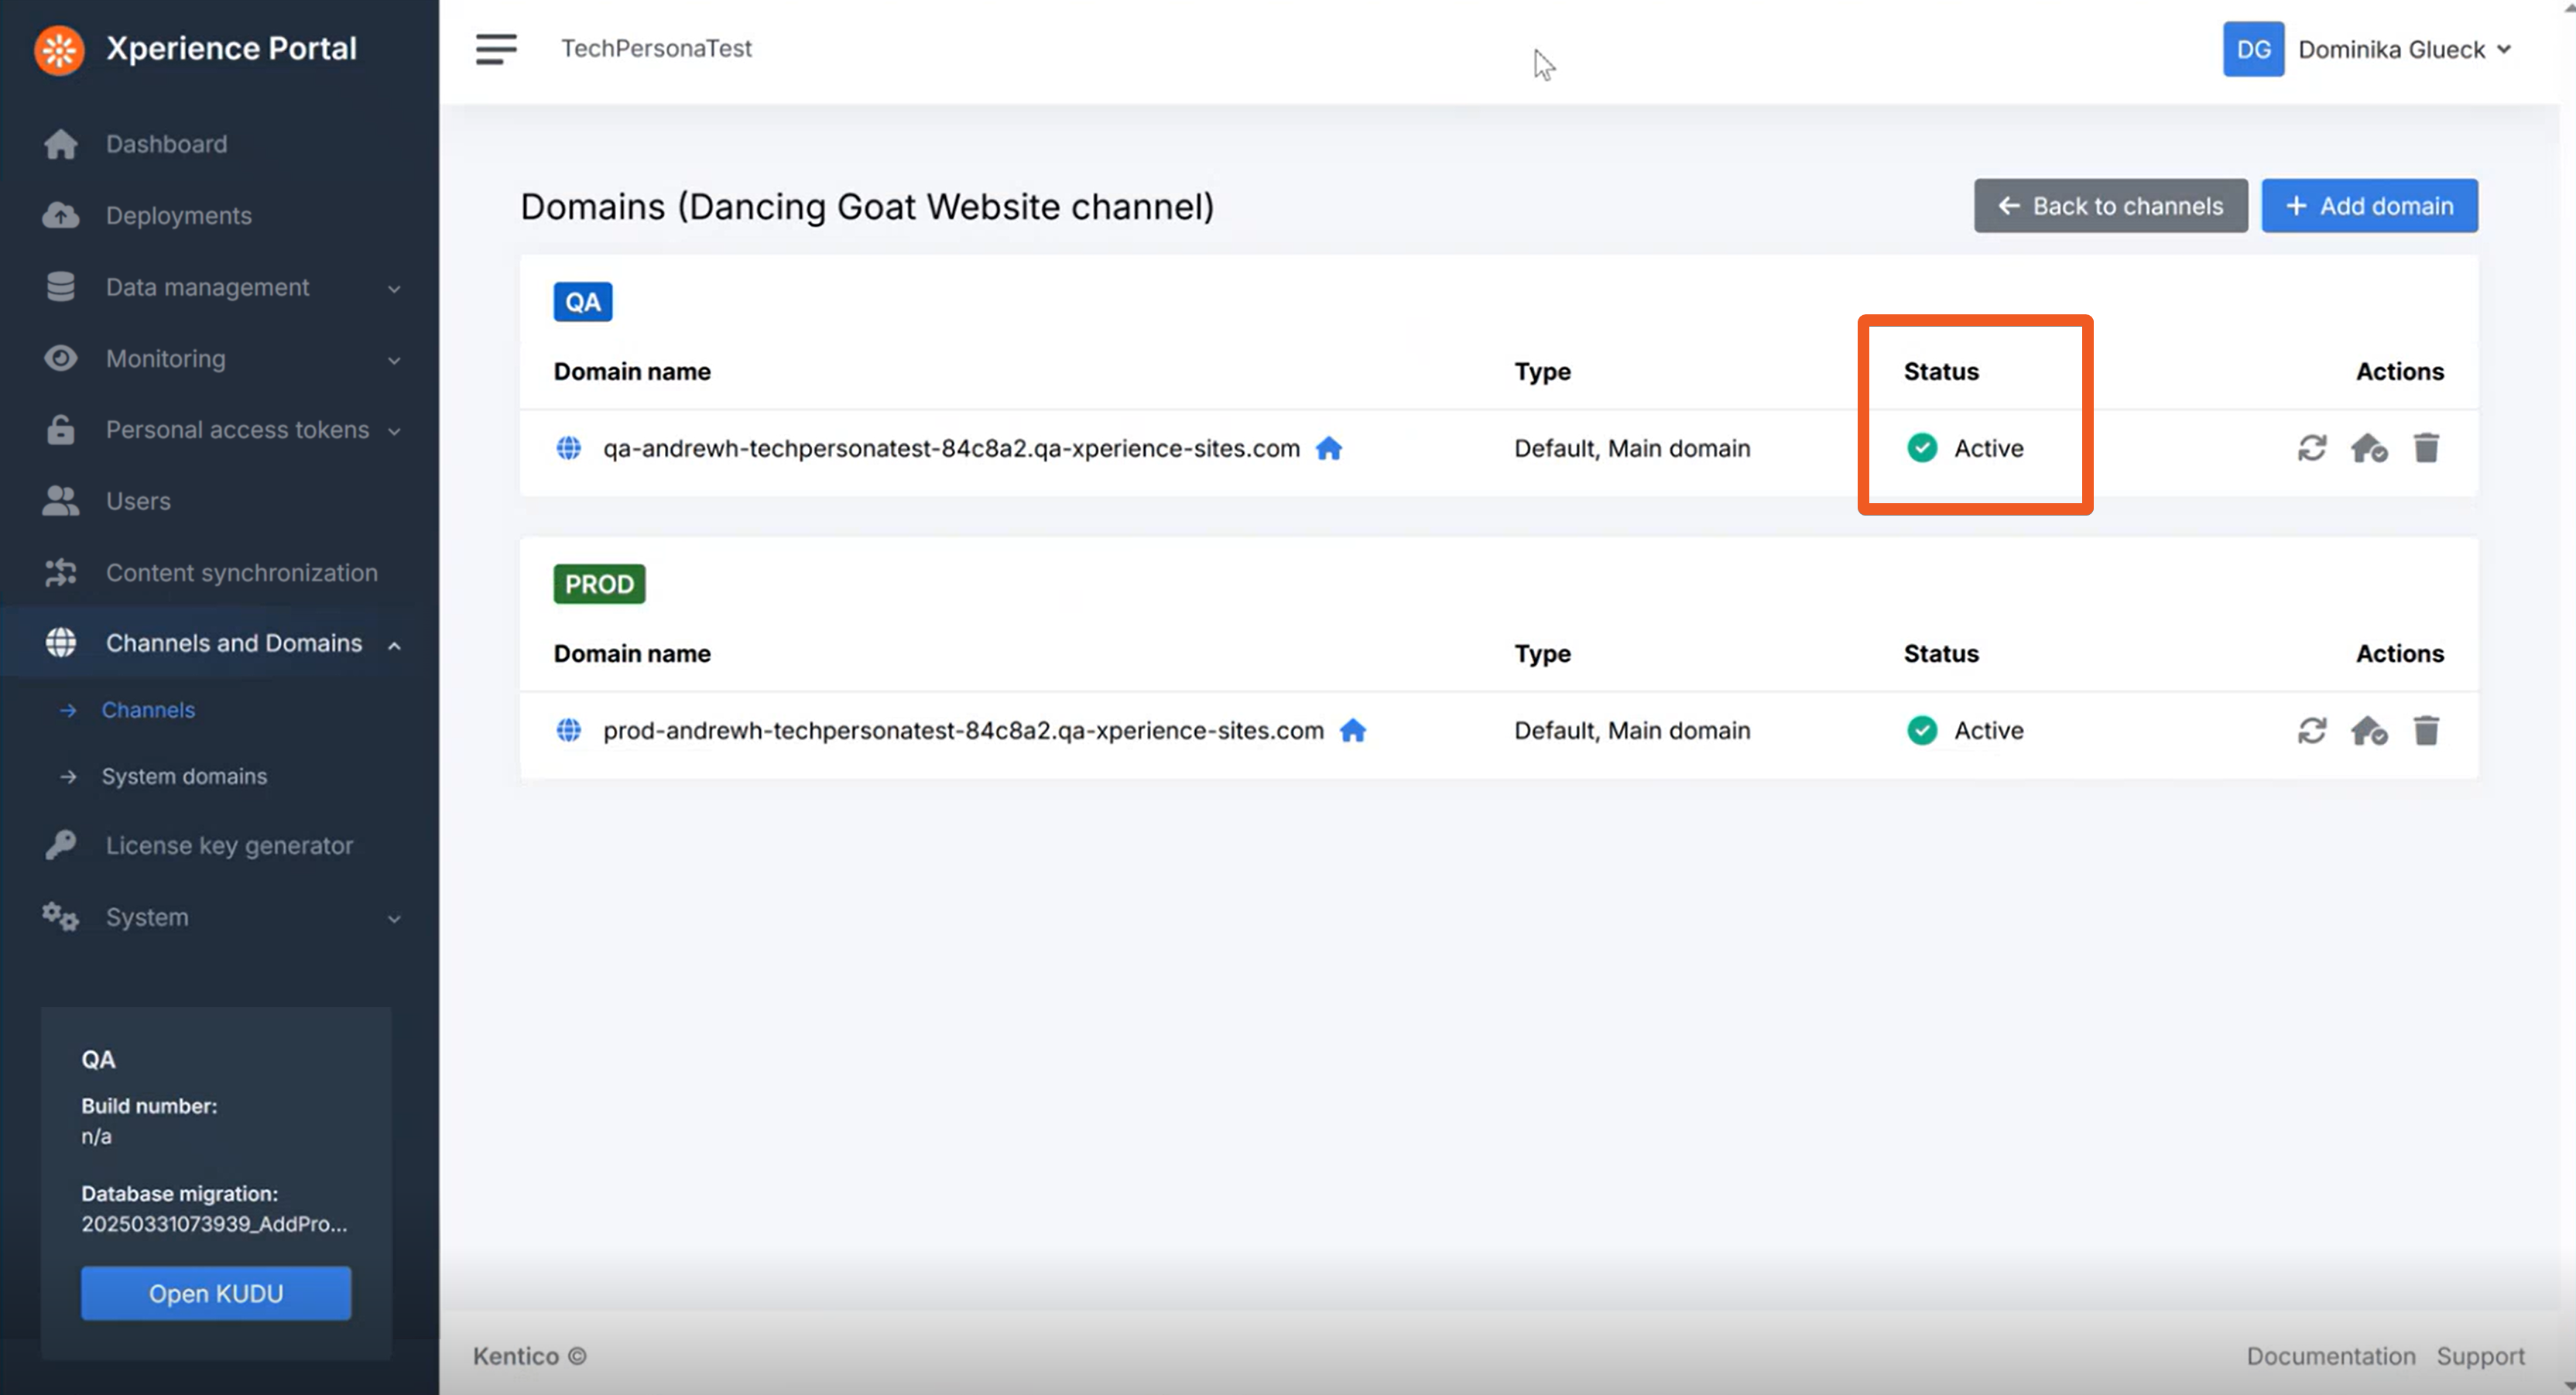
Once the application restarts, you will see both domains as Active and the + Add domain button becomes available again.
If you’re not seeing any updates after several minutes, try manually refreshing the page again.
Check your progress
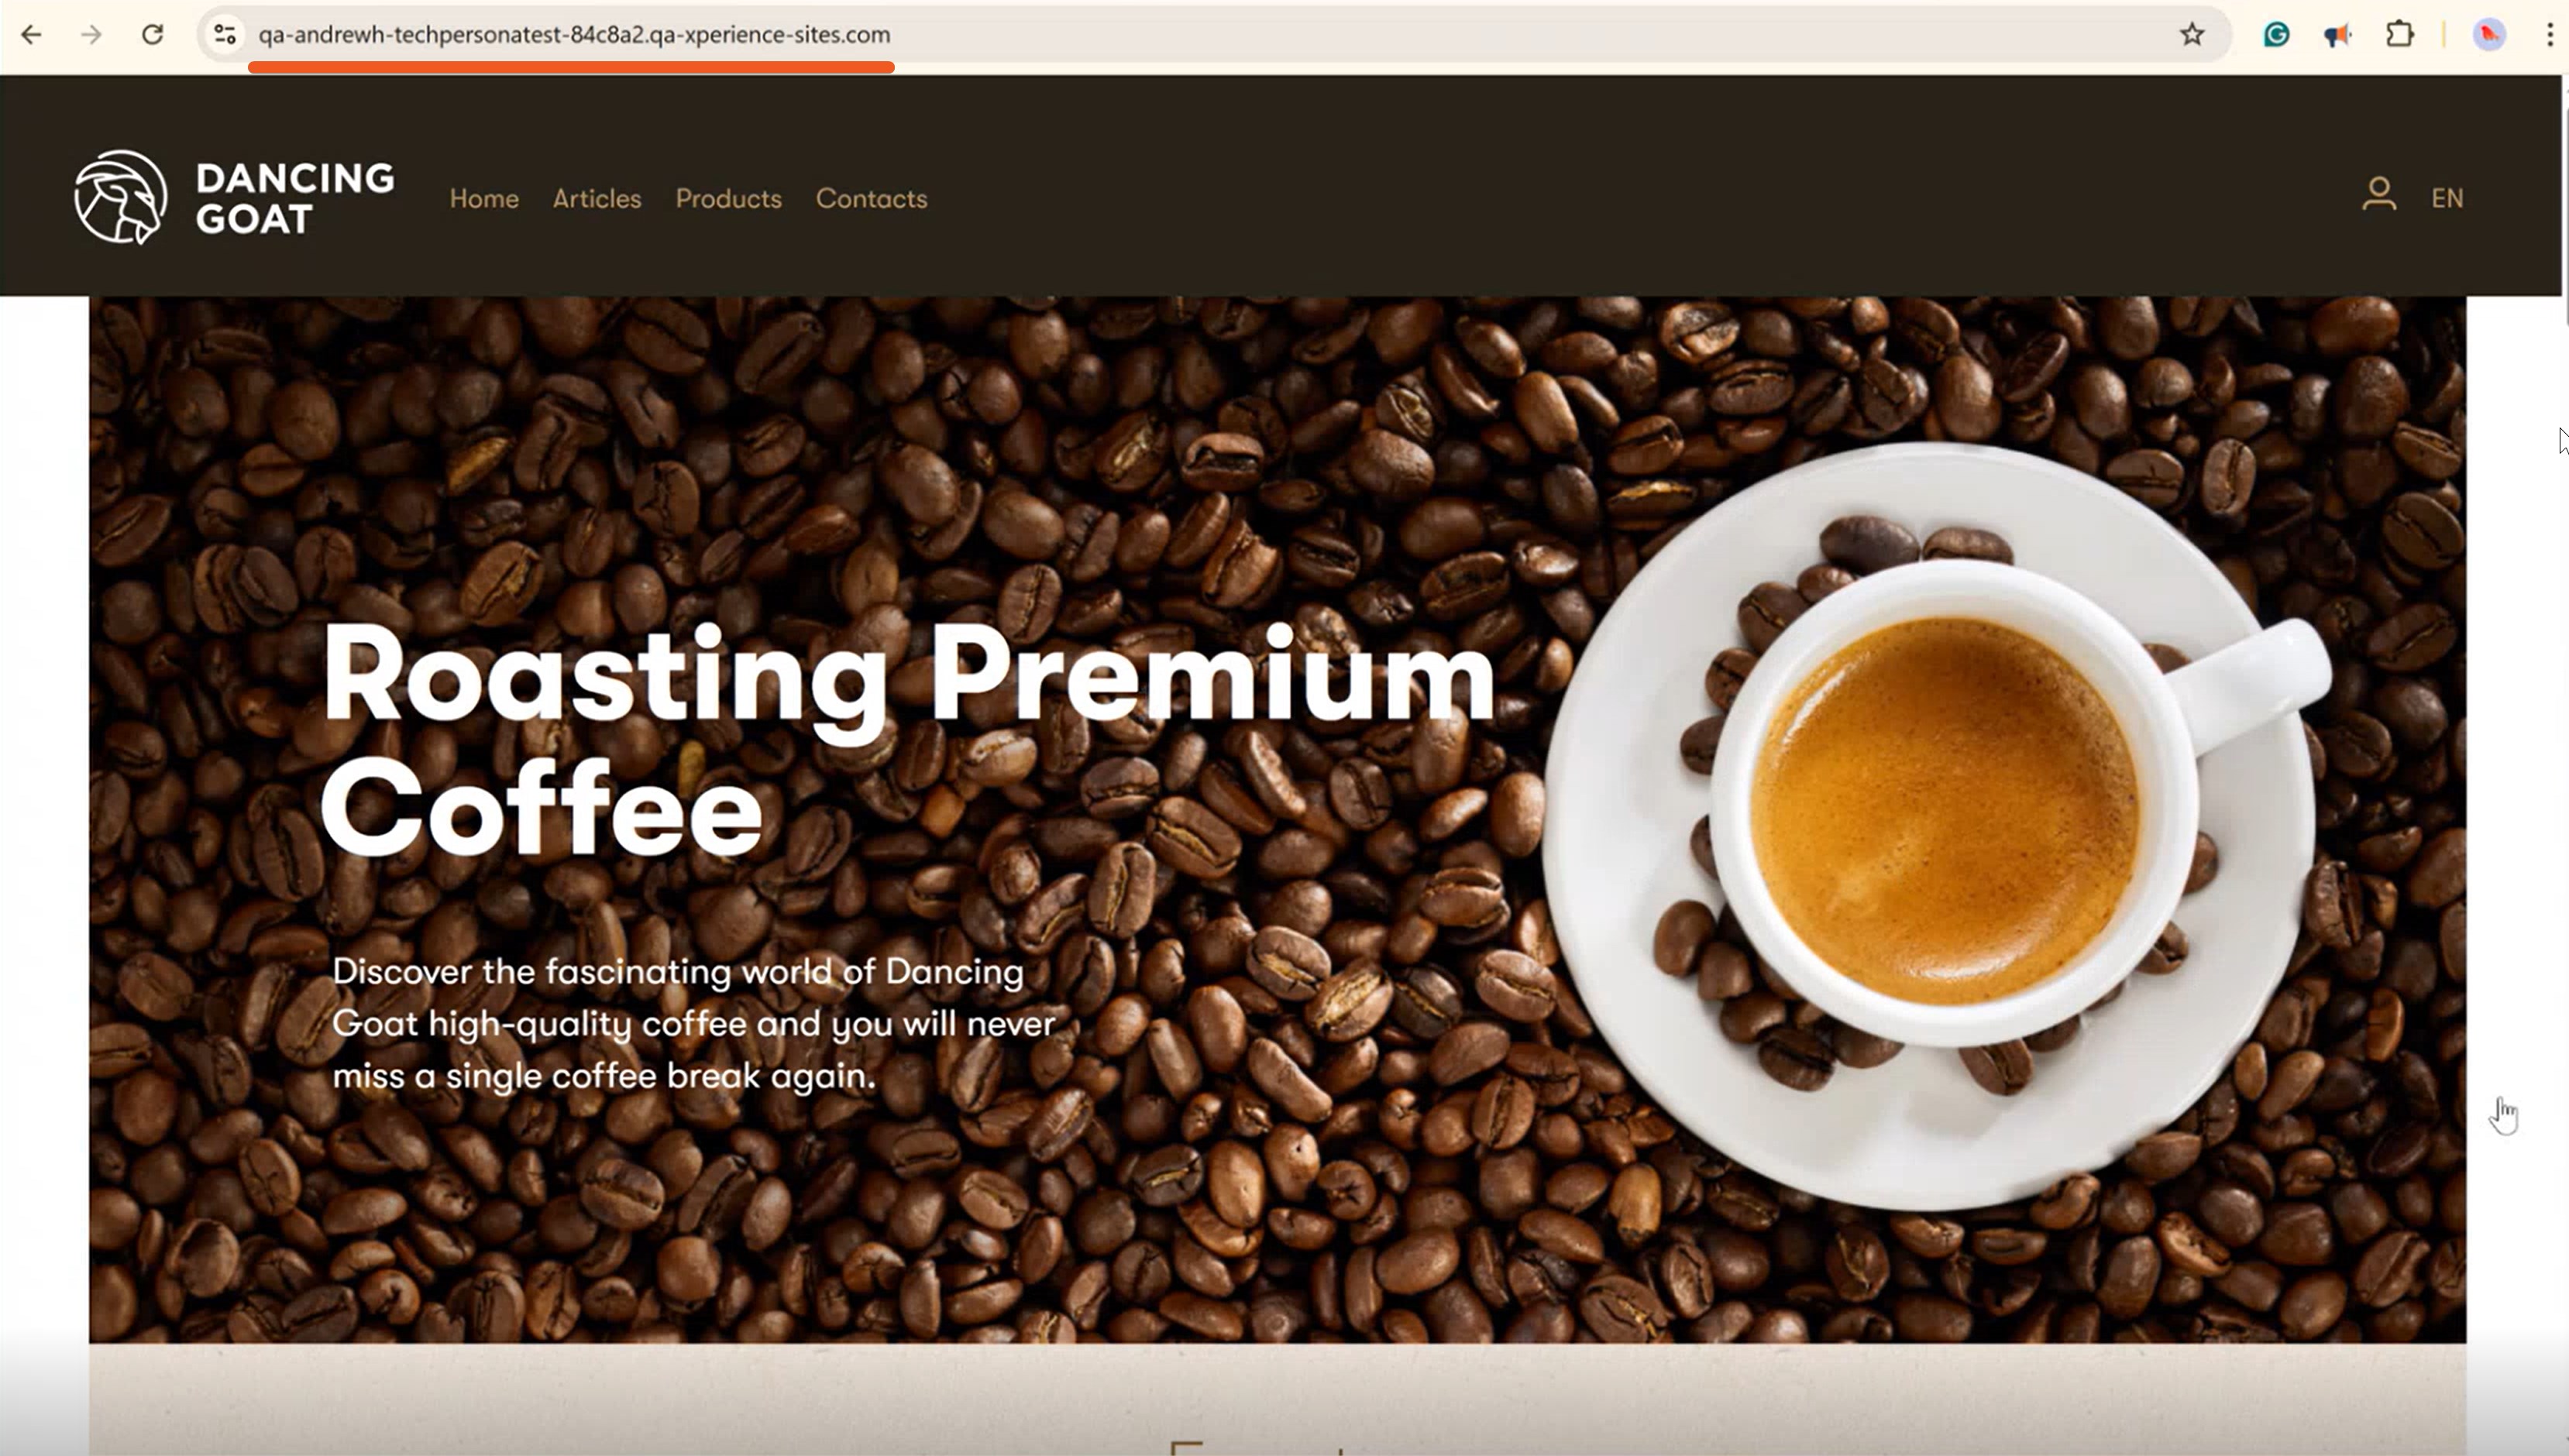
Copy-paste the QA main domain name into your browser’s URL bar. You should now see the Dancing Goat live site deployed to your SaaS QA environment!
If you try to visit the PROD domain, you will only see a default Microsoft Azure page. This is because we have not deployed anything into our PROD environment yet.
See our documentation to learn more about website channel management in the SaaS environment.
Configure the email channel
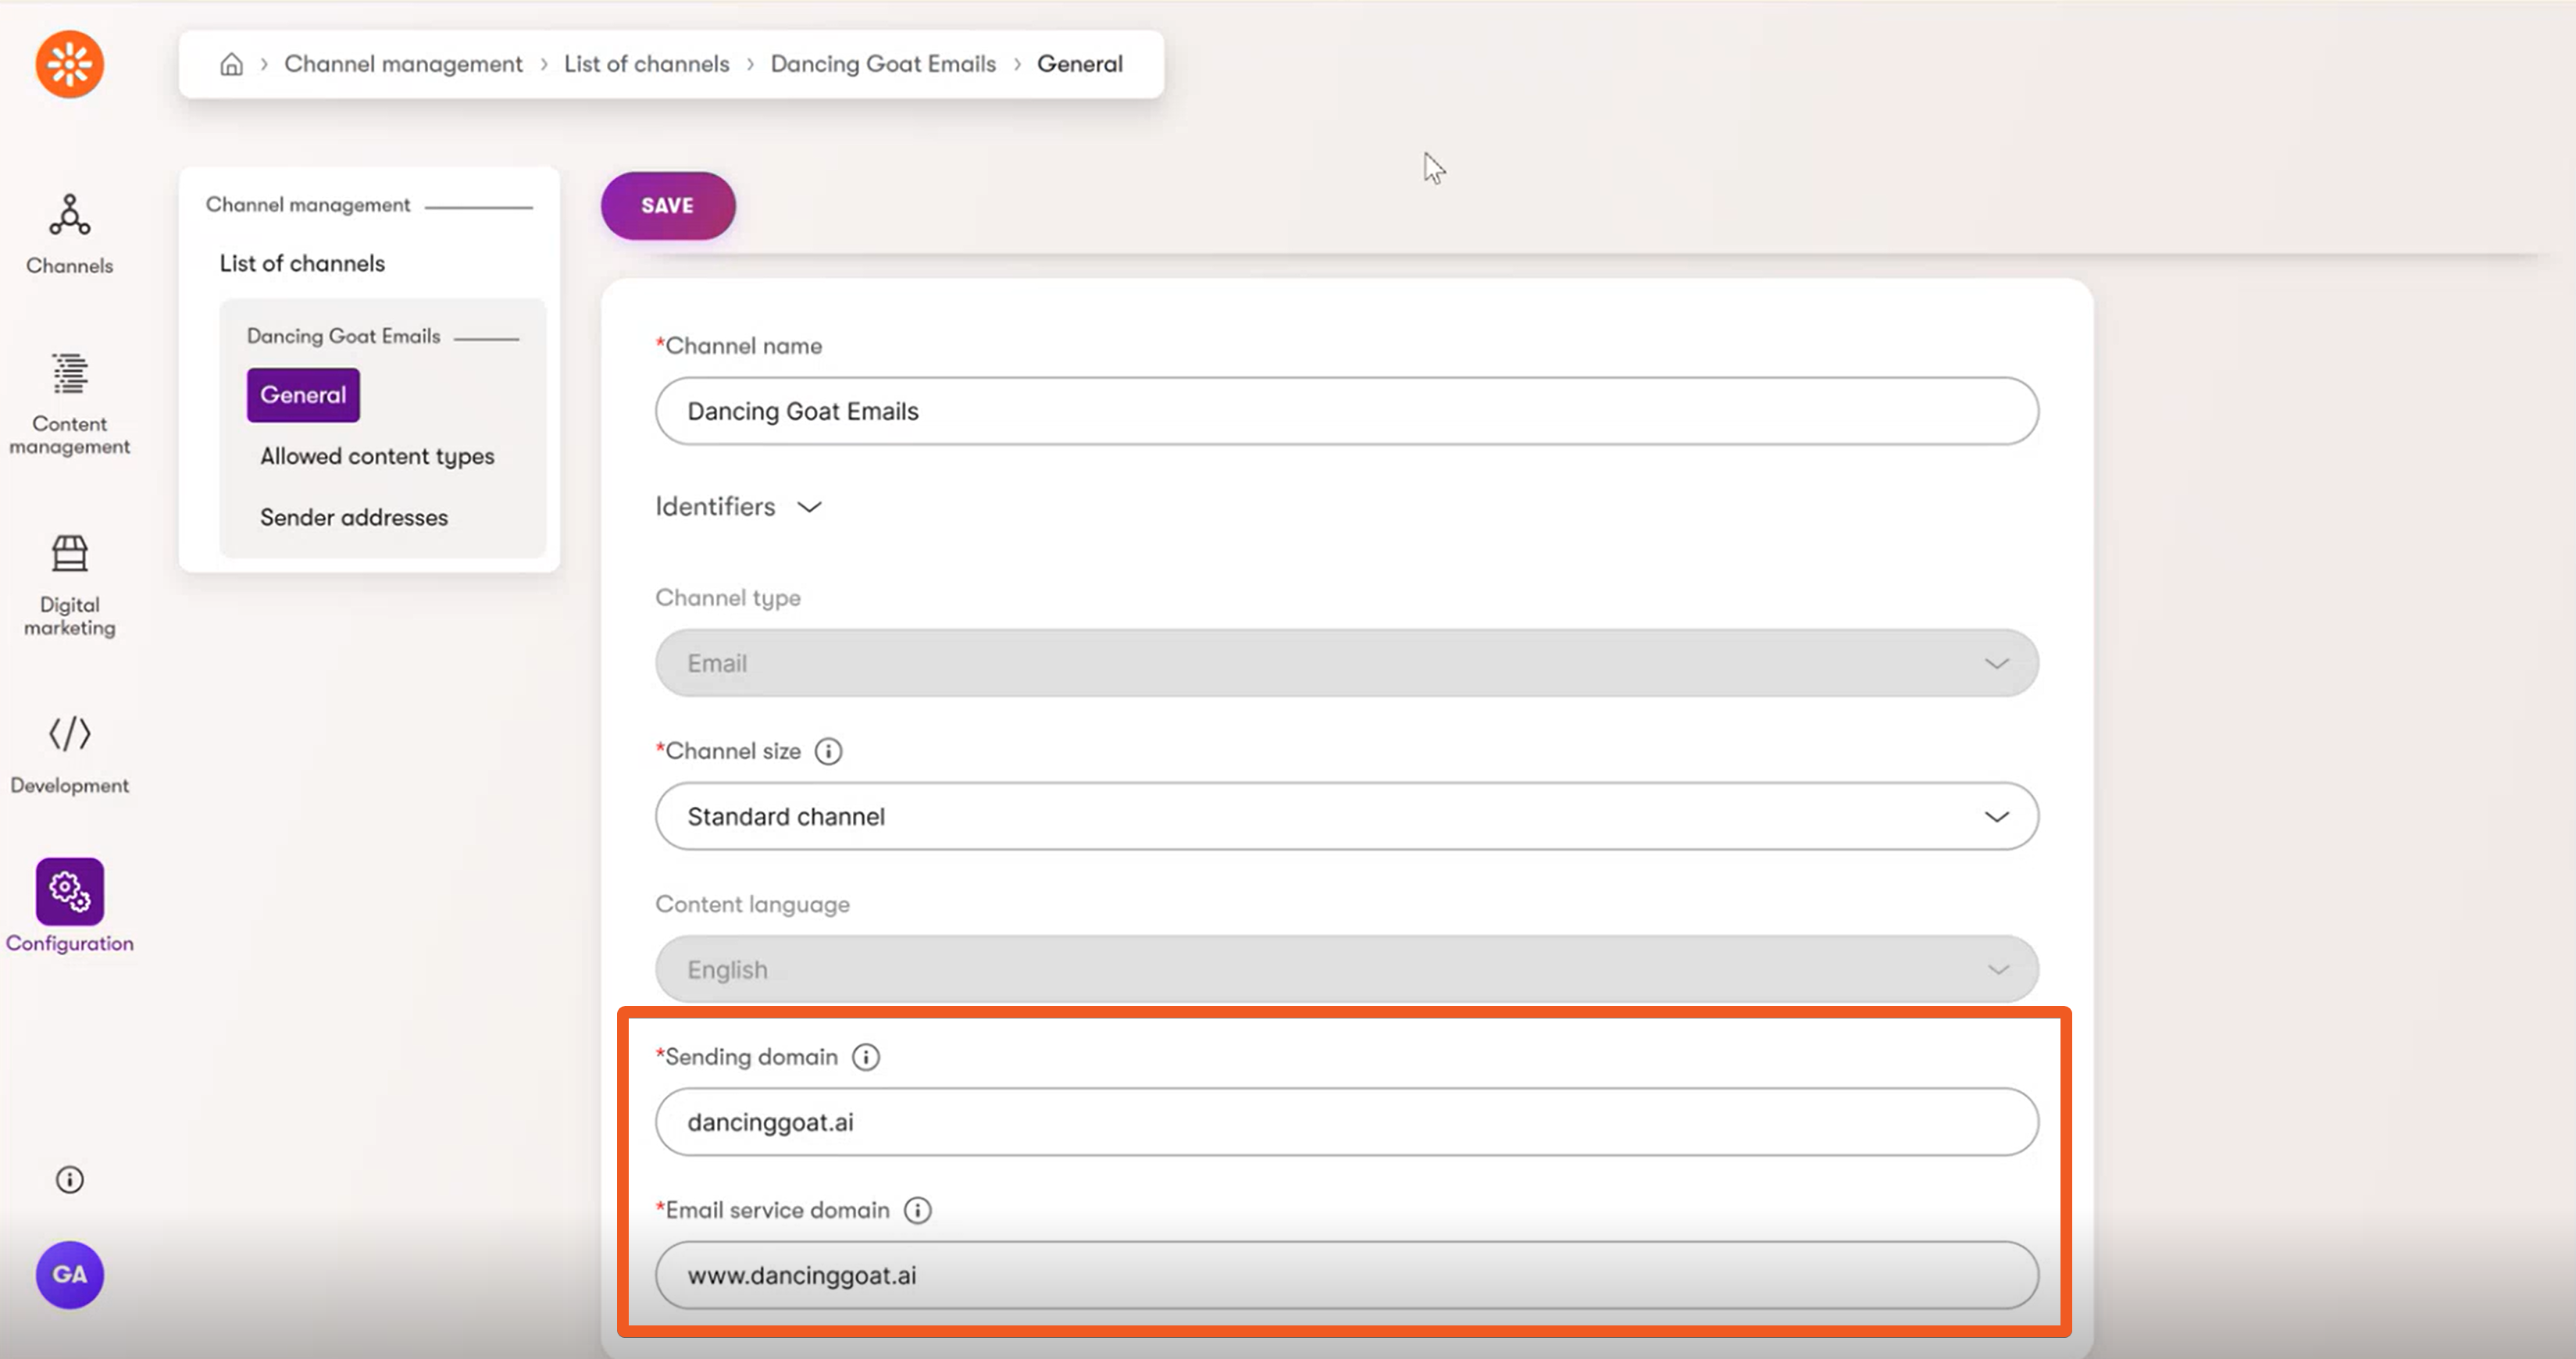
Take a quick look at the General settings of your Dancing Goat Emails channel in the Xperience administration in the Channel management application.
Right now, the Sending domain and Email service domain fields are pointing to non-existing domains. You can edit the fields, but in the SaaS setup, this will never work.
In practice you will see an issue, for example, with displaying images in emails, shown in the video below. The image cannot load as the system is trying to pull it from a non-existing URL address.
In Kentico SaaS, both sending and email service domains have to be controlled by the Xperience portal. Let’s set it up.
Add the email channel in Xperience Portal
The same way you added the website channel, navigate to the Channels and Domains → Channels page and click the + Add channel button.
Fill out the data as follows:
- Display name: Dancing Goat Emails
- Code name: DancingGoatEmails
- Channel type: Email
- Channel size: Standard
As before, the Code name, Channel type and Channel size have to match the setting in the Xperience administration’s Channel management. Naturally, in this case the Channel type is Email, rather than Website.
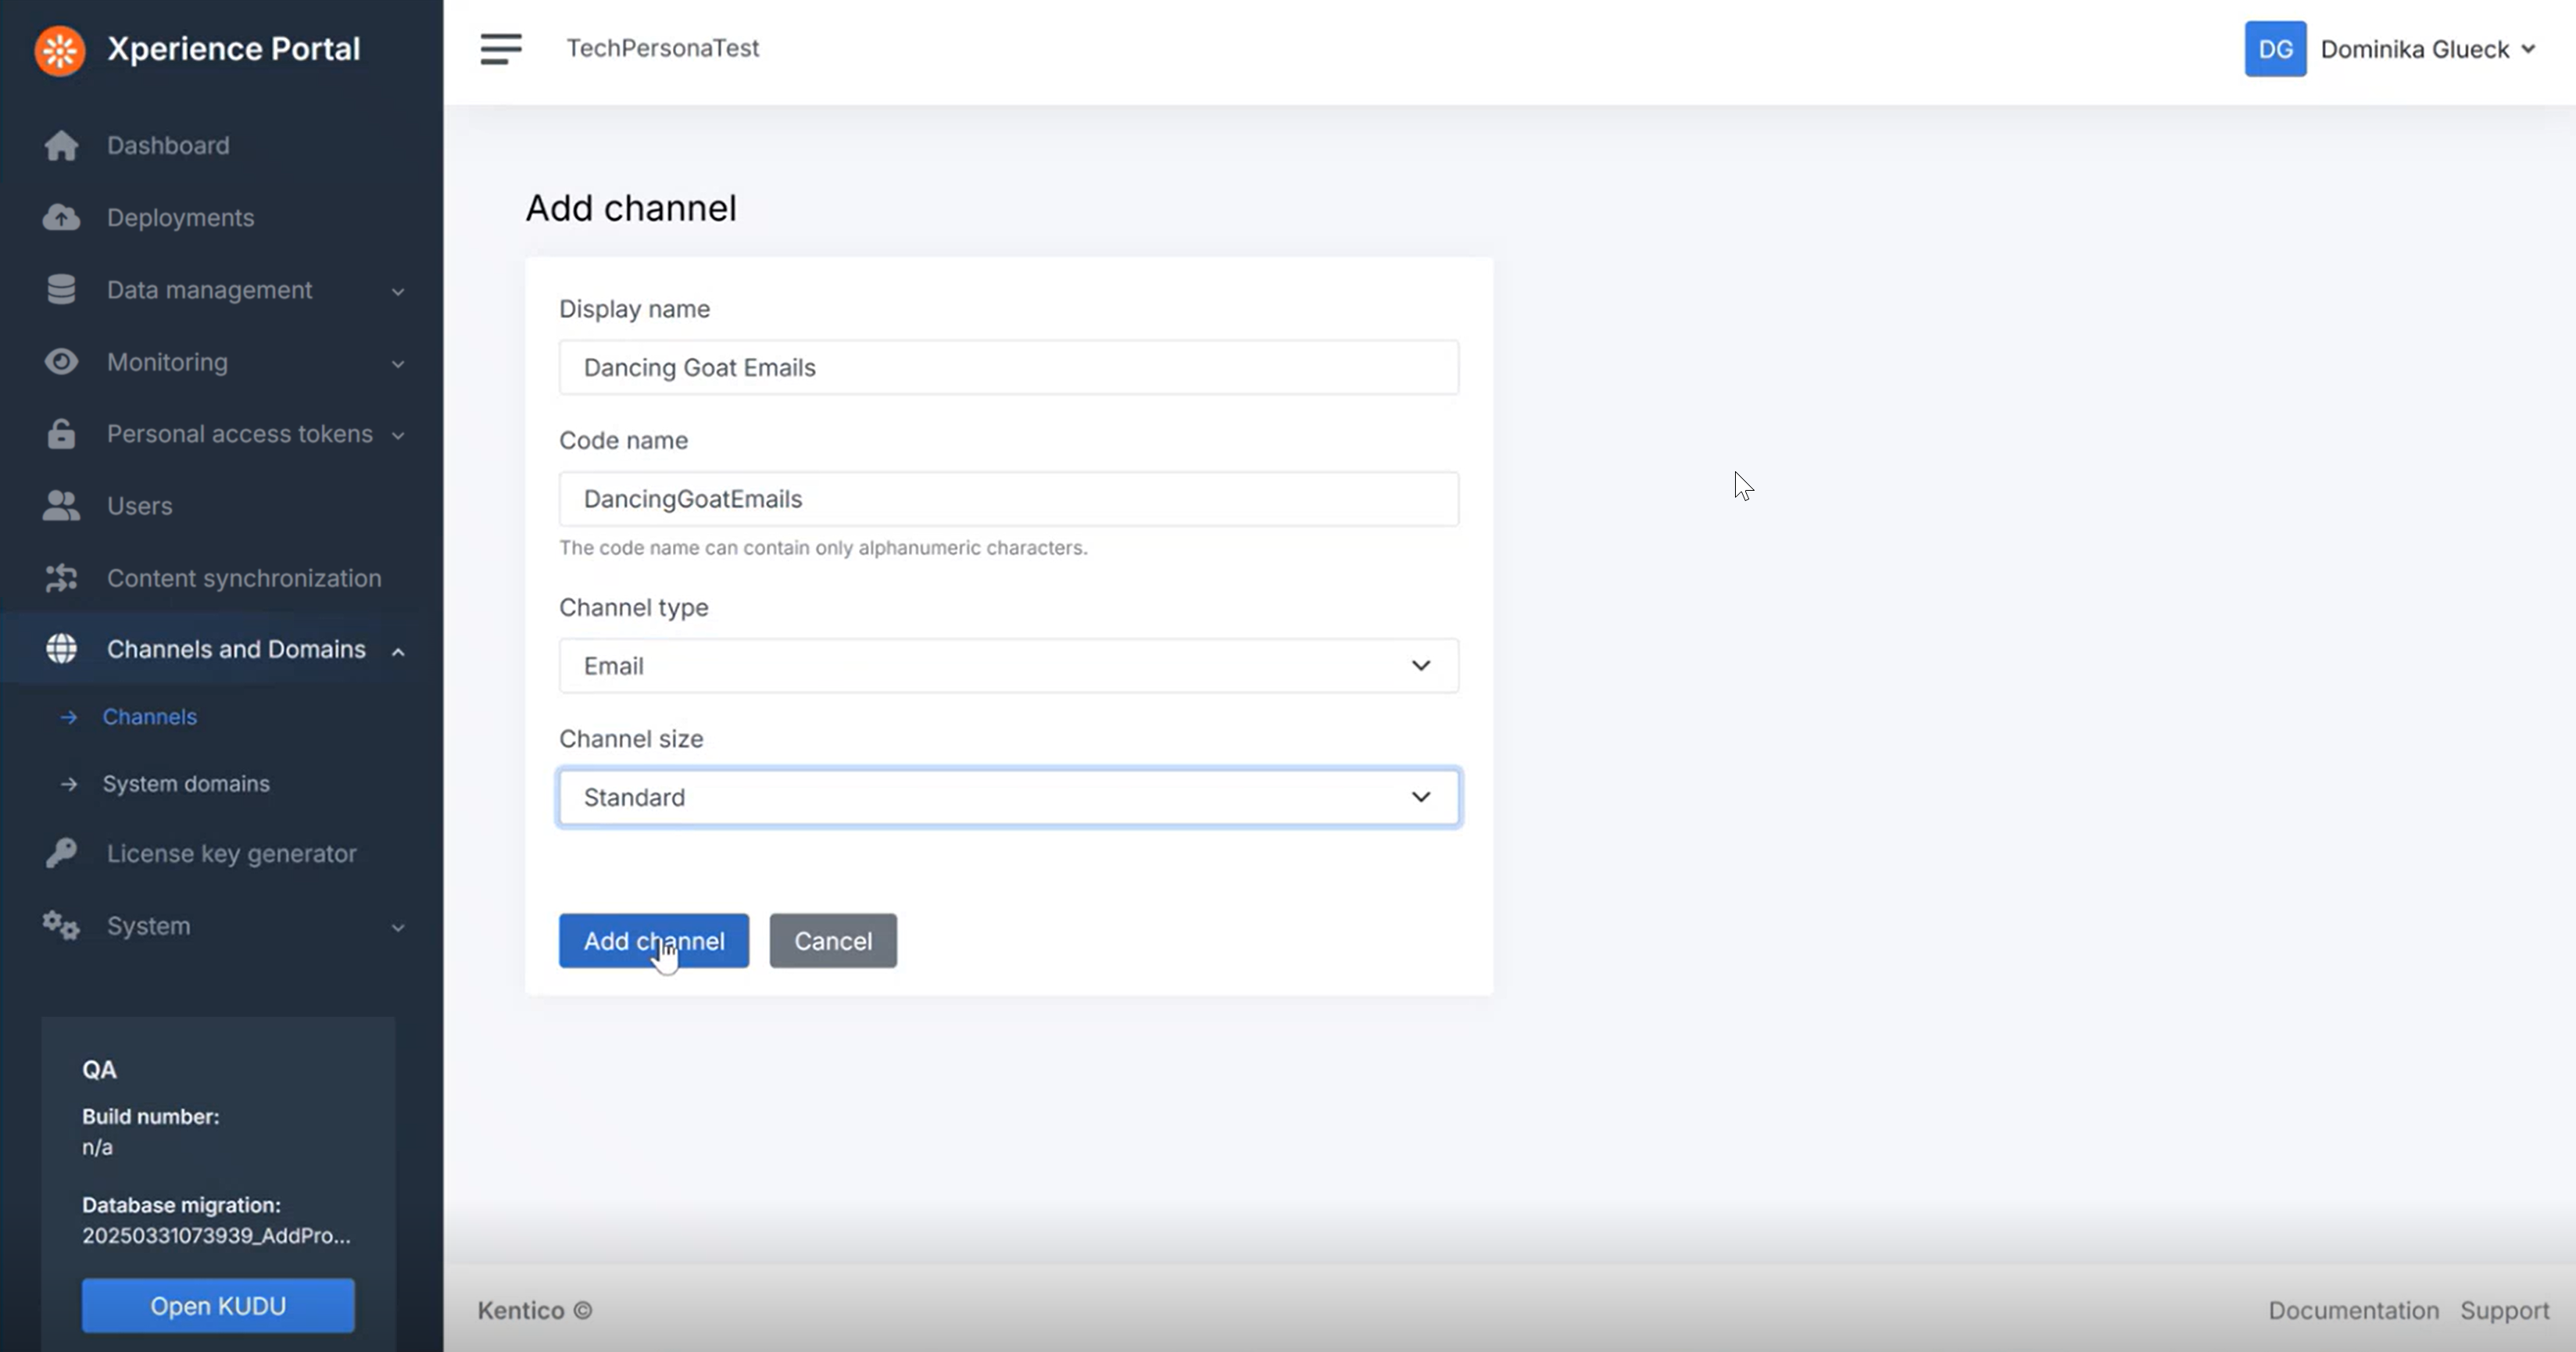
Click Add channel again and wait for the process to complete.
As before, we recommend manually refreshing the browser page if you don’t see any changes after a few minutes.
When prompted, Apply changes and wait for the application to restart for the setup of our new domains to be complete.
Once the app restart is done, you will see the configuration for both of your Dancing Goat channels in the Channels and Domains → Channels page in the Portal. Just like with the website channel, you can see the channel domains by clicking the green globe icon.
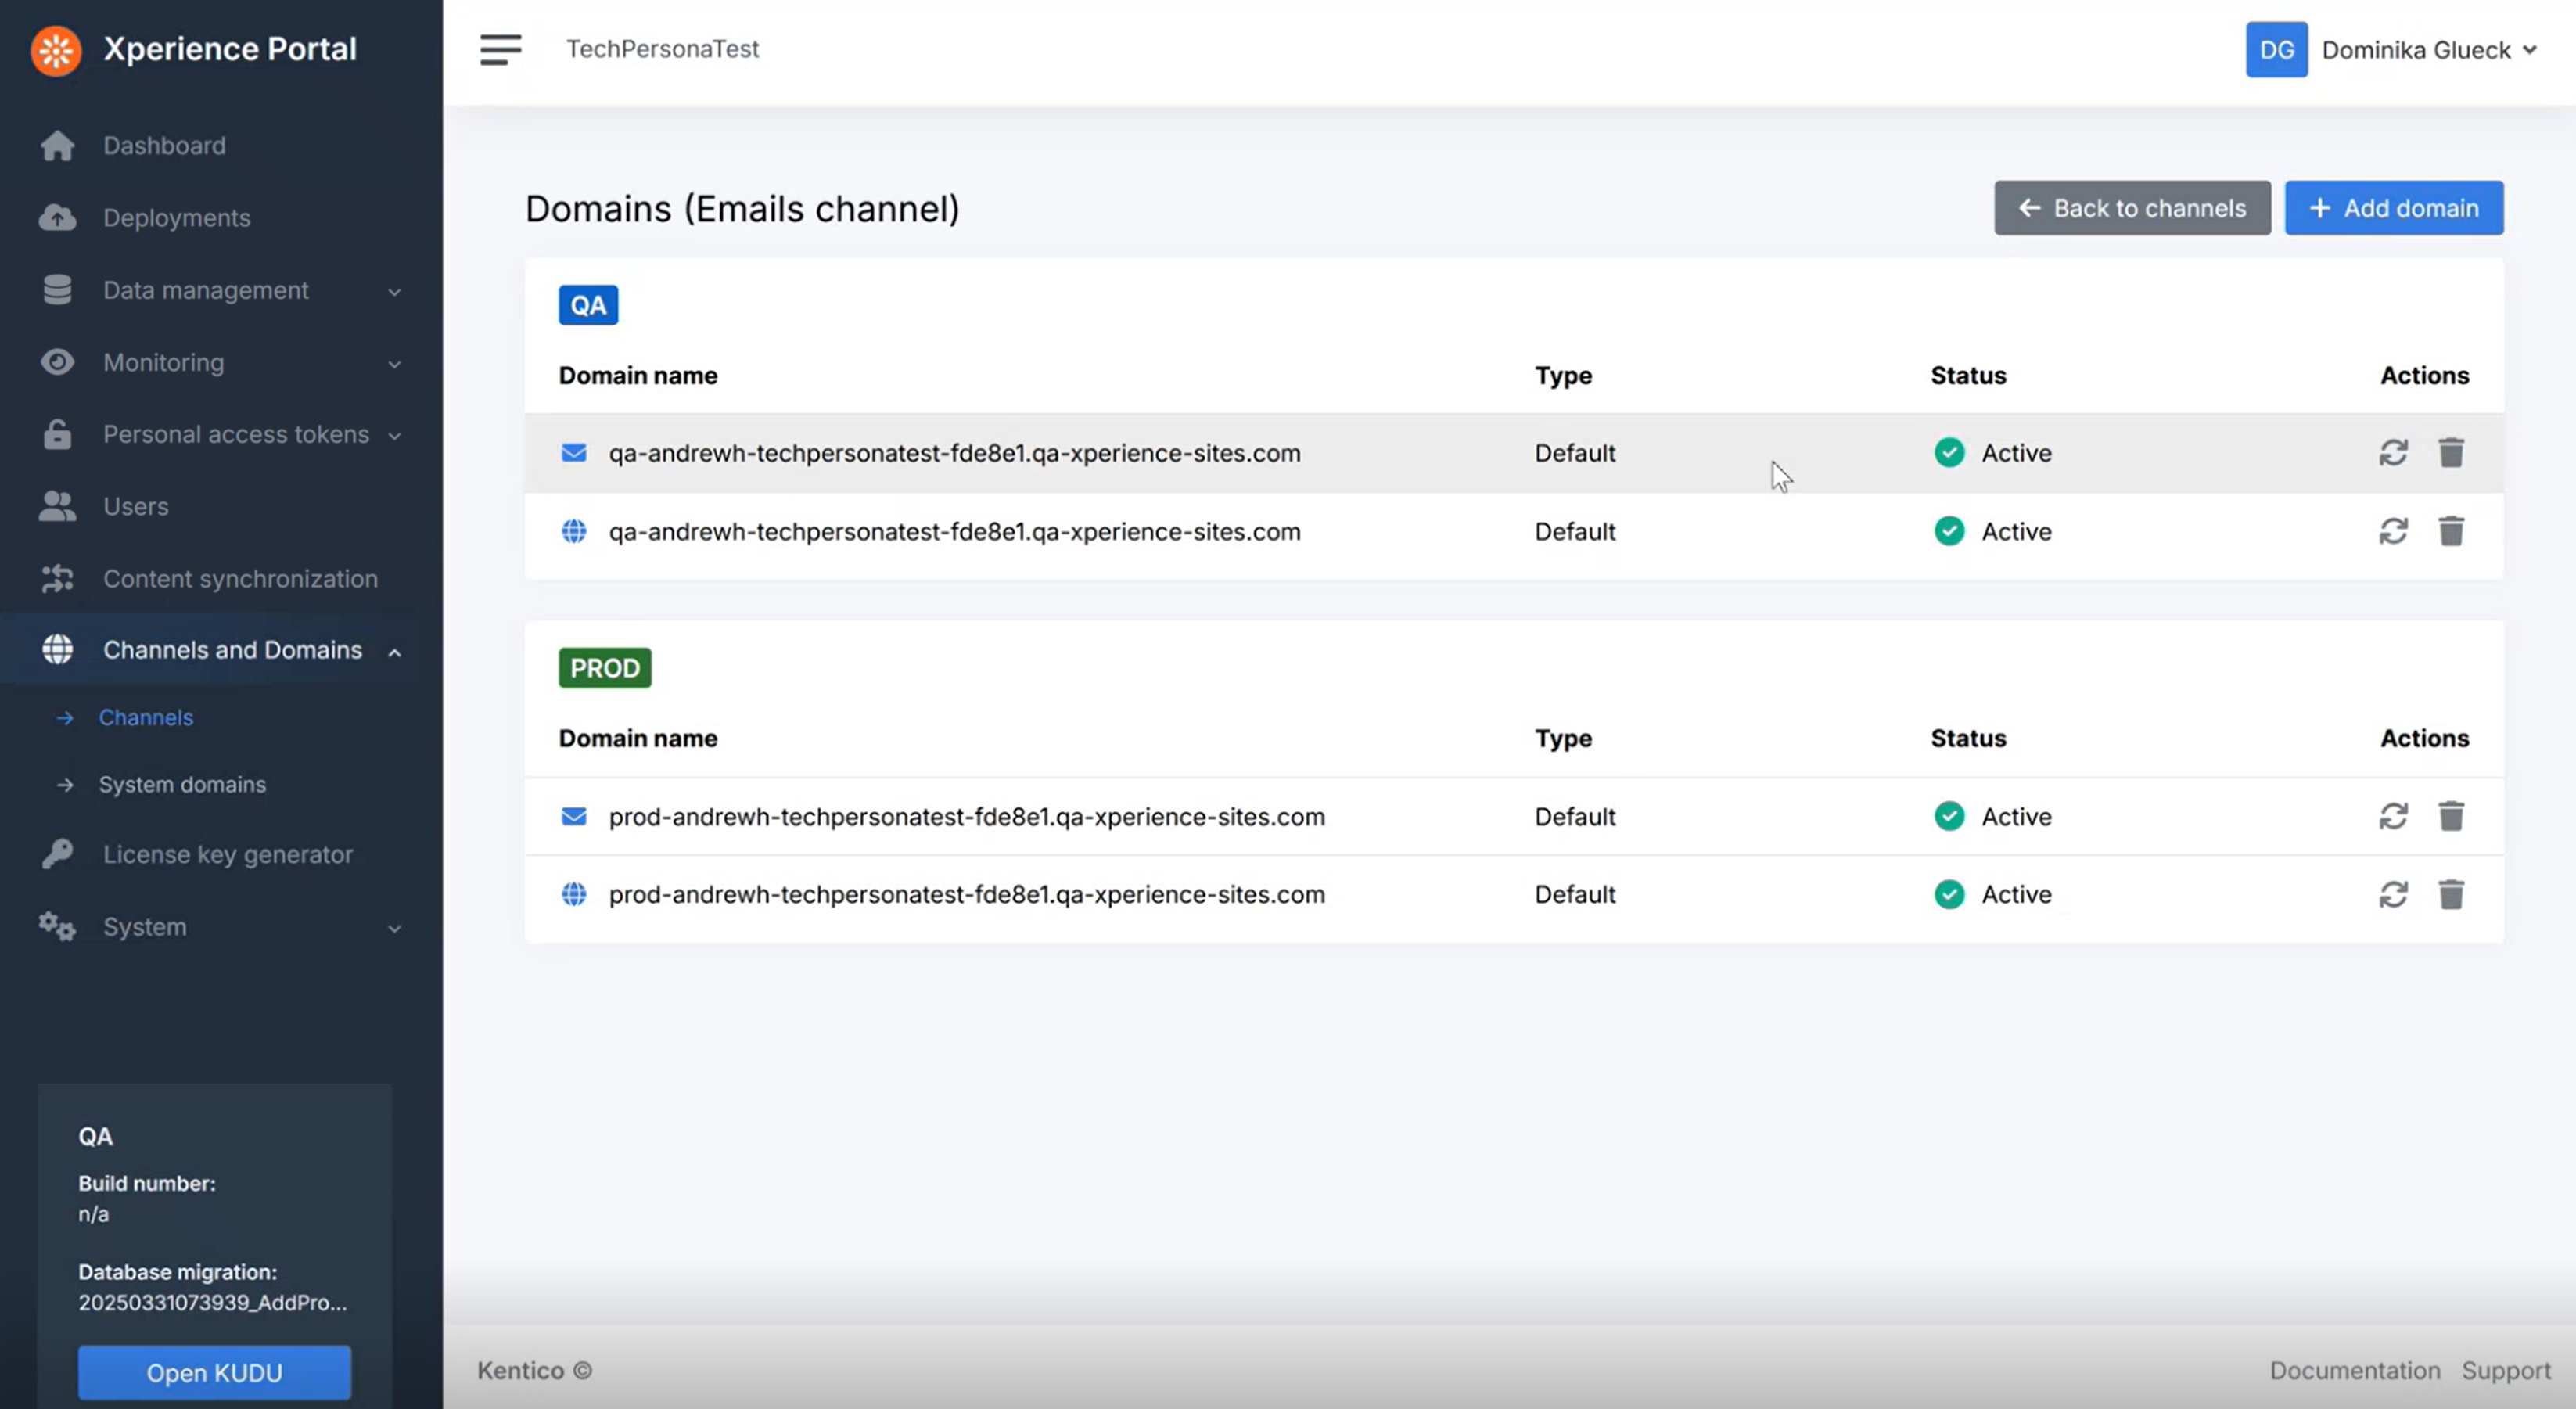
You now have your default Sending and Service domains set up for all your environments (in our example, the QA and the PROD).
The Xperience portal allows you to also set up custom domains, but you can only do this in PROD, so we will come back to the topic later.
Check your progress
Visit your Xperience administration again to see how the Dancing Goat Email channel has changed after the changes you’ve made.
In your Dancing Goat Emails channel, Open the Dancing Goat Regular email, as we did at the beginning, and observe that the logo image is now displaying correctly.
Additionally, if you navigate to your Dancing Goat Emails channel in the administration’s Channel management, you will see the Sending domain and Email service domain fields are now not editable, as the domains are controlled from the Xperience Portal.
See our documentation to learn more about email channel management in the SaaS environment.
Congratulations, you have successfully deployed and configured the Dancing Goat sample site in your SaaS QA environment!
In the following pages, we will look into updating your deployment via Xperience Portal API and the PROD environment deployment.
Continue learning
When you’re ready, move on to the next page: Update a QA deployment using Xperience Portal API