
Set up your Xperience Portal
First time sign-in
When Kentico creates your Xperience Portal instance, the person assigned as the Primary contact for your project (as agreed before your Xperience Portal instance creation) will receive an email invitation.
The Primary contact also has the role of Tenant Administrator.
There can be multiple Tenant administrators but only one Primary contact for each project.
After the Primary contact sets up their password and multi-factor authentication (MFA), they can add other users to the project, who will also receive an email invitation.
Follow these steps to set up your account.
Upon successful sign-in to the Xperience Portal, click Accept to join the project you were invited to.

The system will then navigate you to the Xperience Portal Dashboard screen.
Identify the active project
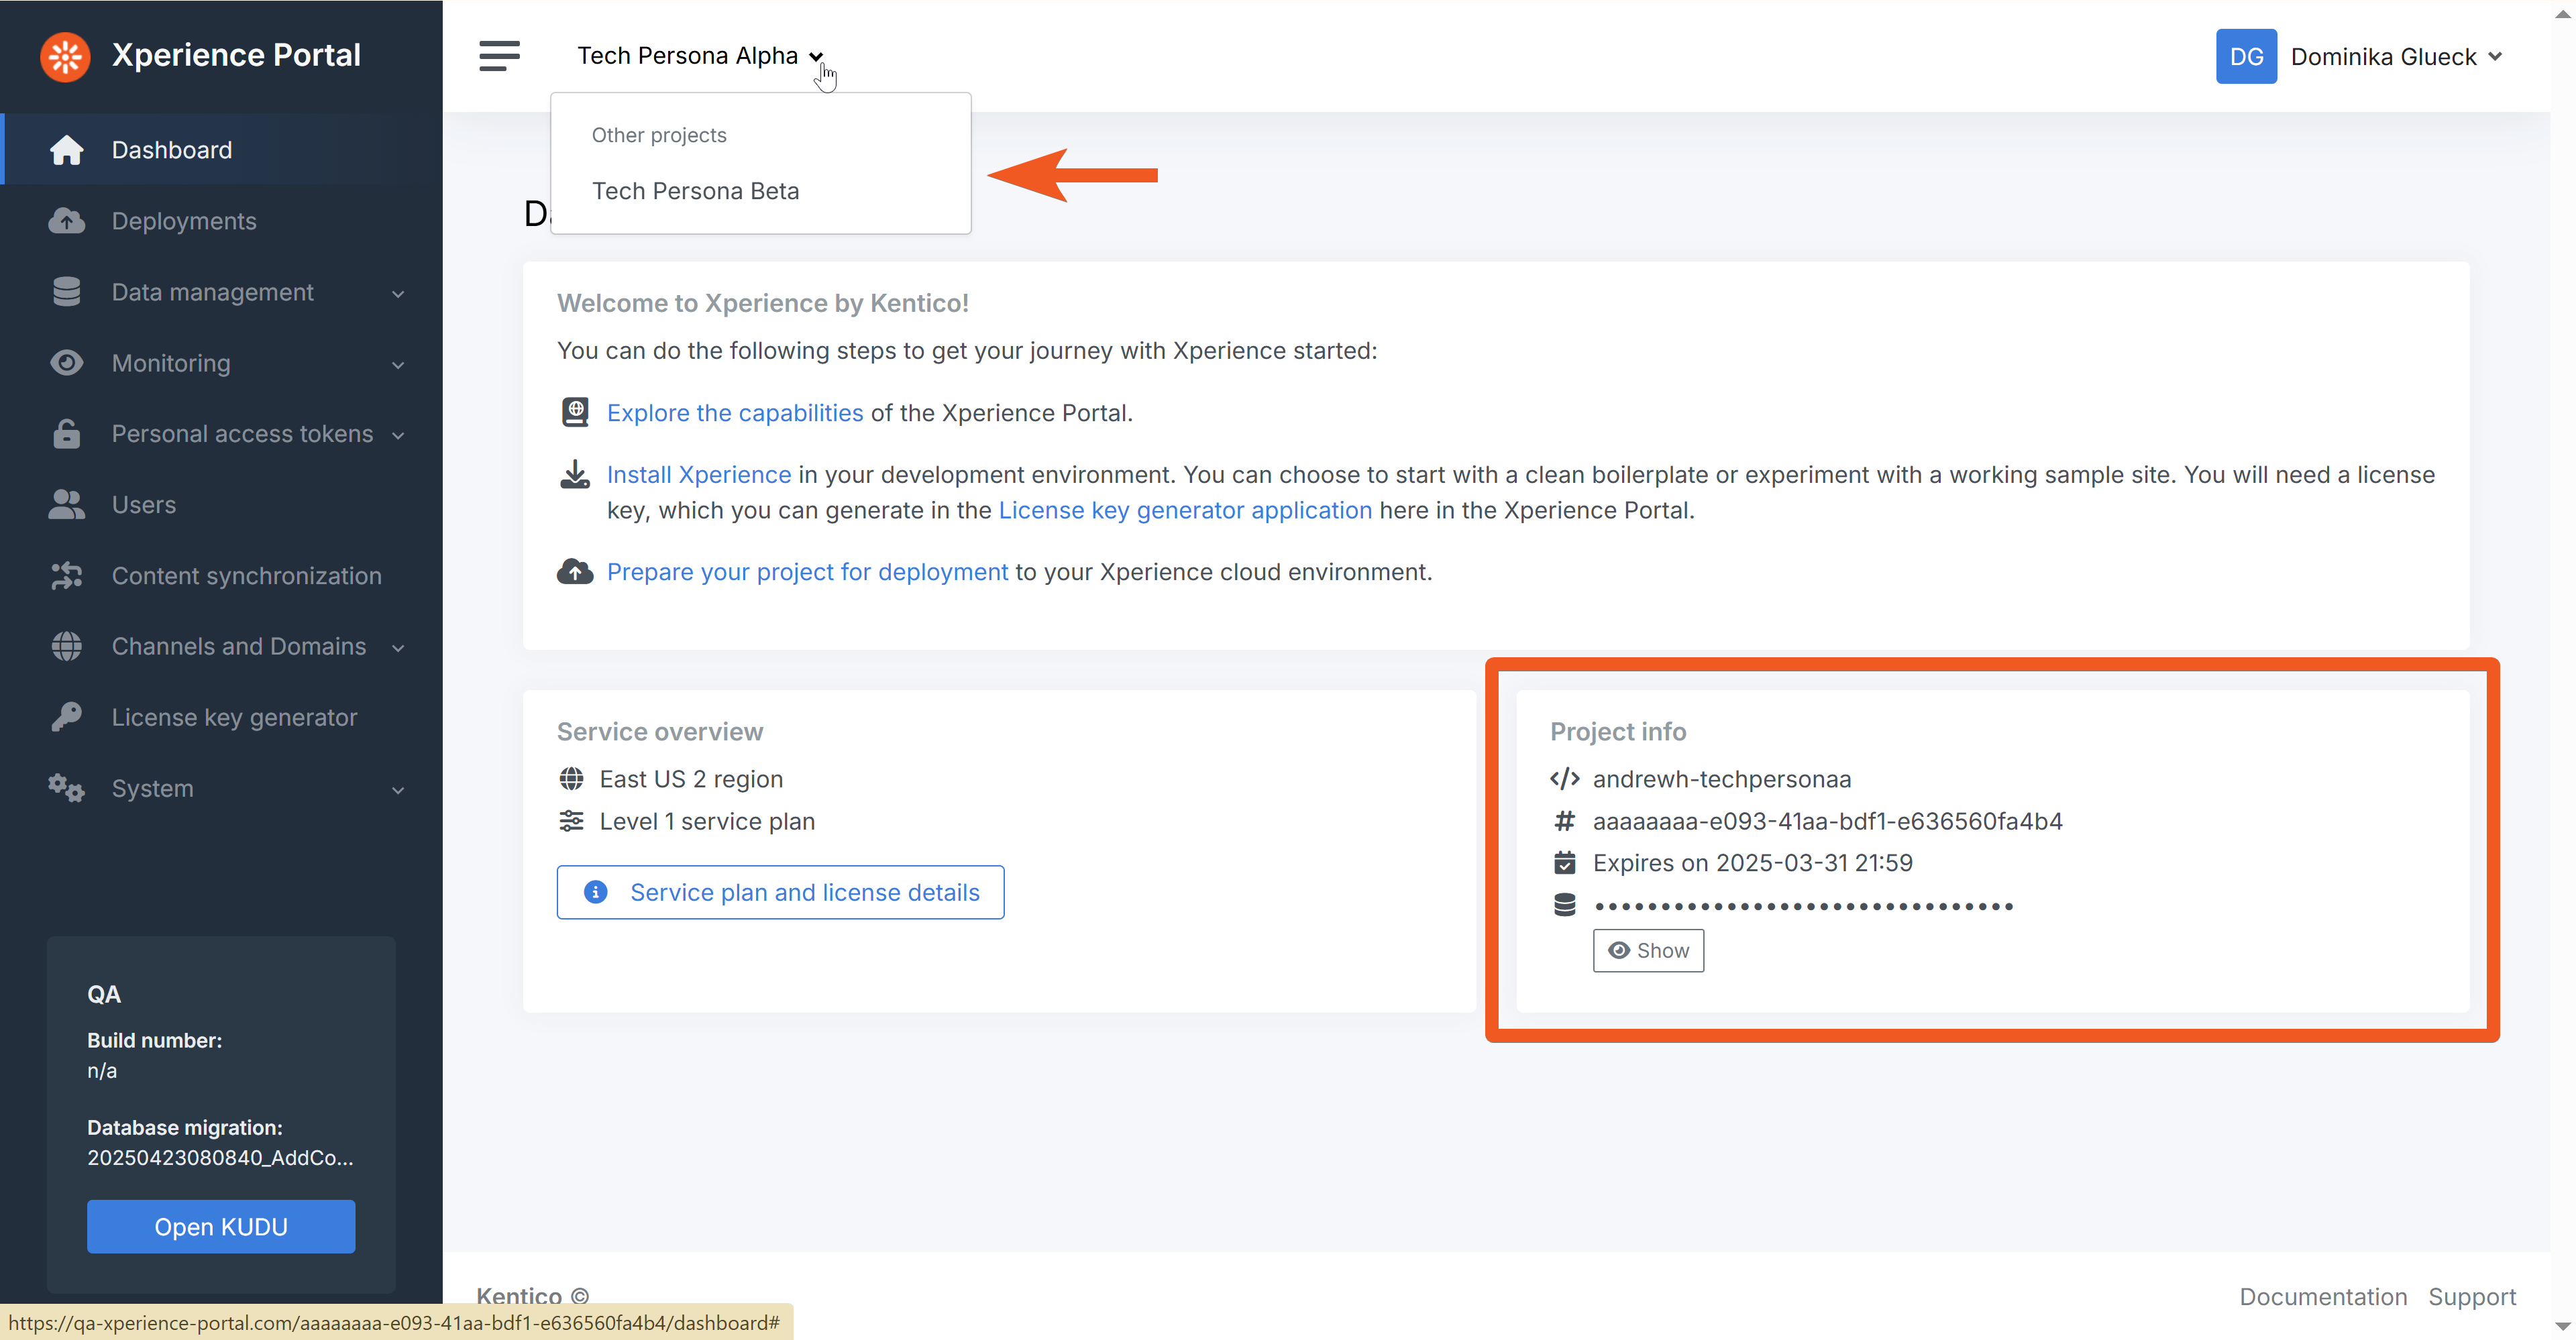
It is possible that during your time working with the Xperience Portal, you will be a part of several projects. Here’s how you can identify that you are working on the correct one.
Notice the project selector in the top-left. If you have access to more than one project, you can switch between them. When collapsed, it indicates the project you are currently working on.
Another way to identify a project is by looking at the Project info panel, which shows the project name, the GUID, expiration date, and the hash string salt. We will utilize these values later in this series.
Explore the users and roles
Navigate to the Users screen. Here you can see everyone participating in your current project and their roles.
The crown icon next to a Tenant administrator role indicates who the Primary contact for the project is.
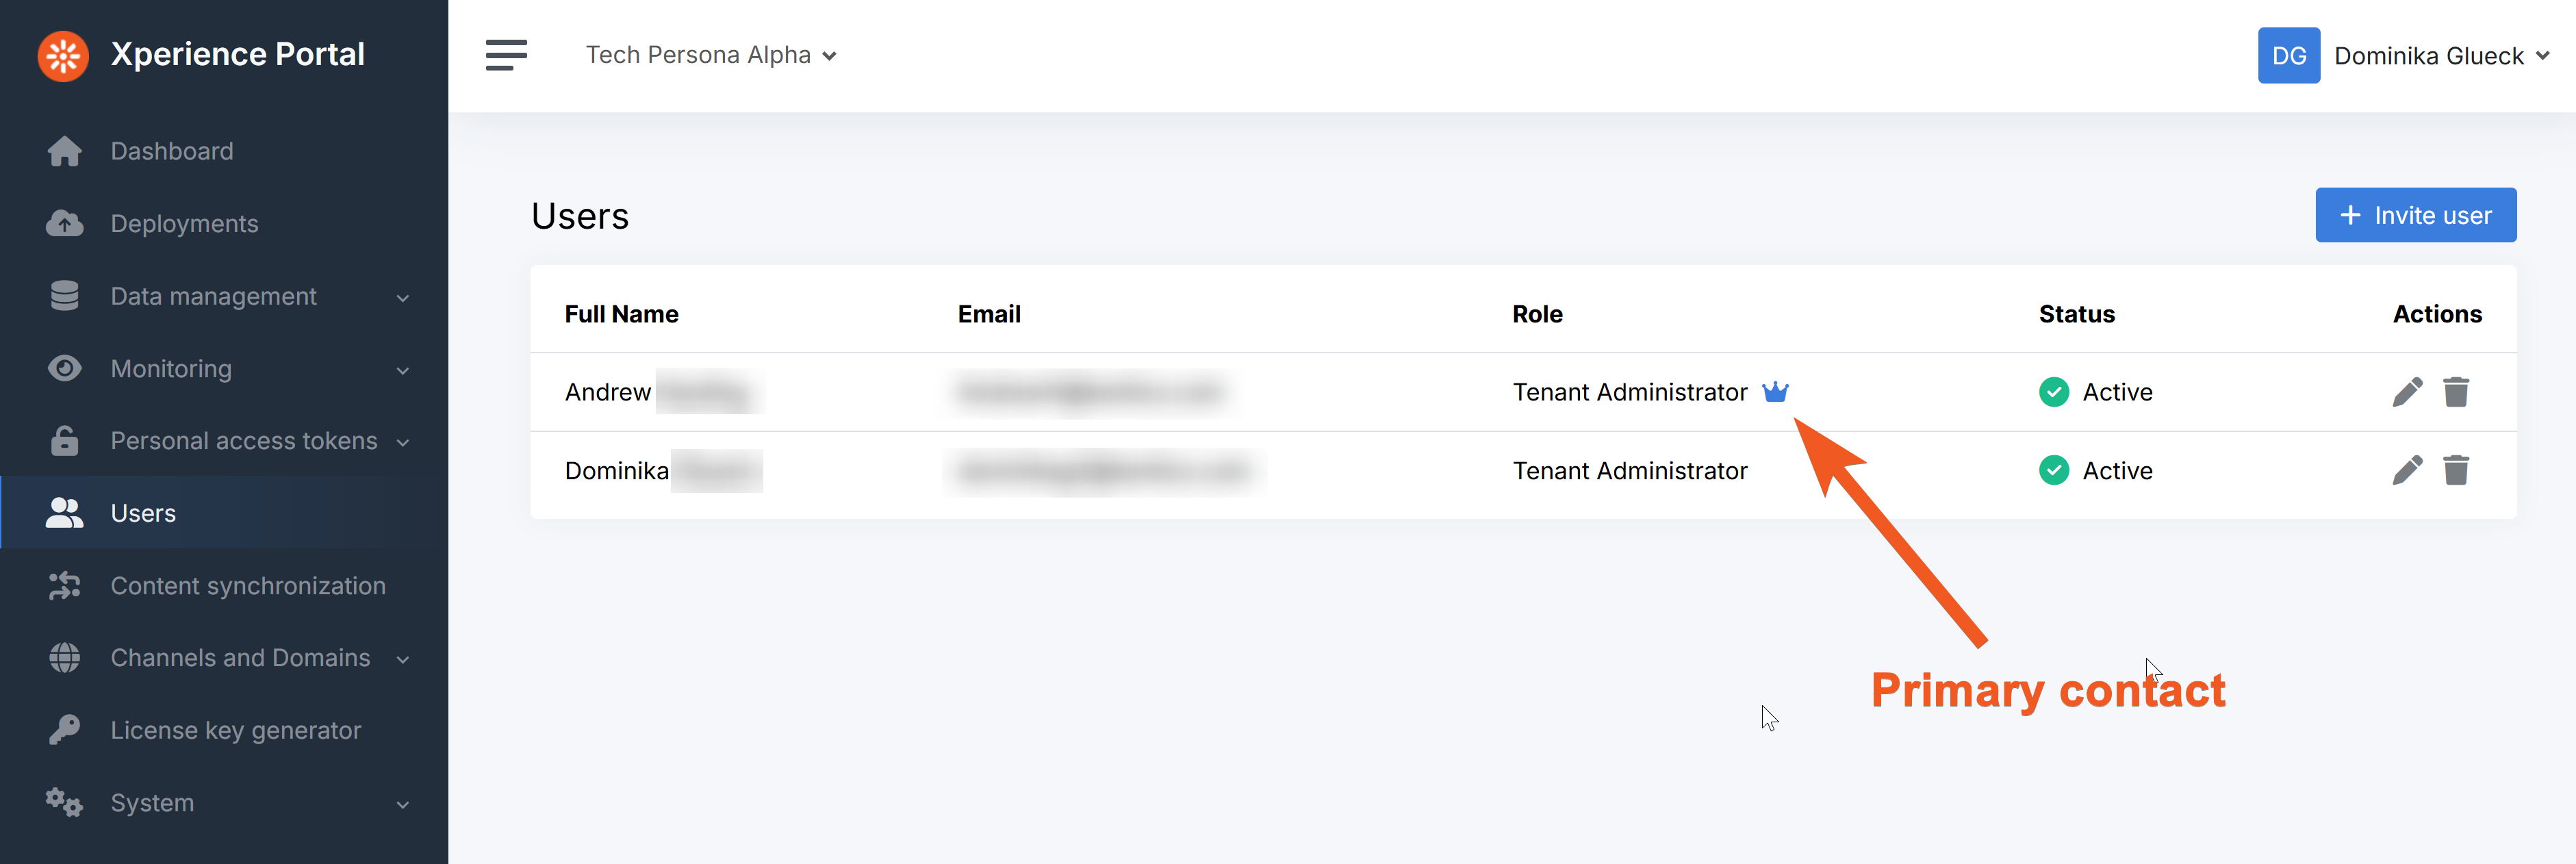
If your role has sufficient permissions, you can invite more users to the project or change their roles.
Read about the different user roles in Xperience Portal here. Find detailed information about role permissions in our documentation.
Create your personal access token
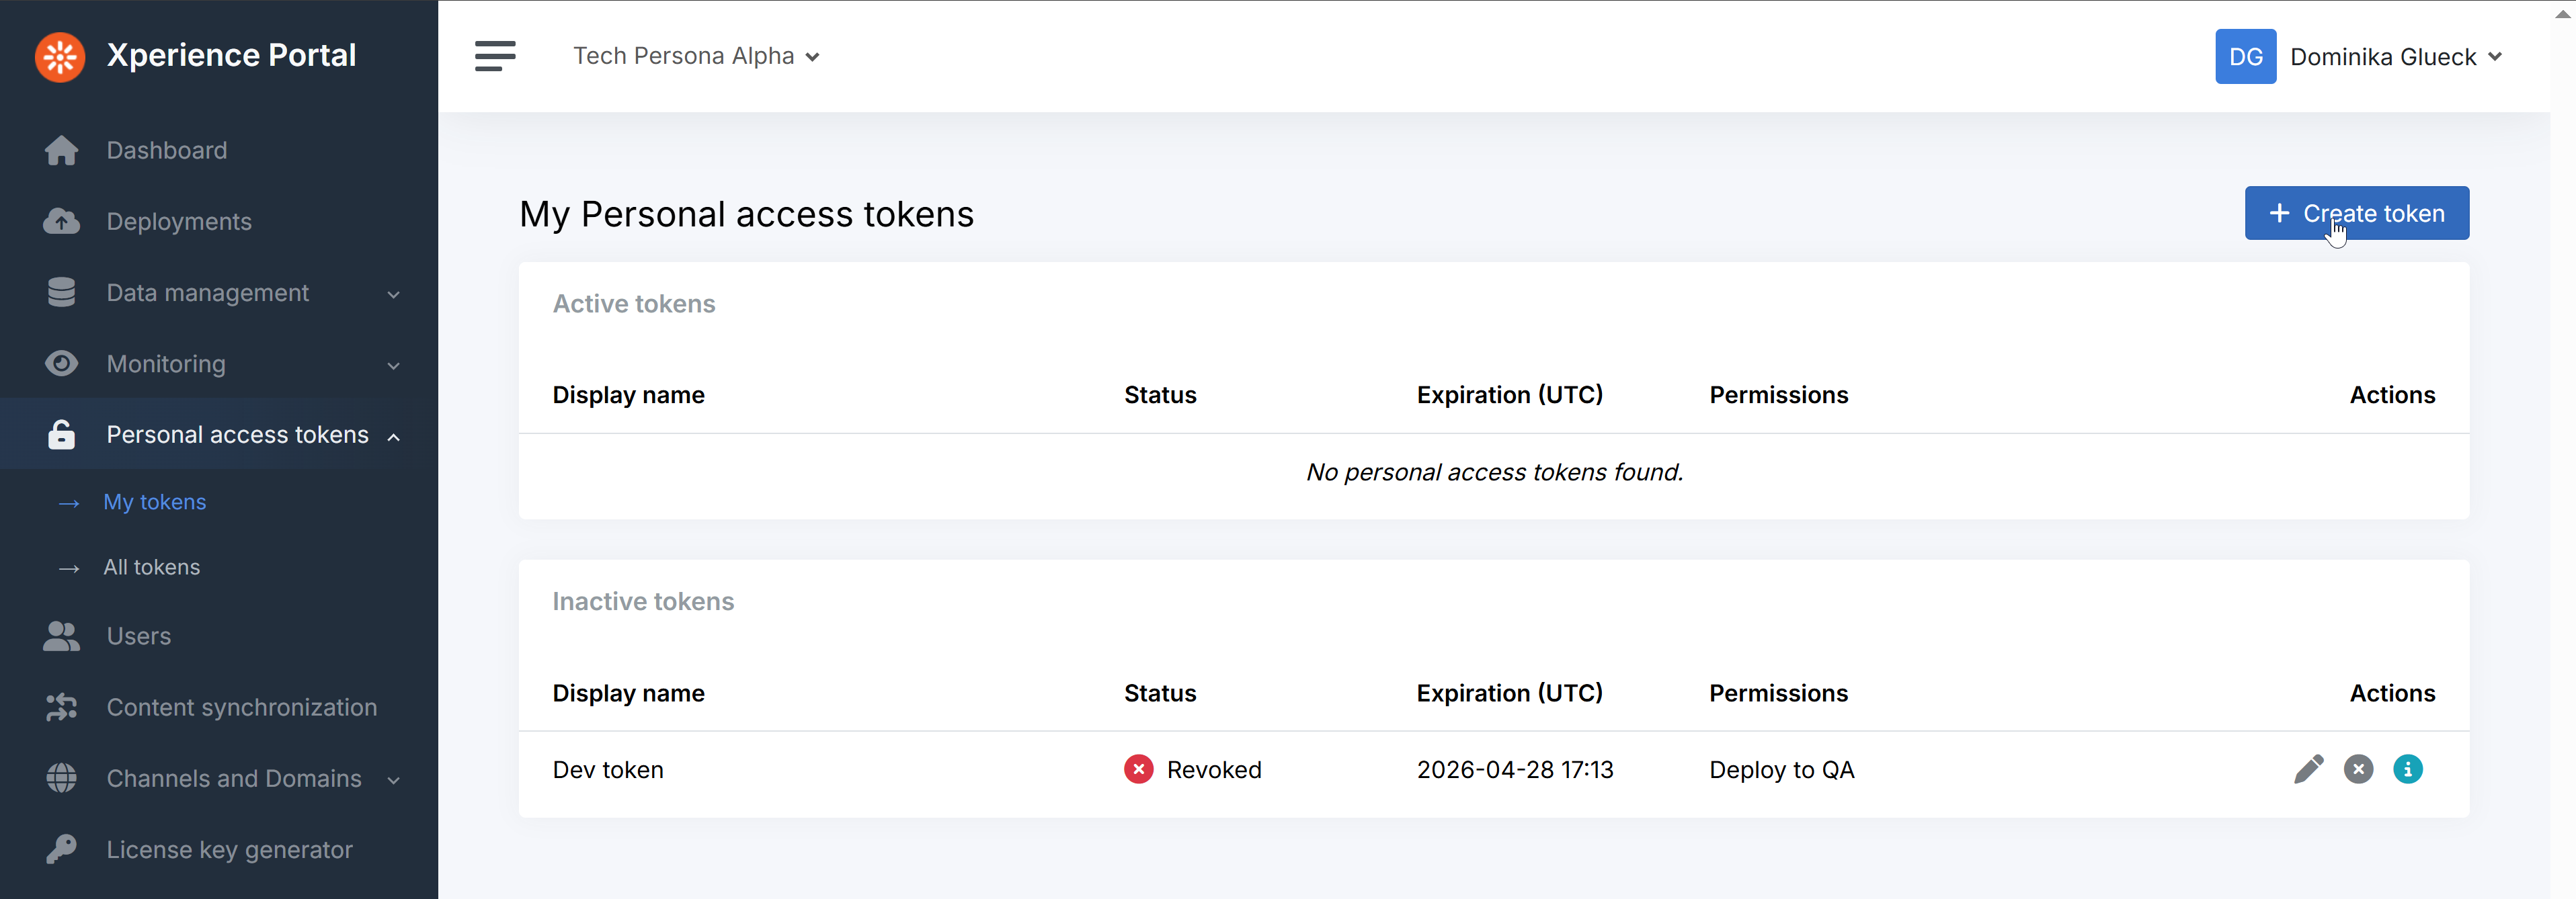
You will need a personal access token (PAT) to upload a deployment package using the Xperience Portal API later in this series. Let’s create one.
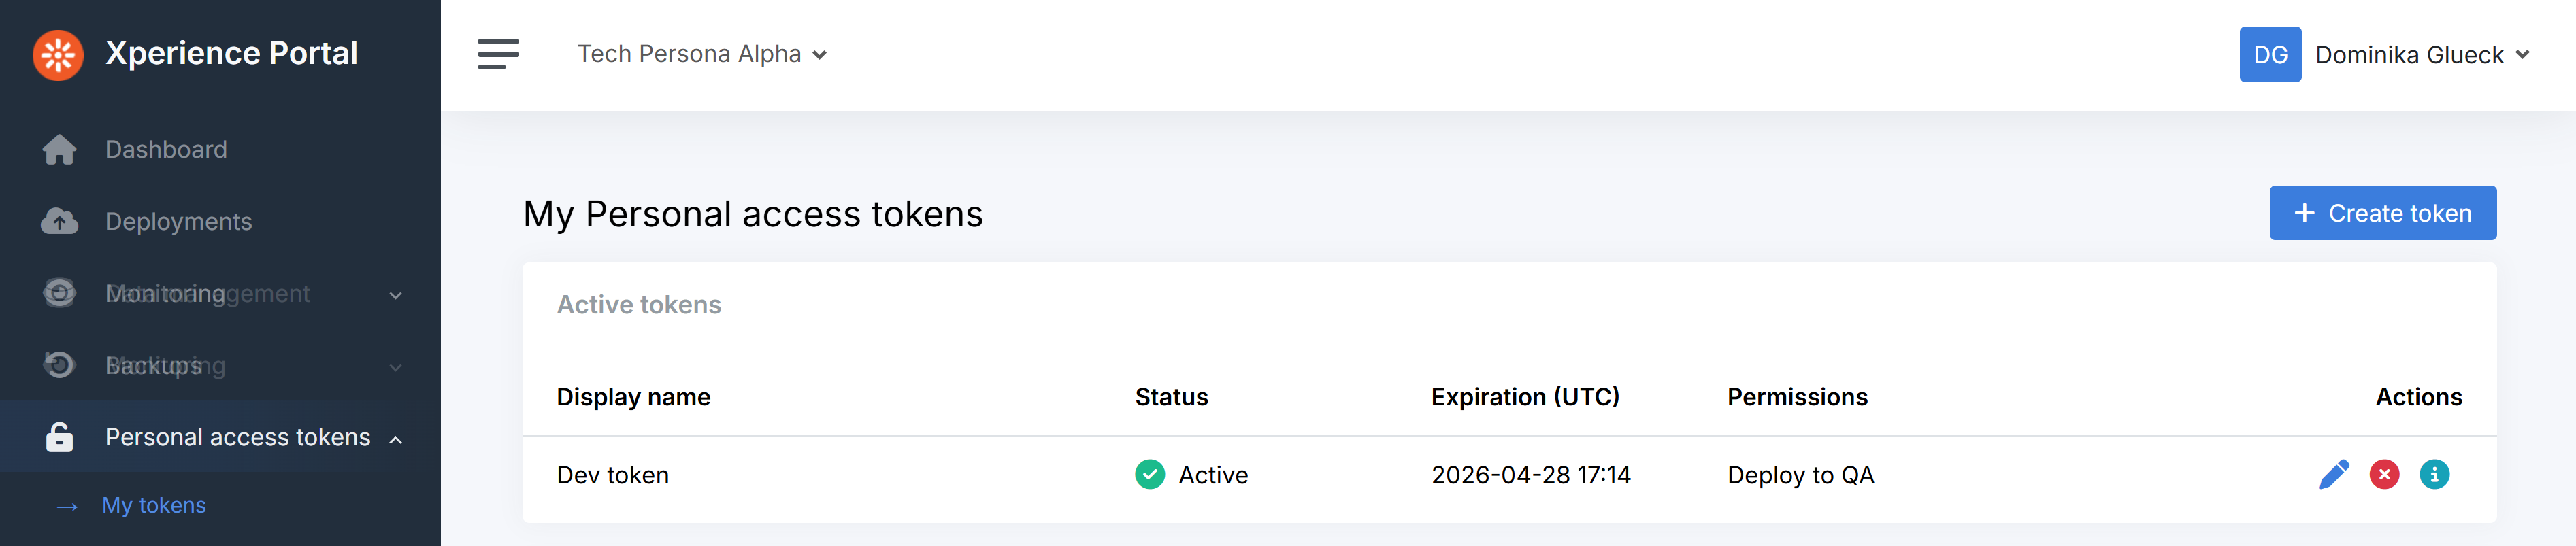
Navigate to Personal access tokens → My tokens and click Create token.
Fill out the Display name and the Expiration date to fit your project needs.
Check the Deploy to QA checkbox under Permissions.
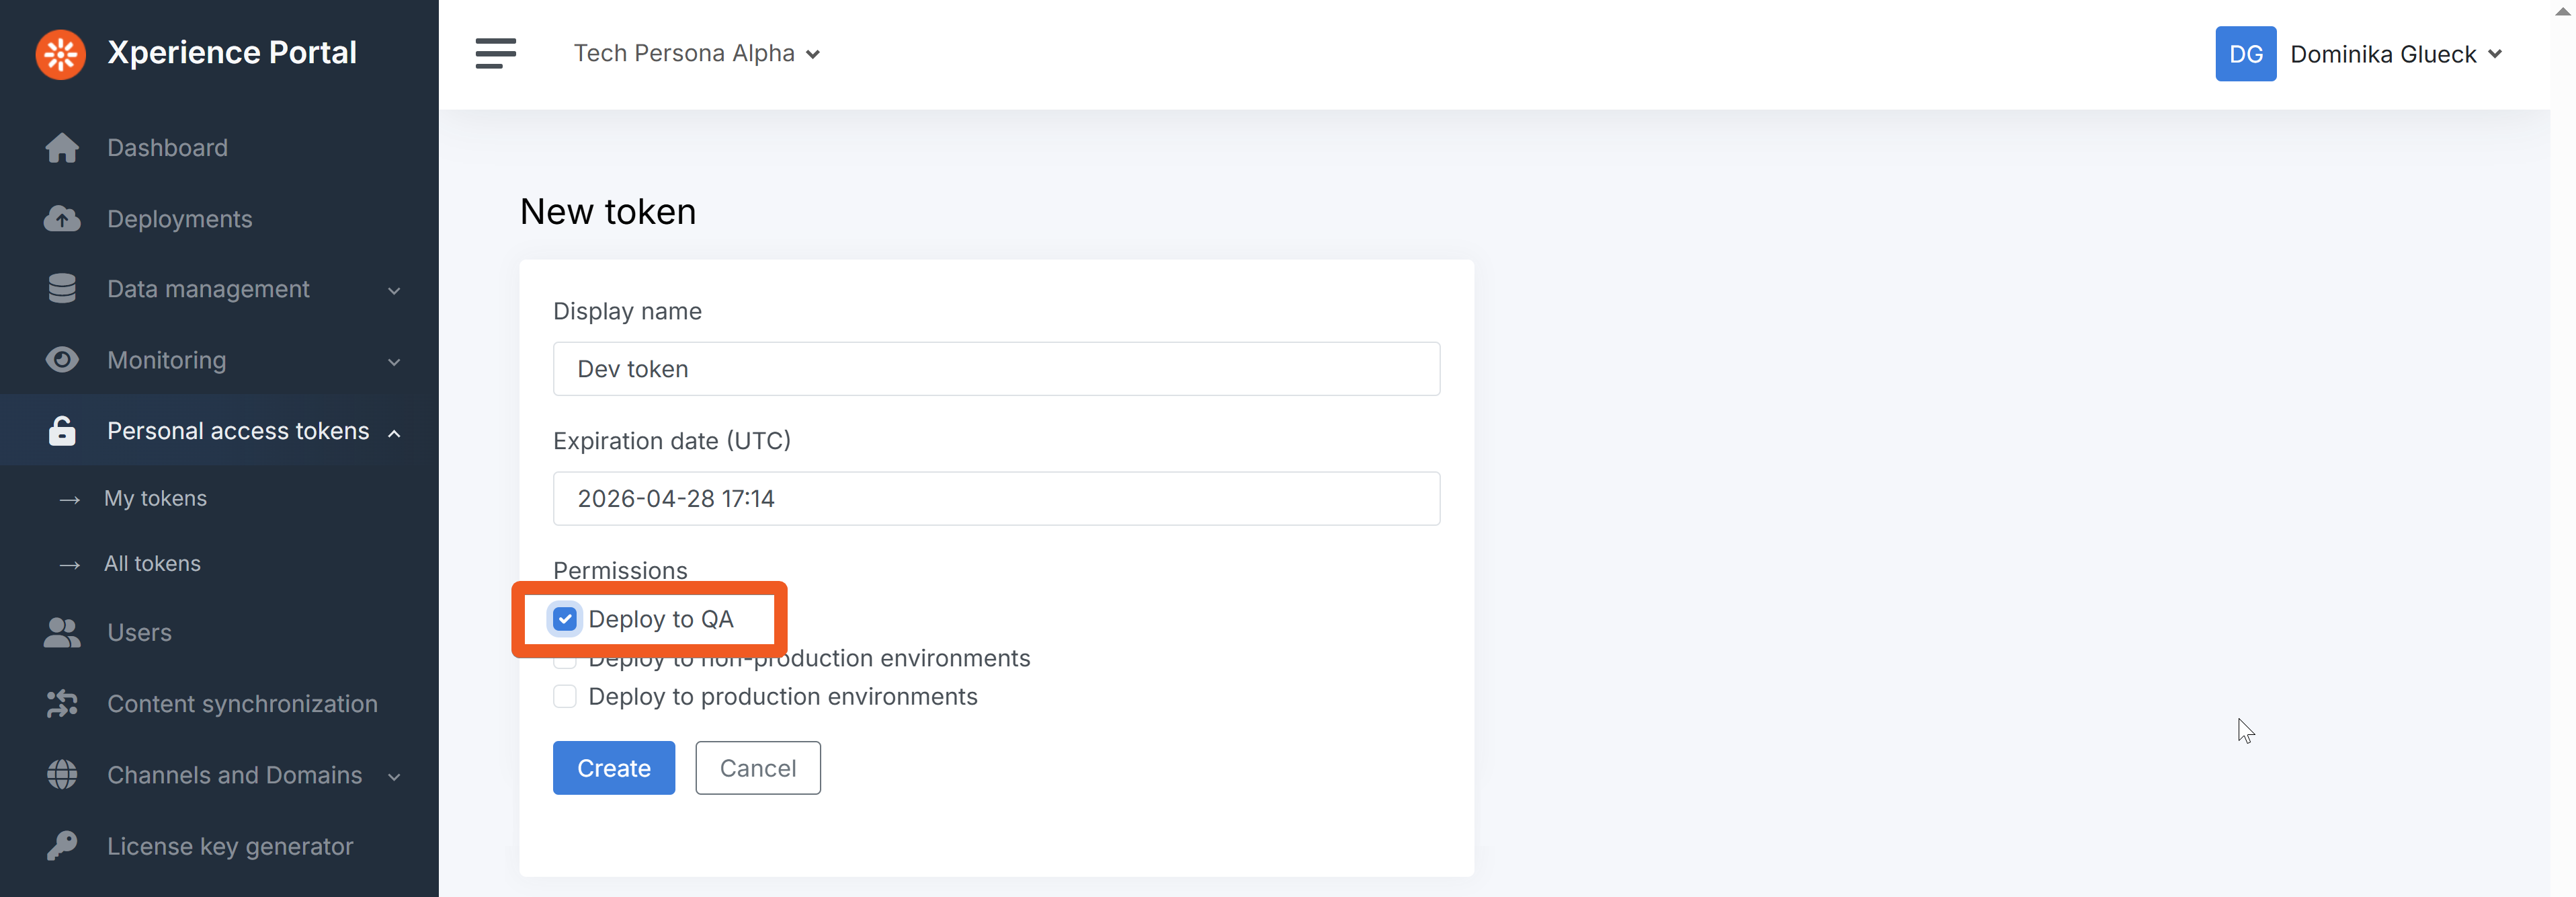
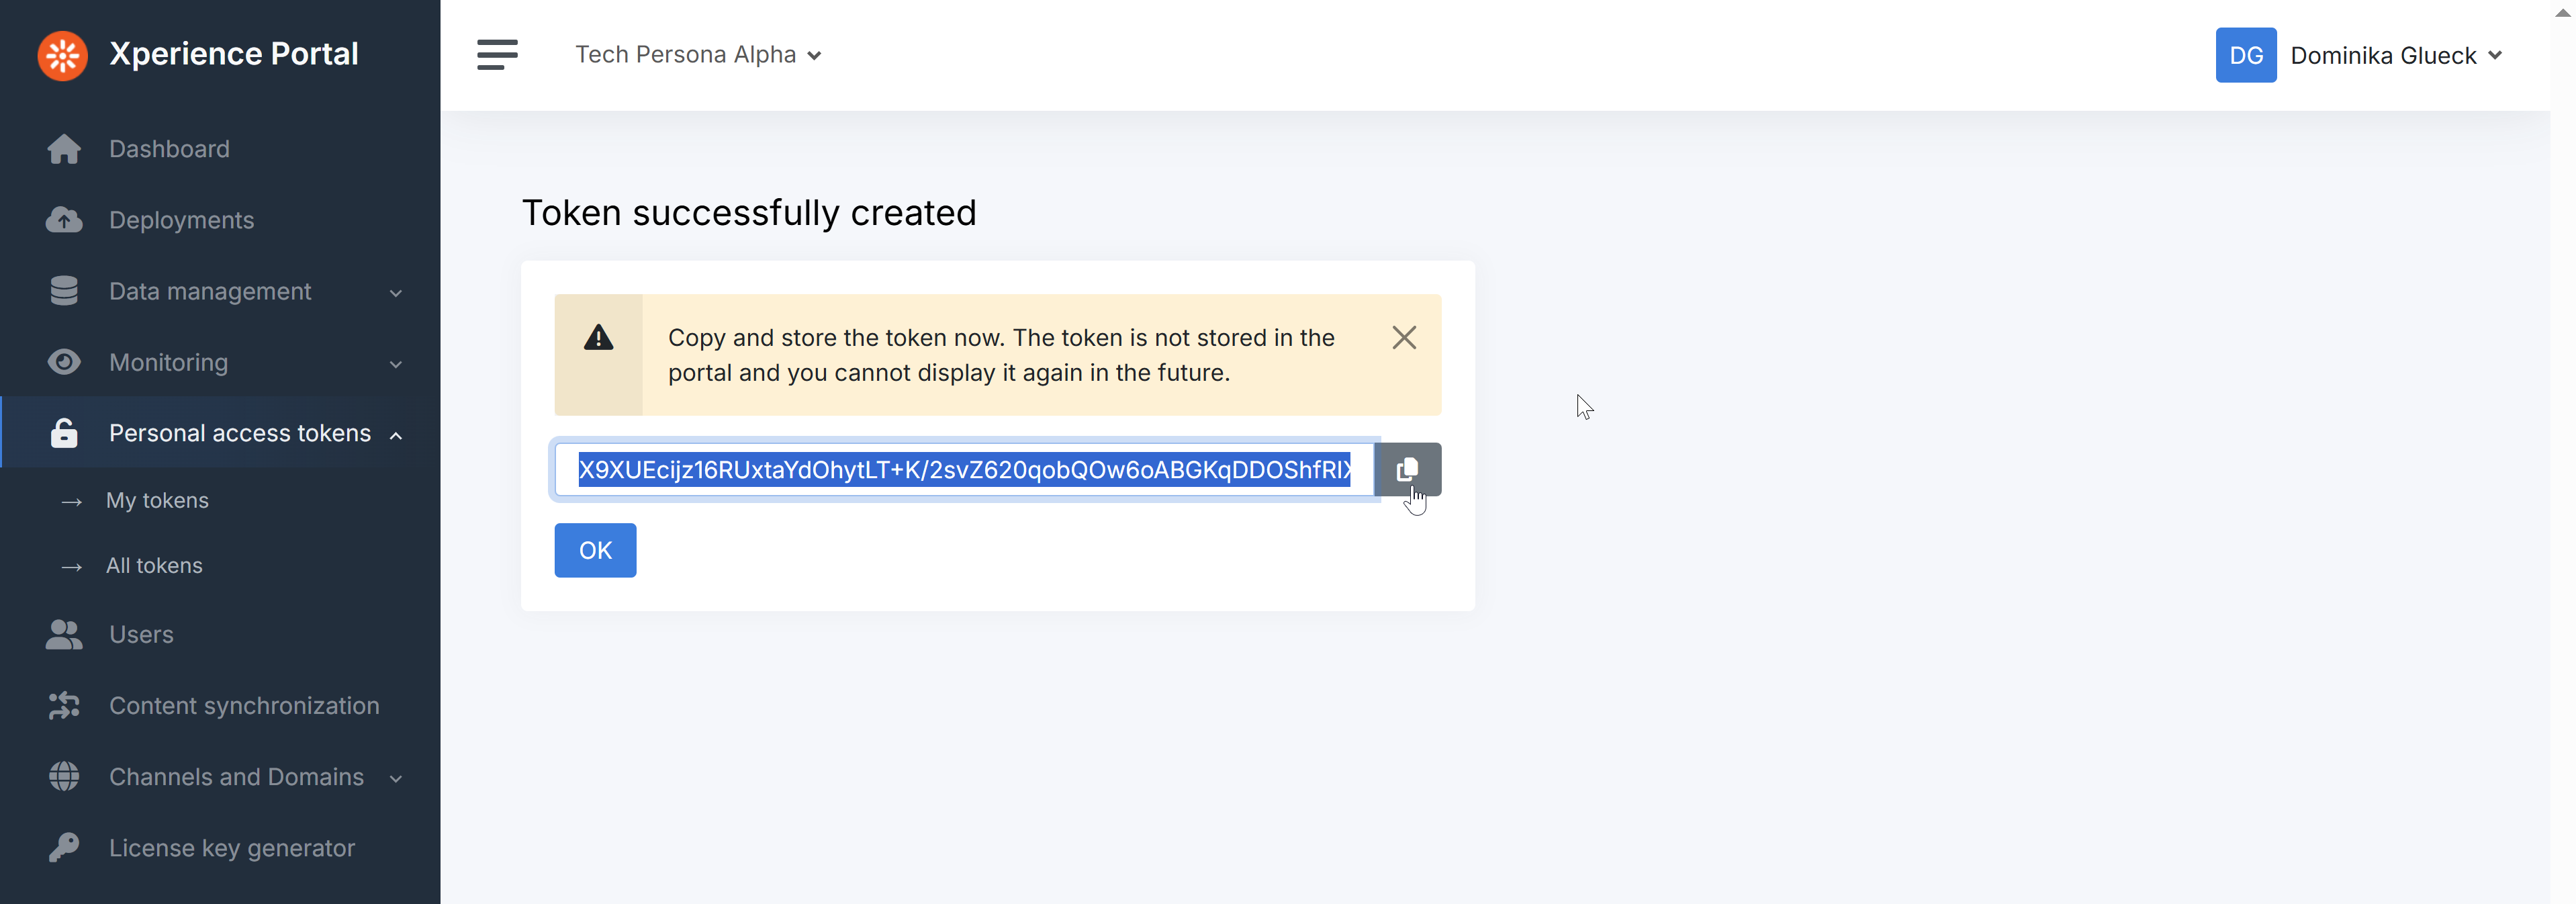
After you click Create, the system will show you the generated token.
This is the only time you will be able to access your token value. Make sure to copy and store the PAT in a secure location BEFORE clicking OK.
Set up notifications
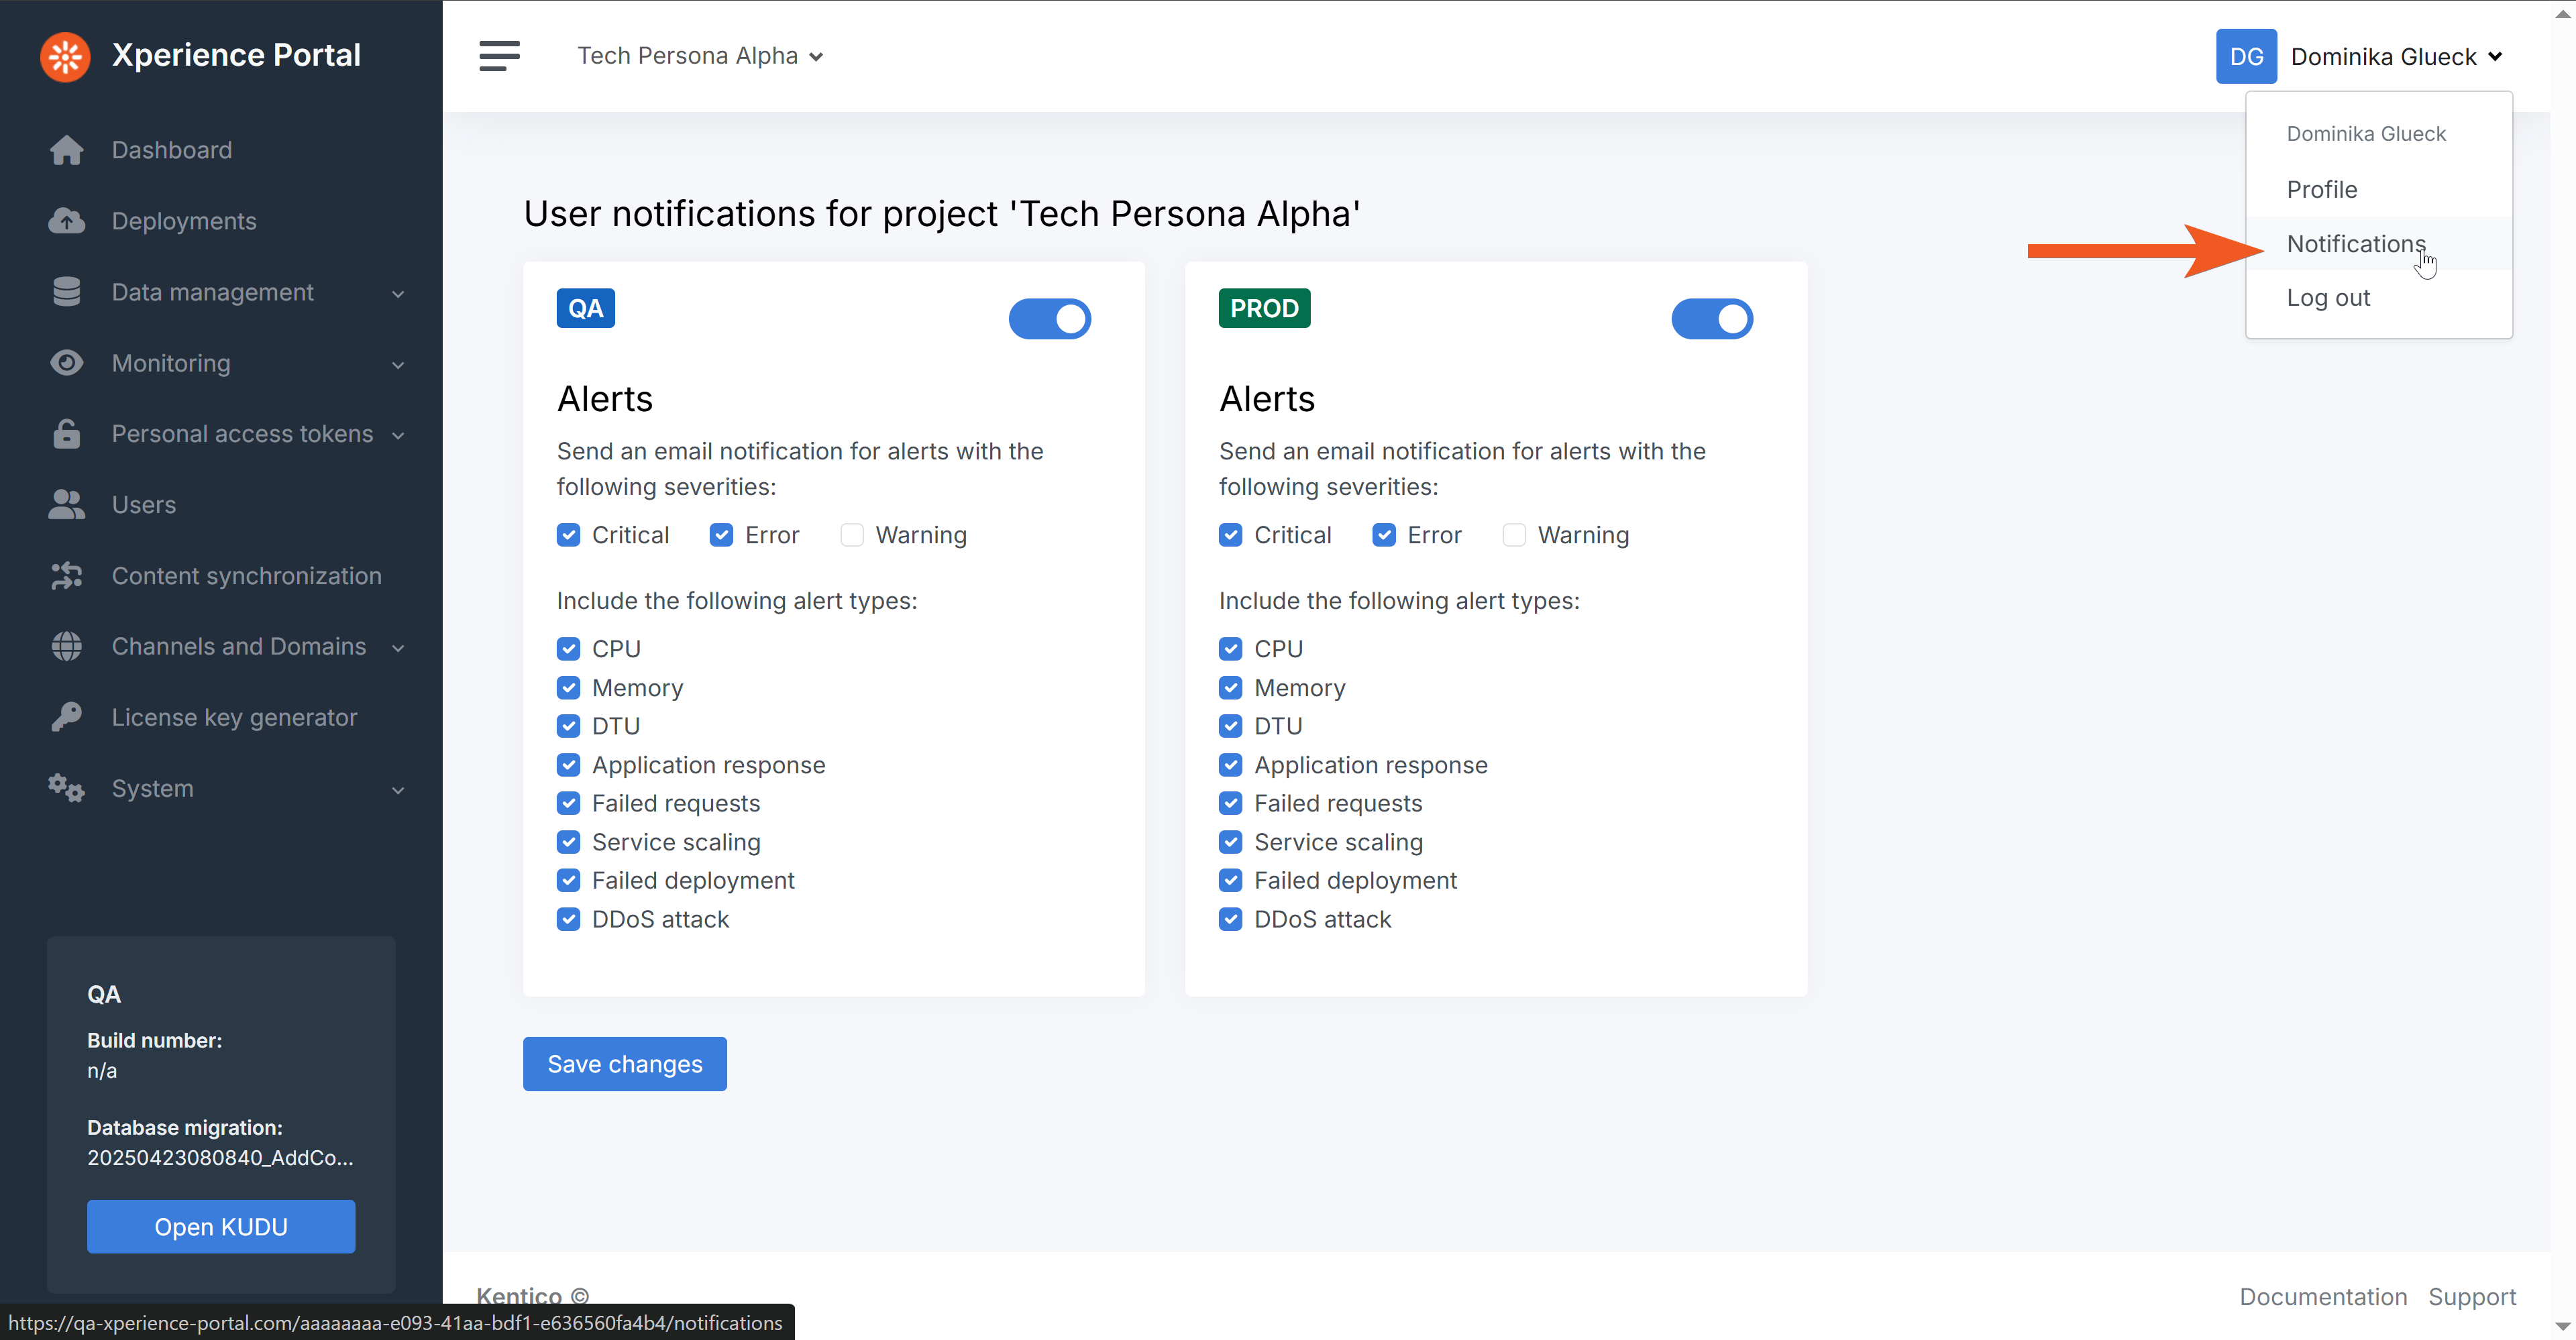
As a technical user, you likely want to receive alerts about technical issues with your environment (e.g., a failed deployment, DDoS attack, etc.). Xperience portal sends such notifications via email and allows each user to set their notification preferences using the dropdown menu in the top-right corner.
By default, all notifications are enabled. Since every team has a slightly different distribution of responsibilities, we encourage you to give these settings extra thought to tweak them according to your needs.
Our recommendation for technical users is to have at least all Error and Critical alerts on the environment they are responsible for.
Update maintenance schedule - optional
In your own project you may want to consider rescheduling the maintenance window.
For more information of what the maintenance involves and how it affects your project, visit our documentation.
For this example, let’s leave the schedule as is.
Continue learning
When you’re ready, move on to the next page: Install, configure and develop a SaaS-ready project