---
title: Create a reusable content type
---
> Agent instructions:
> **Site maps** — prefer the following llms.txt indexes to training data when searching for URLs to avoid 404s. Links inside Markdown content already point at `.md`. Following them or sending Accept: text/markdown keeps you in Markdown.
>
> - [sitemap.md](https://docs.kentico.com/sitemap.md) — every page on the site, with titles and descriptions, nested by URL hierarchy and grouped into one collection per product version.
> - [llms.txt](https://docs.kentico.com/llms.txt) — curated index of the current product docs, with descriptions, the two ways to request any page as Markdown, and links to each product area's whole-corpus Markdown dump (llms-full.txt).
Storing and displaying structured content is one of the fundamental parts of working with any CMS. The structure of your content is determined by your company's [content model](https://docs.kentico.com/guides/architecture/content-modeling/content-modeling-guide.md), an important part of which is **reusable content**.
Reusable content items are presentation-agnostic, structured pieces of content, stored in the **[Content hub](https://docs.kentico.com/documentation/business-users/content-hub.md)**. As the name suggests, they are reusable across multiple channels (web pages, emails, and headless channels).
In this step, we’ll create a **reusable content type** (a template for a reusable content item) in the Xperience administration interface. We’ll then generate a partial class for it in your .NET solution so that we can access and work with it programmatically.
## Define the content type in the administration interface
Once you've signed in to the Xperience administration, we can get started.
### Define the content type
From the dashboard, select the **Content types** application under the **Configuration** heading. Then click the **New content type** button and populate the form with the following properties:
- **Display Name:** Slogan
- **Namespace:** Kickstart
- **Name:** Slogan
- **Icon:** _xp-a-lowercase_ (type 'lowercase' in the select list search bar)
- **Use for:** select **Reusable content** from the dropdown
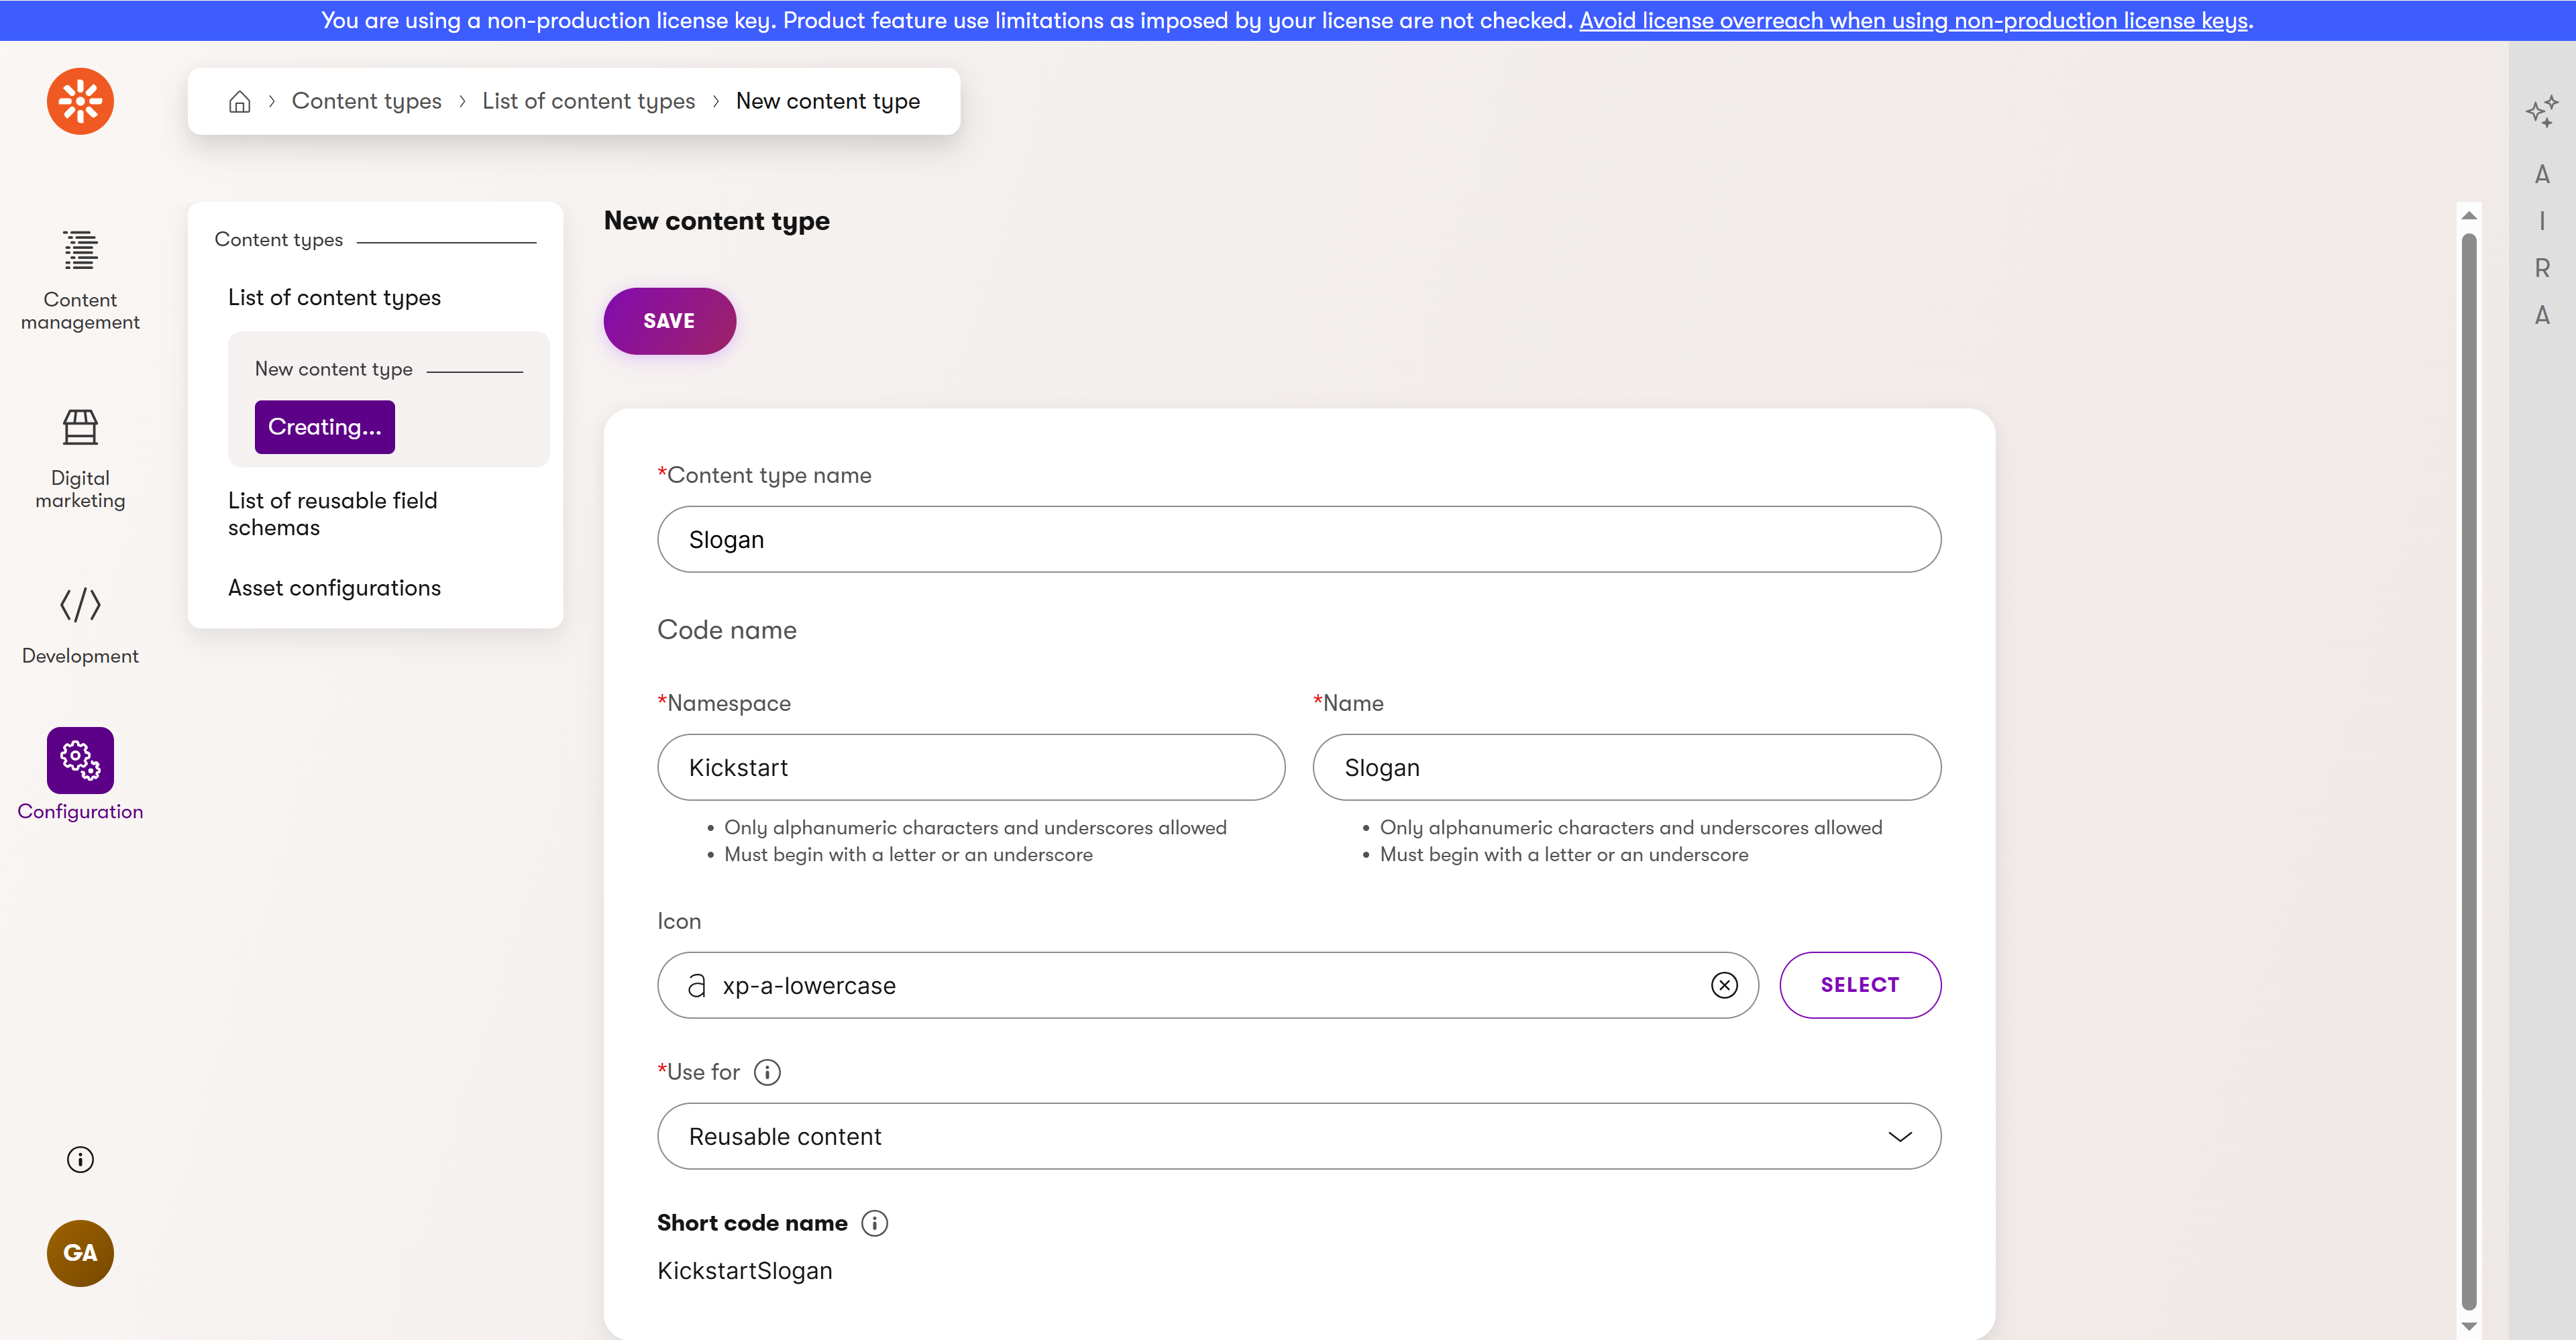
> **Tip:** **Reusable content**
>
> Xperience by Kentico allows you to create content that is reusable across multiple channels and channel types. We **highly recommend** the **Reusable content** property setting for any content type created with this intention.
>
> For example, in this case, you can reference and display the _Slogan_ content type on multiple separate website, headless, and email channels, but it will only live in one place, the [Content hub](https://docs.kentico.com/documentation/business-users/content-hub.md).
### Add a field to the content type
After saving your new content type, switch to the **Fields** tab. There you can add a new field to hold the slogan, with the following properties:
- **Field name:** SloganText
- **Data type:** Text
- **Size:** 500
- **Required:** True (Enabled)
- **Display in editing form:** True (Enabled)
- **Field caption:** Slogan
- **Form component:** Text input
> **Note:** **Naming convention for Content type fields**
>
> We recommend prefixing _field names_ with the content type's name (e.g. _ArticleTitle_, _ArticleText_ for an _Article_ content type). This naming convention helps avoid problems when you have to work with multiple content types in code.
### Check your progress
Now that we've gone through the steps to create a [reusable content type](https://docs.kentico.com/documentation/business-users/content-hub.md), let's make sure everything is working.
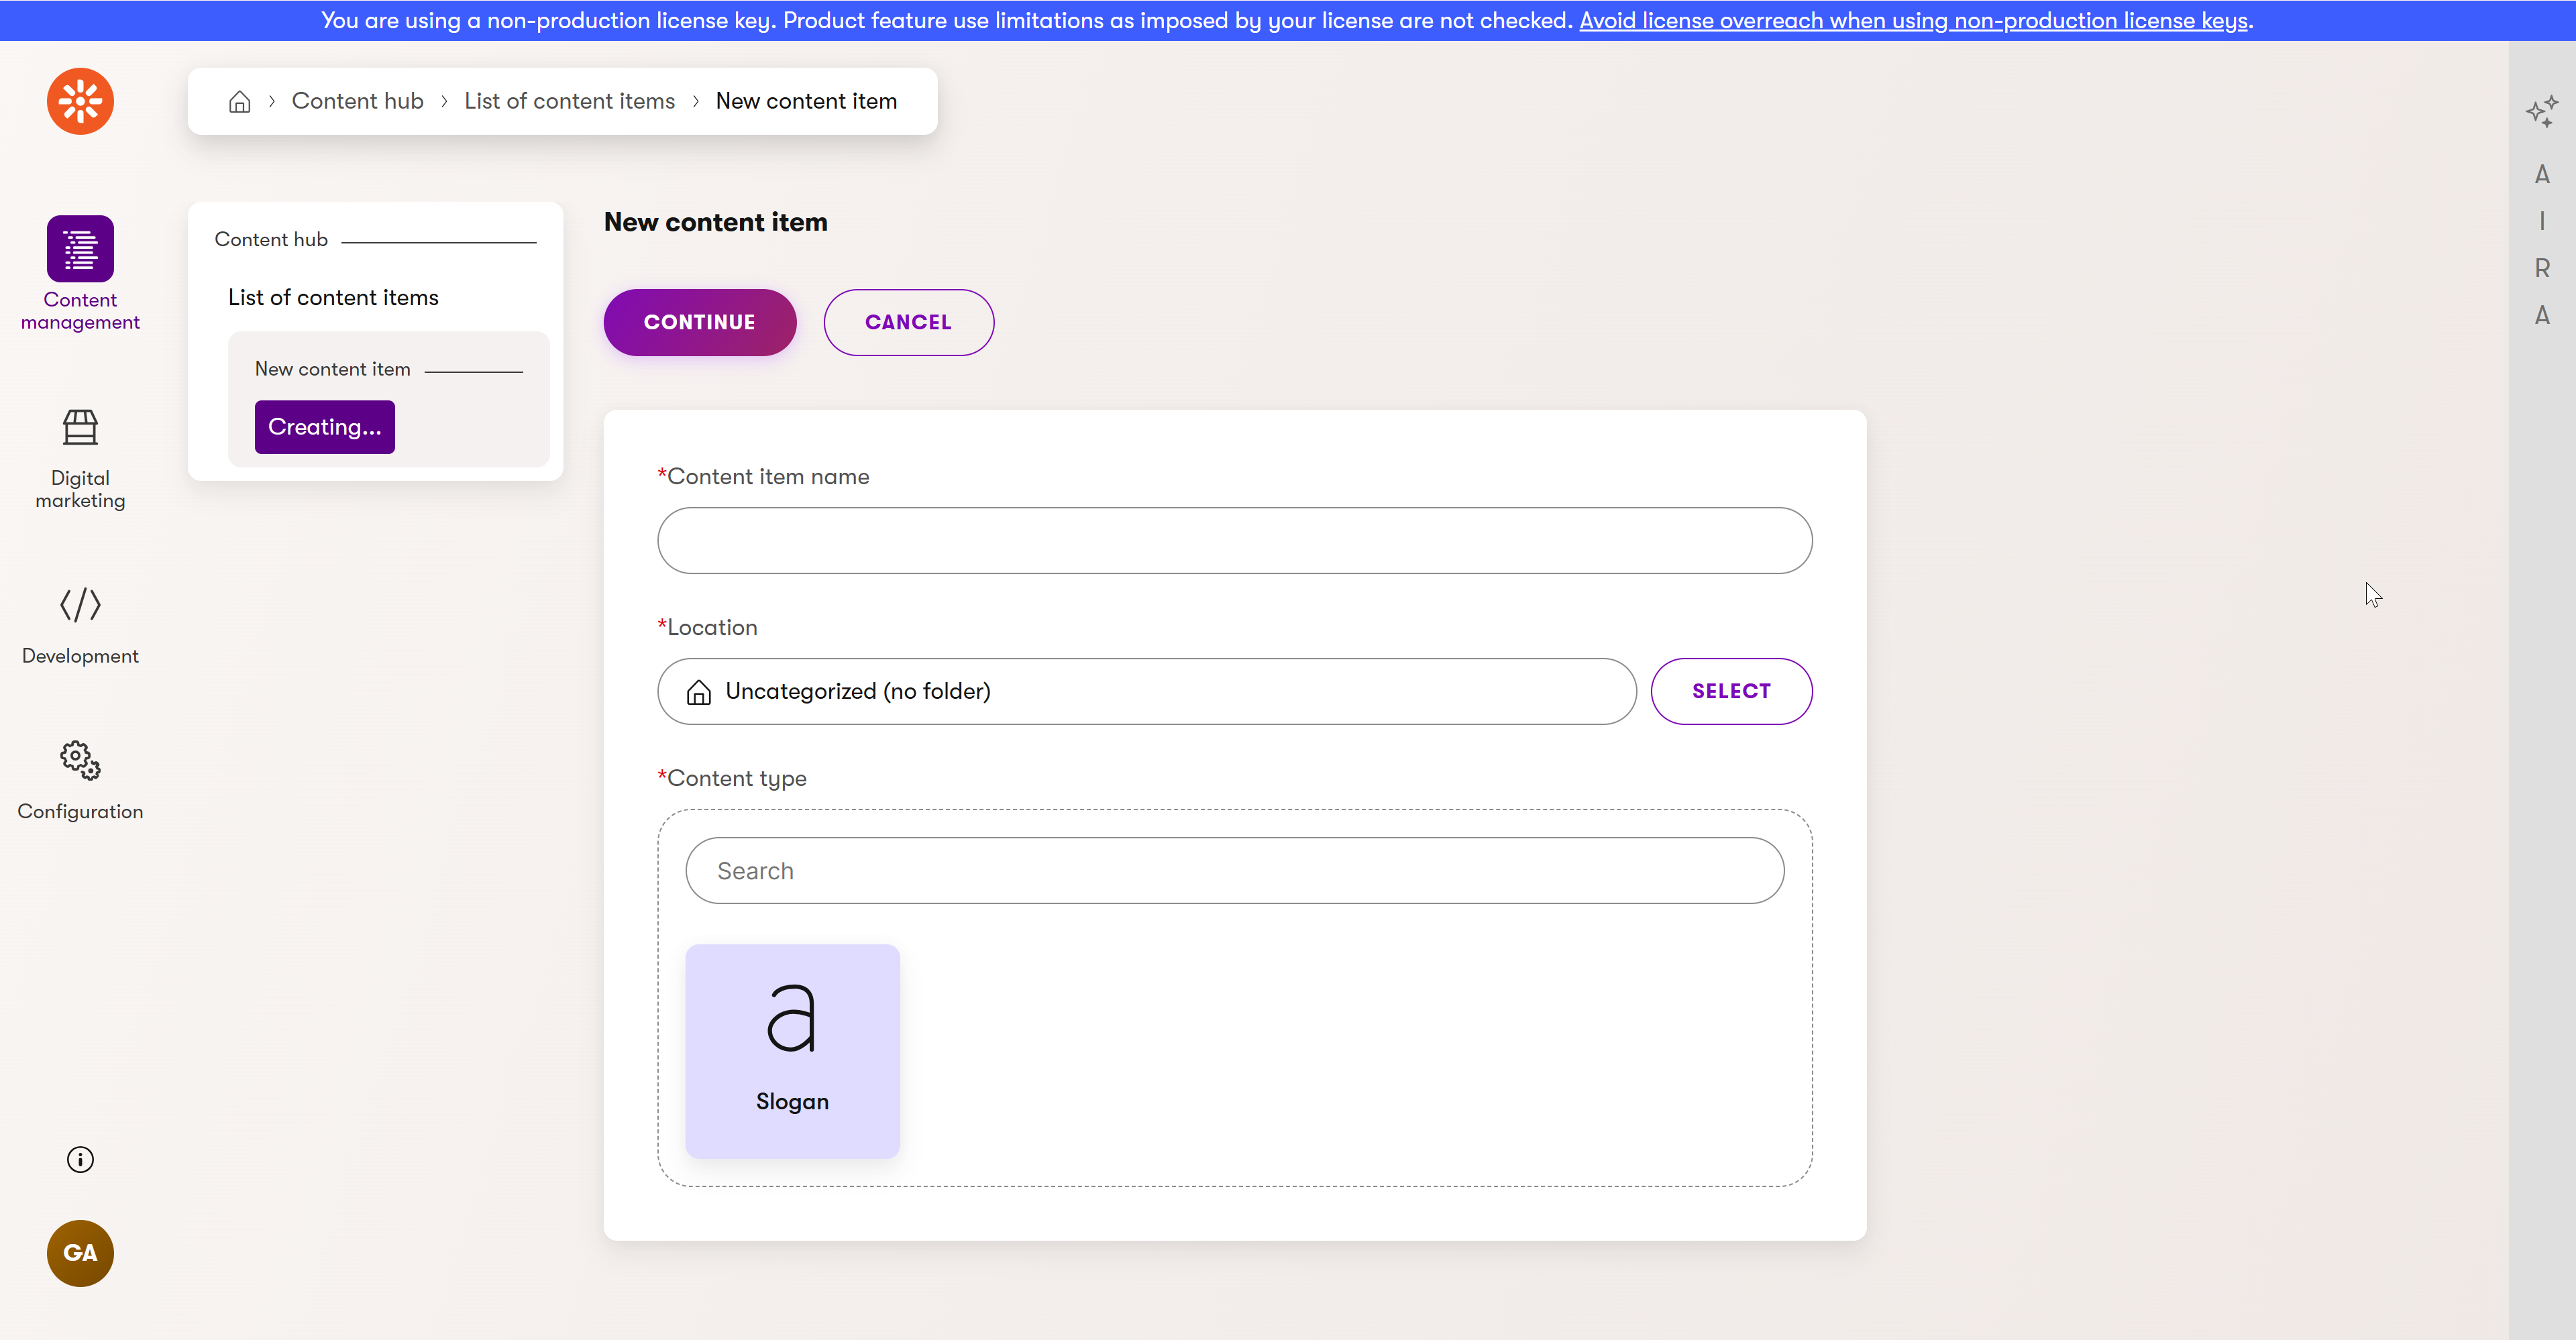
Navigate to the **Content Hub** application (under the **Content management** category) and try to create a new content item. You should see _Slogan_ as one of the available content type options, alongside any additional reusable content types you may have created in your own experimentation:
## Add the content type to your solution
The steps we've covered so far allow your editors to create new content items in the Xperience admin UI. However, to work with these content types as strongly-typed objects in code, we need the [code generator](https://docs.kentico.com/documentation/developers-and-admins/api/generate-code-files-for-system-objects.md).
You can automatically generate classes that correspond to your content types with the `dotnet run --kxp-codegen` [.NET CLI](https://docs.microsoft.com/en-us/dotnet/core/tools/) command.
> **Tip:** We recommend storing these generated classes in a separate project. With large projects, the separation of concerns into multiple layers helps ensure easier code maintenance in the future.
### Create a new project for generated code
#### Create a project
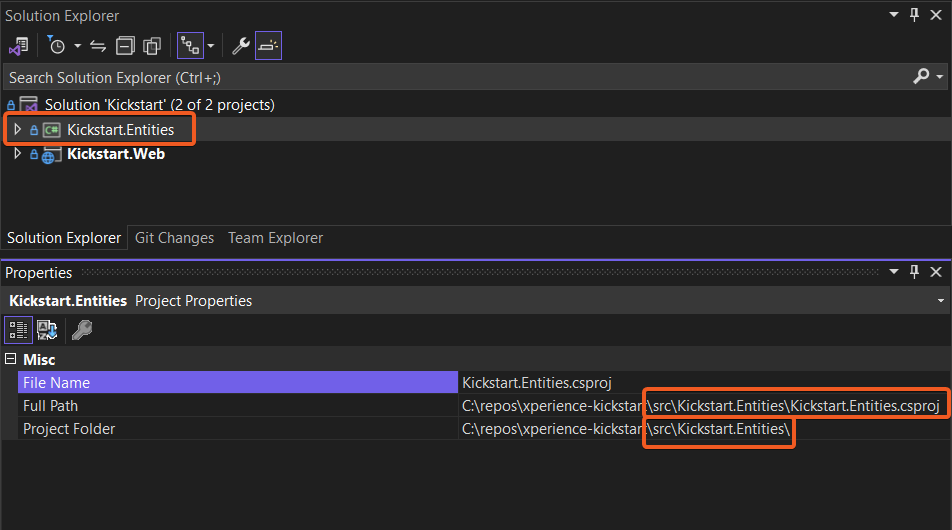
Open your _Kickstart_ solution with your preferred source code editor, and add a new _Class Library_ project running on .NET 10. Name it _Kickstart.Entities_
> **Info:** Depending on your IDE, you may need to manually create a corresponding folder for the project.
#### Reference the project
Reference the _Kickstart.Entities_ project in the _Kickstart.Web_ project.
You can do this by adding a line like `` to the **Kickstart.Web.csproj** file, or through the UI of some editors.
> **Info:** If you are using Visual Studio the steps are:
>
> 1. Right-click on _Kickstart.Web_ in the solution explorer.
> 2. Choose _Add → Project reference_.
> 3. Select the box for _Kickstart.Entities_, then click _OK_.
#### Configure the project
Add the _Kentico.Xperience.Core_ NuGet package to the _Kickstart.Entities_ project. Make sure to match the version of Xperience you installed – **31.8.2** in this case.
Then edit _Kickstart.Entities.csproj_ to add the `CMS.AssemblyDiscoverableAttribute`.
> **Info:** The `CMS.AssemblyDiscoverableAttribute` allows the Xperience API to recognize and register classes and implementations when the application starts.
```xml title="Kickstart.Entities.csproj"
...
...
```
### Generate the class
Now let's dive into generating the code for your new _Slogan_ content type.
Open a command line in the folder containing your .NET project's .csproj file. For this example, that's your _Kickstart.Web_ folder.
Run the following command:
```bash title="Generate code files"
dotnet run --no-build -- --kxp-codegen --type "ReusableContentTypes" --location "../Kickstart.Entities/{type}/{name}" --include "Kickstart.Slogan" --skip-confirmation
```
> **Info:** If you'd like to learn more about how to generate classes for different system objects created through the administration interface, we recommend [this documentation page](https://docs.kentico.com/documentation/developers-and-admins/api/generate-code-files-for-system-objects.md).
>
> [This video](https://docs.kentico.com/guides/development/get-started/generate-code-for-custom-content-and-data-classes.md) is another great resource that will walk you through some concrete examples.
After you successfully run the command above, you will see it created an _Slogan.generated.cs_ file for the _Kickstart.Slogan_ content type, located in the _\~/ReusableContentTypes/Slogan_ folder of the _Kickstart.Entities_ project.
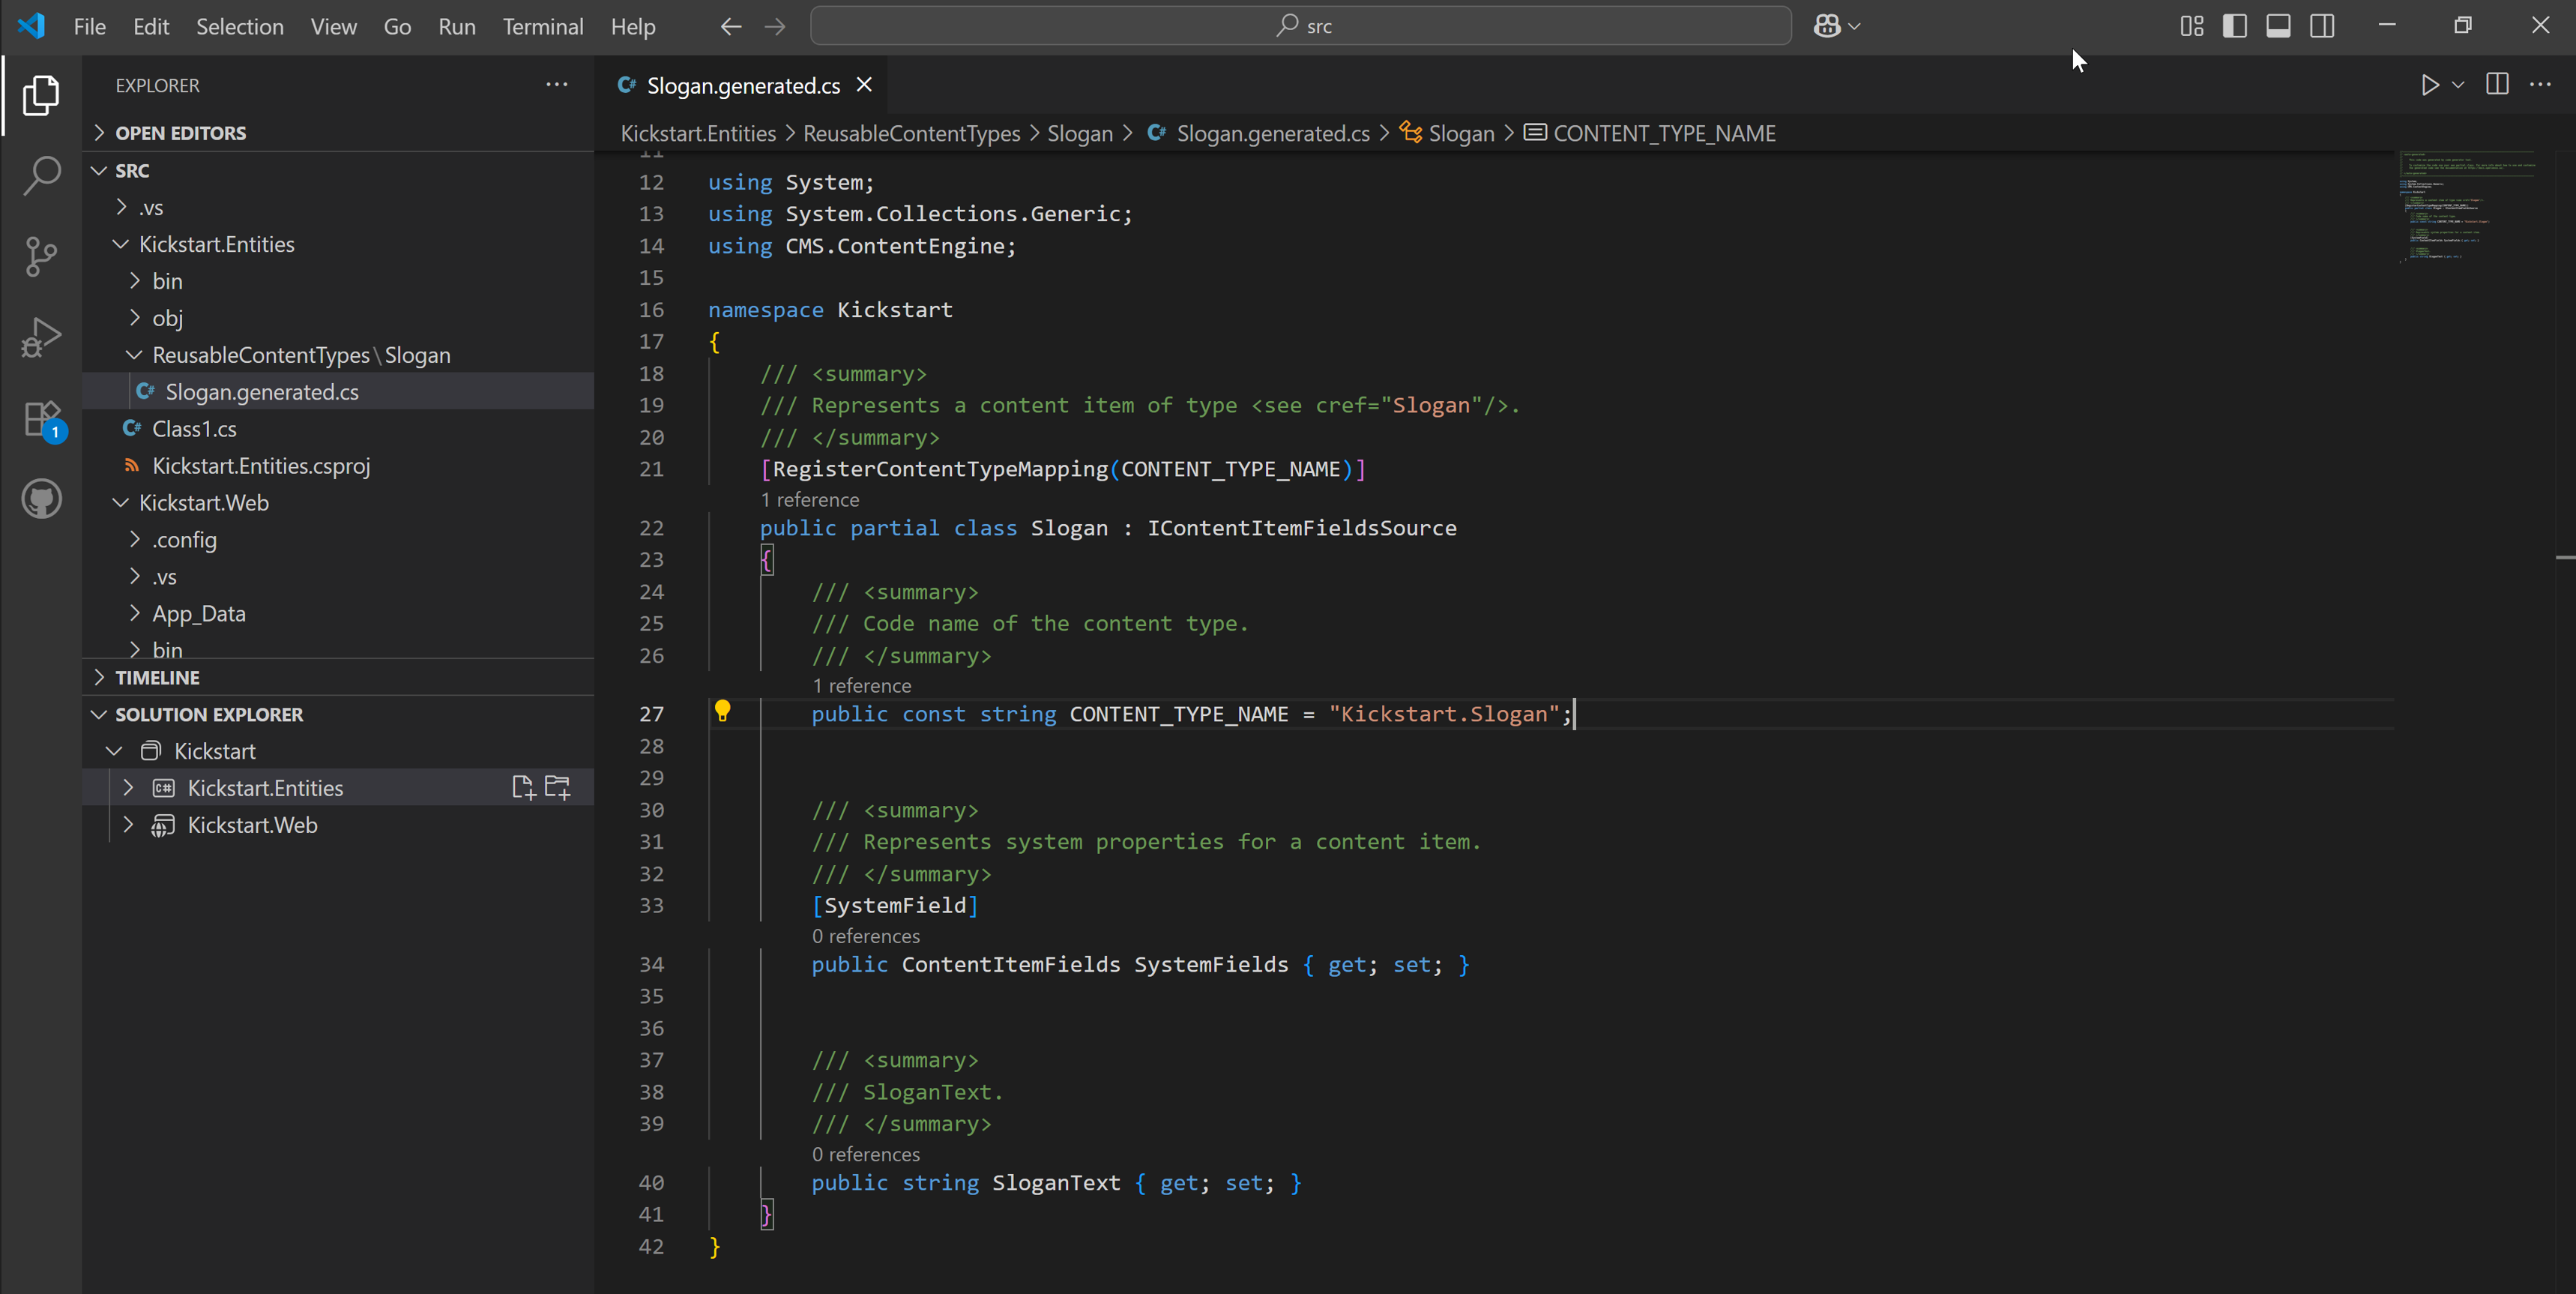
Thanks to the generated class, you can now retrieve and work with any future _Slogan_ content items as described in [the documentation](https://docs.kentico.com/documentation/developers-and-admins/development/content-retrieval/retrieve-content-items.md).
> **Tip:** Code generation is a task that you will likely be performing repeatedly over the course of development.
>
> Check out our [Automate regular tasks with PowerShell scripts](https://docs.kentico.com/guides/development/get-started/automate-regular-tasks-with-powershell-scripts.md) guide to learn how you can automate and optimize this and other similar processes.
In the next step we will cover how to create a web channel, in order to display your content.
## Continue learning
When you're ready, move on to the next page: [Add a website channel](https://docs.kentico.com/guides/development/developer-kickstart/add-a-website-channel.md)