
Deploy to production
You have successfully created, configured, and updated your project in Kentico SaaS. So far, we have only discussed the QA environment. Now let’s deploy your solution into PROD in Xperience portal.
Staging
The QA and UAT deployment environments are intended to ensure all the functionality, features, and key branding assets (e.g., logos) are present in your SaaS application. They do not provide sufficient performance, availability, and backup policies for projects with larger content editing teams.
Kentico provides an option to add a Staging (STG) environment to your service plan for this purpose. If your plan does not include the STG environment, the editors should prepare content in PROD.
See our documentation for information about deployment best practices and staging best practices.
Deploy from QA to PROD
While uploading a deployment package to the PROD environment directly in the Xperience Portal is possible, this feature is reserved for emergency fixes and special cases only.
Typically, we recommend you deploy to PROD from QA or UAT, optionally through STG, depending on your license tier.
When your solution is ready to move into the staging or production environment, the process is very straightforward.
To start, visit your Xperience Portal and ensure you are working under the correct project.
On the Deployments page, under the QA environment, open the Deploy to dropdown and select the environment you want to deploy to.
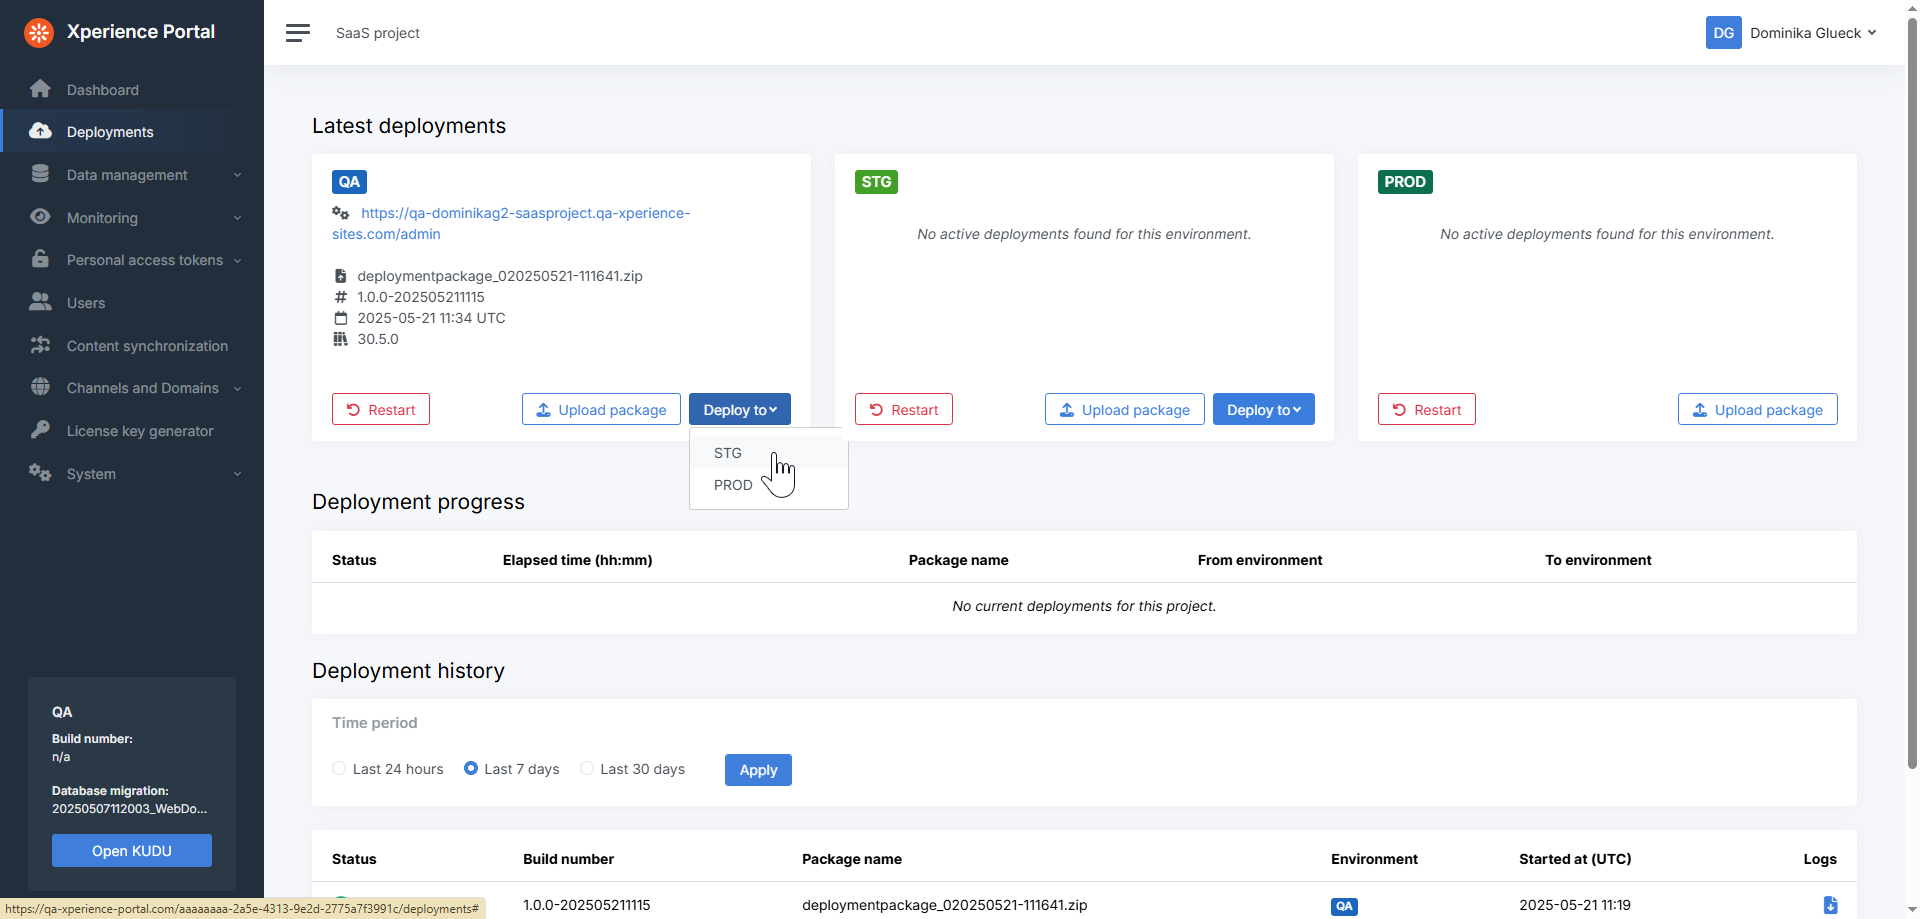
The screenshot above shows the Deployments page for a Level 1 license with staging enabled.
Our example uses a Level 1 license without staging, so we will deploy straight from QA to PROD. If you had an additional STG environment, you would first deploy QA → STG, then STG → PROD. For all of these, the process looks very similar.
After choosing your deployment environment from the dropdown, you’ll see a pop-up warning that the application will be temporarily shut down for the duration of the deployment.
For production scenarios, you can enable zero-downtime deployments by ensuring your code supports read-only mode and using the -ZeroDowntimeSupportEnabled parameter when you initially create the deployment package.
Click Start deployment.
Just like in QA before, the portal queues your deployment before changing its status to In progress.
You may not see your queued deployment immediately. If you clicked Start deployment and the system navigated you back to the Deployments page, but you’re not seeing your deployment queued or in progress, do NOT click Deploy to → PROD again. Instead, try waiting for a minute or refreshing the page.
Otherwise, you may end up with several identical deployments queued, unnecessarily taking up resources.
You can watch the status and time elapsed on the Deployments page.
The above process applies if your deployment package is smaller than 2 GB. If it exceeds 2 GB, you need to use the custom restore feature instead to upload your data into each environment.
Check your progress
Once the PROD deployment finishes, just like before, you can see it in the Deployment history section with status and other information, and the option to download logs.

In the PROD section of the Dashboard, you can also see the new deployment info and a link to the Xperience Administration in PROD (using the system domain). If you click the link, you should be able to sign in to and browse your solution’s administration in the cloud production environment.
During the channels configuration step, we created default channels and domains for all of your environments, so now you should also be able to see your PROD live site through your production website channel default domain:
Set up custom domains - optional
Xperience Portal allows you to set up custom domains for the PROD environment.
System domains
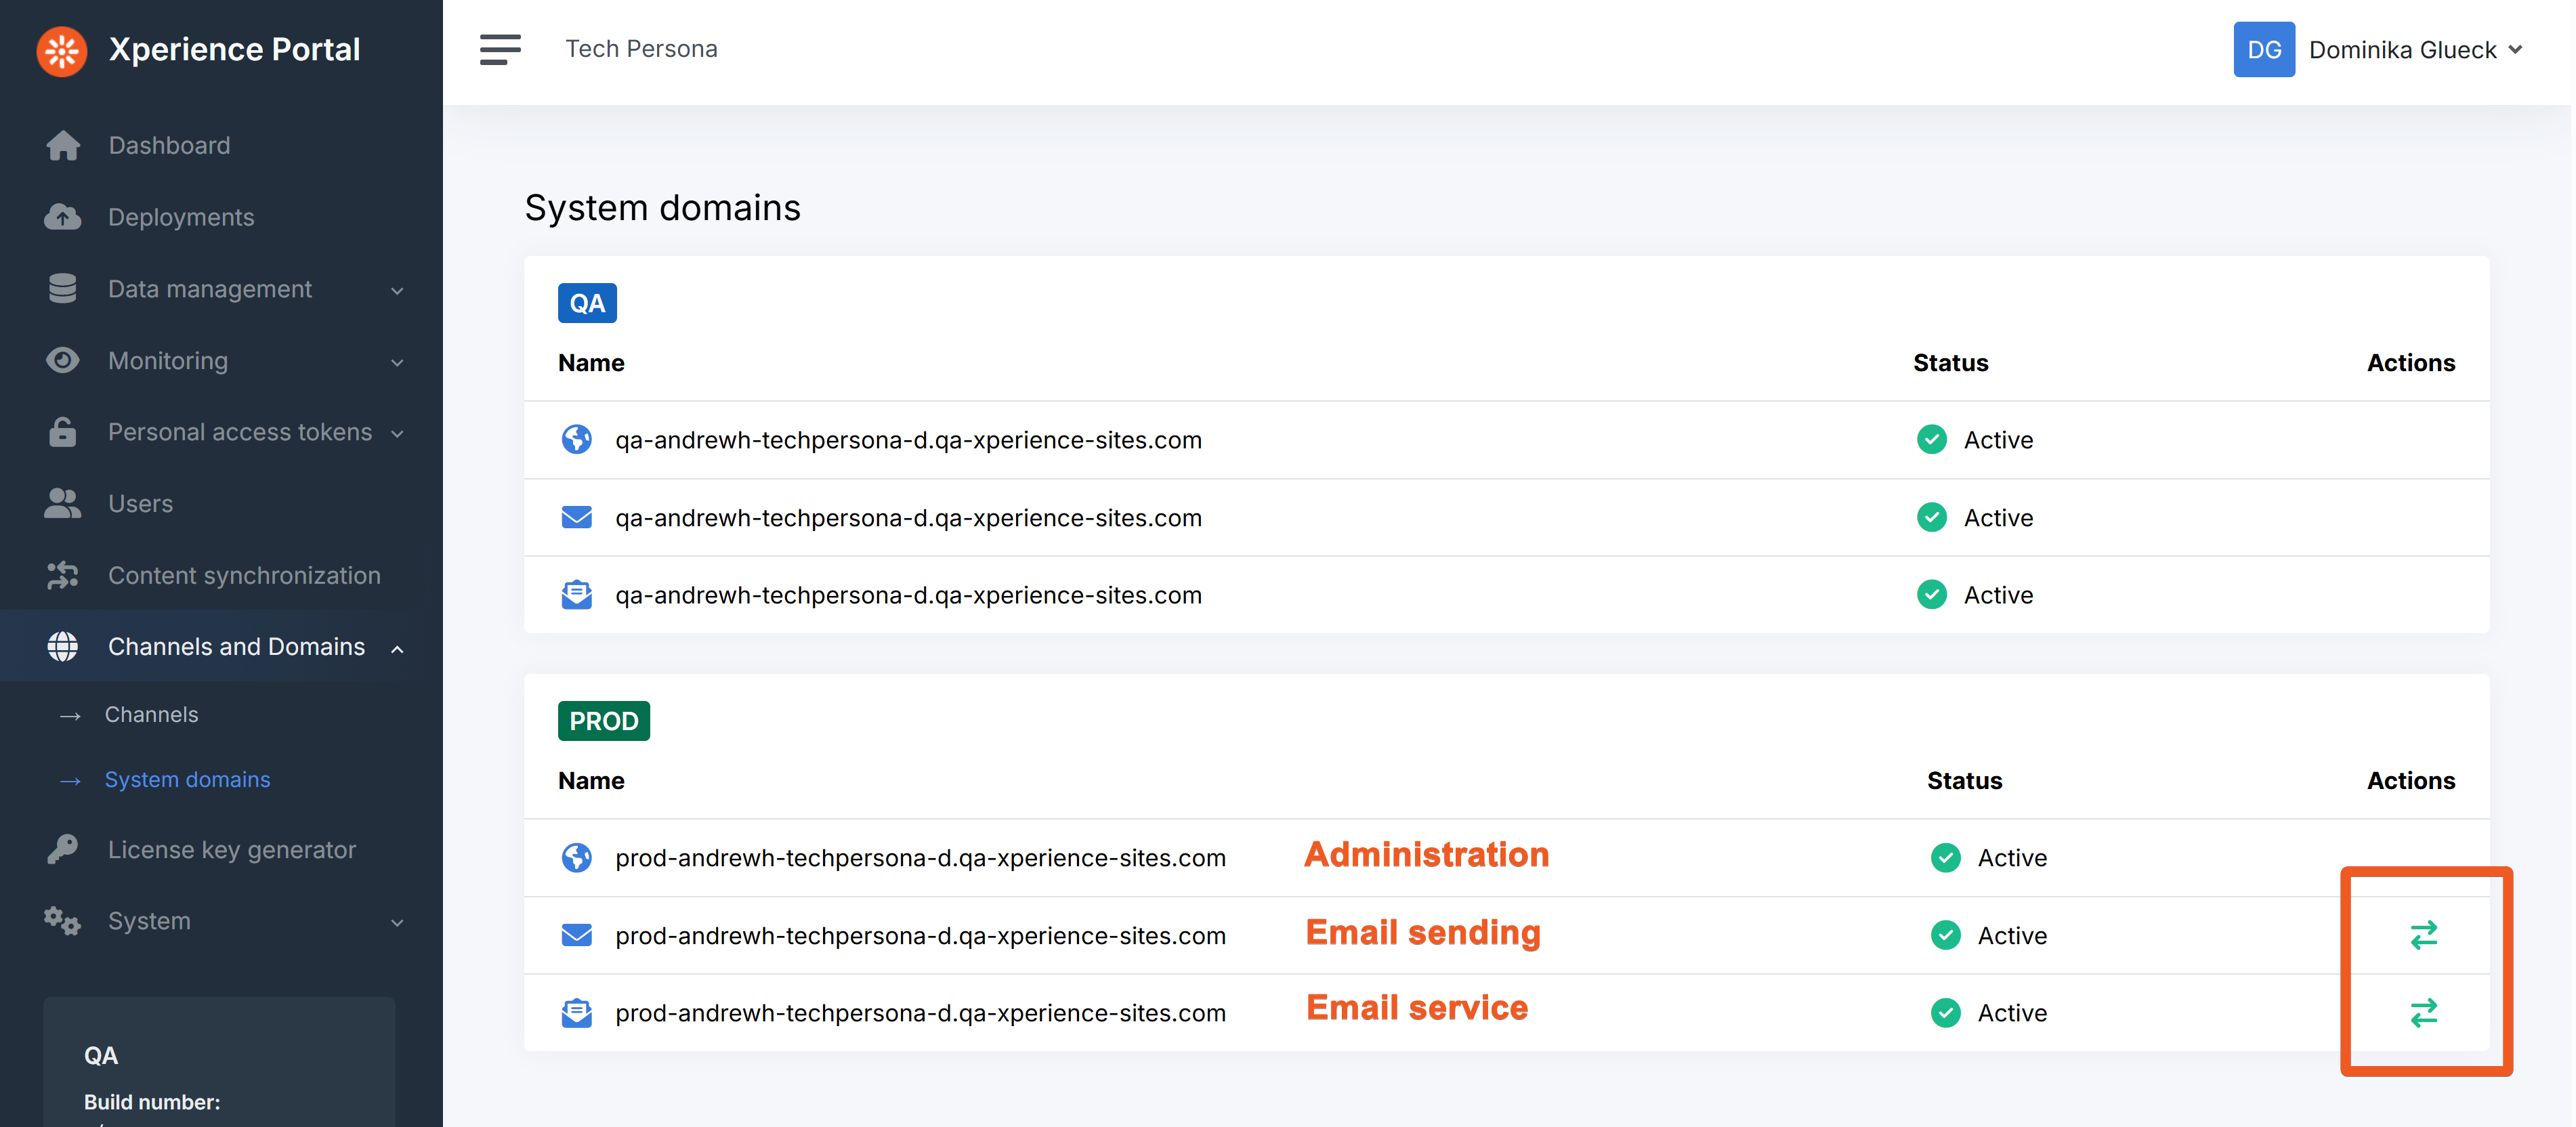
Under Channels and domains → System domains, you can see system domains for all your environments:
- Administration (append /admin to the domain to visit the Xperience administration for the environment)
- Email sending
- Email service
You cannot rename any of these domains, but you can add another domain as an alias for Email sending and Email service in PROD by clicking the green swap icon. If you have an existing valid domain you can use, feel free to give it a shot.
Channel domains
Under Channels and domains → Channels, you can define custom domains for each channel.
For example, click the green globe icon on your Dancing Goat Website channel, click Add domain, and go through the wizard. Notice that the system will only allow you to create a custom domain for PROD.
The dancing-goat.com domain in the video is just imaginary for the sake of a quick demo. It does not have DNS records configured, so its creation will eventually fail.
Similarly, you can set up custom domains for your PROD email channel.
Continue learning
When you’re ready, move on to the next page: Where to go from here