
Email Builder
Email Builder provides a user-friendly interface where non-technical users can create and edit email content using configurable components prepared by developers.
Emails created using the Email Builder consist of components, which are implemented using ASP.NET Blazor as Razor components. The markup of Email Builder components can either be standard HTML or use the MJML markup language – a framework for easily creating responsive emails. For detailed information, see Develop Email Builder components.
To start using Email Builder:
Develop and register Email Builder components:
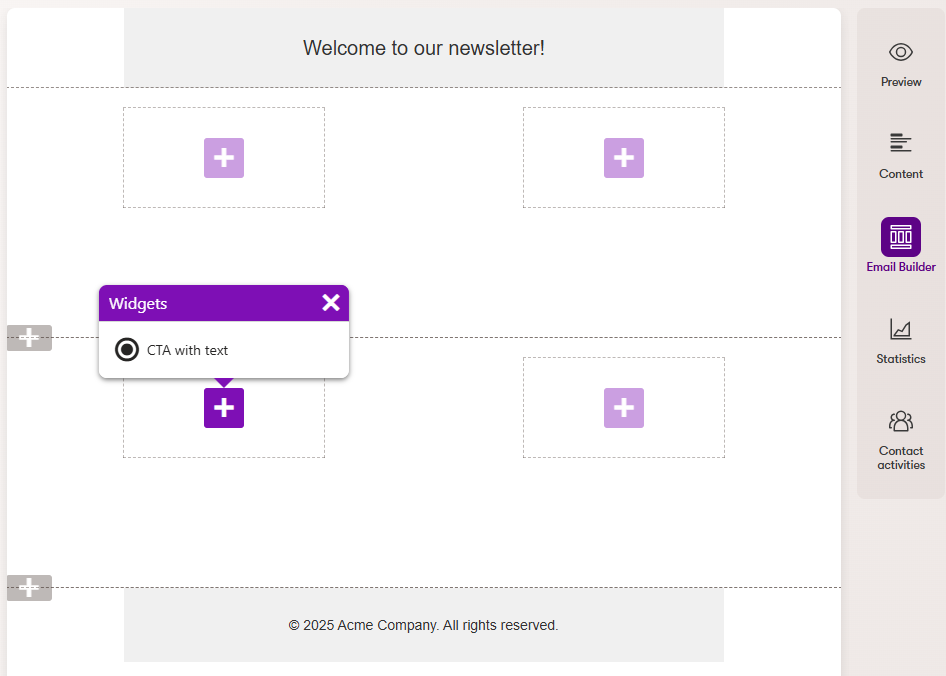
- Templates (the overall email design and fixed content)
- Sections (layouts for placing widgets)
- Widgets (individual pieces of email content, such as text, images, CTA links, etc.)
Create emails using one of the registered Email Builder templates.
Currently, Email Builder is only supported for emails with the Regular, Automation or Order status change purposes.
Email Builder Starter Kit
The Email Builder Starter Kit provides a basic set of components, which greatly reduce the development time required to begin using Email Builder. The Starter Kit components allow users to easily create the most common types of email content. Developers can adjust or extend the components according to specific project requirements, or use them as examples when implementing custom components.
The Starter Kit is available in the Xperience by Kentico Email Builder Starter Kit GitHub repository. See the repository’s README file for detailed information and instructions.
Enable the Email Builder feature
To use Email Builder, you need to enable it as a feature in your Xperience project.
Open your Xperience project in Visual Studio.
Adjust your application’s startup class (Program.cs).
Within
AddKentico, callUseEmailBuilder.Configure
EmailBuilderOptionsand set theAllowedEmailContentTypeNamesproperty.- Specify content type code names for the email content types where you wish to use Email Builder.
Decide whether you wish to use MJML markup for your Email Builder components.
- See our MJML markup documentation for detailed information.
Make sure your application’s service collection and middleware pipeline reflects the sample below.
C#Program.csusing Kentico.Web.Mvc; using Kentico.EmailBuilder.Web.Mvc; using Kentico.Xperience.Mjml; WebApplicationBuilder builder = WebApplication.CreateBuilder(args); // ... builder.Services.AddKentico(features => { // Enables Email Builder features.UseEmailBuilder(); // ... }); builder.Services.Configure<EmailBuilderOptions>(options => { // Allows Email Builder for the 'Acme.Email' content type options.AllowedEmailContentTypeNames = ["Acme.Email"]; // Replaces the default Email Builder section (only required when using MJML markup for components) options.DefaultSectionIdentifier = "Acme.DefaultMjmlSection"; options.RegisterDefaultSection = false; }); // (Optional) Enables MJML markup processing for Email Builder components builder.Services.AddMjmlForEmails(); // ... // Middleware pipeline configuration WebApplication app = builder.Build(); app.InitKentico(); app.UseStaticFiles(); // ... app.UseKentico(); // ... app.Kentico().MapRoutes();
The Email Builder feature is now enabled. You can now develop Email Builder components, assign builder-based email templates to new emails of the allowed content types, and start creating emails in the Email Builder visual interface.