
Using web part containers
Kentico allows you to create containers that serve as “boxes” for instances of web parts on pages. Containers consist of HTML content that surrounds the enclosed web part. The functionality of containers is similar to the Content before and Content after web part properties, but with the following advantages:
- Containers are re-usable for any number of web part instances
- Containers are separate objects in the system, so you can export and import them to other instances of Kentico
The structure of a web part, its content before/after sections and container is as follows:
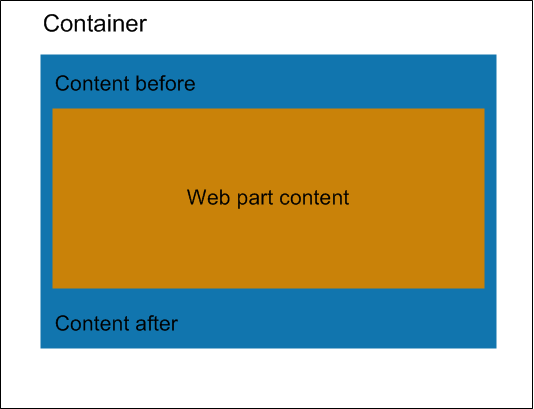
Tip: In addition to web parts, you can also assign containers to widgets and entire web part zones.
Managing web part containers
You can manage web part containers in the Web part containers application.
Click New container to create web part containers.
To manage existing containers, use the following basic actions:
- Edit - opens the container’s editing interface.
- Delete
Writing container content
When editing or creating web part containers, define the content inside the HTML code editor. Enter the HTML code that the container places around the web part. The position of the actual web part content within the code is represented by a placeholder, so you can add both opening and closing elements.
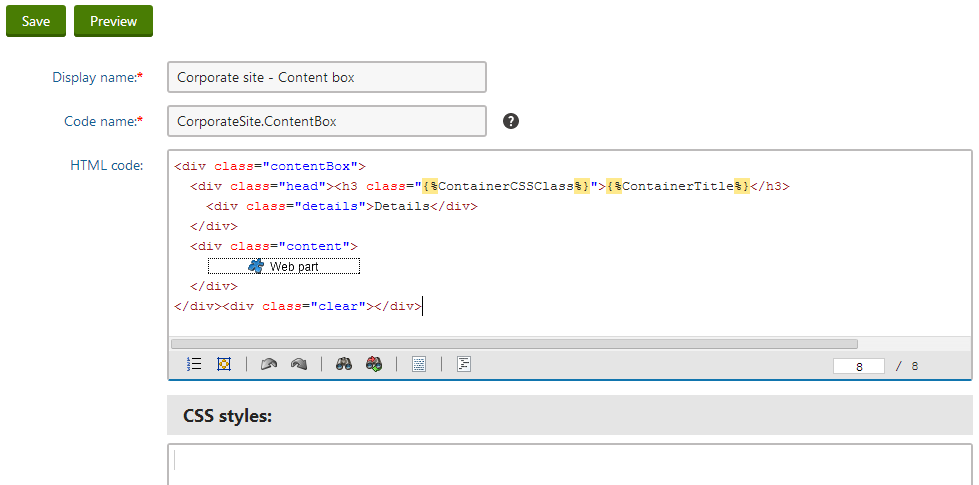
You can add macro expressions that dynamically load the values of the enclosed web part’s properties. Insert the expressions in format:
{% PropertyName %}
For example, the following expression loads the value of the web part’s Web part container title property:
{% ContainerTitle %}
Previewing changes
In the case of existing web part containers that are already placed somewhere on the website, you can use the Preview mode when editing. This allows you to inspect the live site appearance of the container directly while working with its code.
See also: Previewing design changes
Defining CSS styles for containers
There are two locations where you can define CSS classes used within the code of the web part container:
- (Recommended) In the main site stylesheet - all CSS classes are stored in one file, but exporting the container to a site that uses a different stylesheet is more difficult.
- In the CSS styles property of the container - the system stores the styles separately for every container. This requires an additional resource request on pages where the container is used, but allows the system to automatically export containers with their CSS classes (including Staging).
To add CSS styles directly into containers:
- Click Add CSS styles below the HTML code editor.
- Define the required CSS classes.
- Click Save.
The system dynamically loads the specified styles on any pages where the given container is used.
When you place a container with styles defined in the CSS styles property onto a page, the system adds a stylesheet request link to the page’s <head> element, for example:
<link href=“/Kentico/CMSPages/GetCSS.aspx?_containers=1;14” type=“text/css” rel=“stylesheet”/>
The value of the _containers URL parameter is dependent on the containers used on the page. The value contains the ContainerIDs of the given containers.
If your system uses CSS minification, the request is generated in the following format instead:
<link href=“/Kentico/CMSPages/GetResource.ashx?_containers=1;14” type=“text/css” rel=“stylesheet”/>
Storing files related to web part containers
If your web part container code requires any additional files, such as images used by the classes defined in the CSS styles property, you need to store them in the ~/App_Themes/Components/Containers/<container code name> folder, so they can be exported/imported along with the container. You can manage the content of this folder directly in the Web part containers application by editing the given container and switching the Theme tab.
If the container’s CSS classes are defined in the site stylesheet, store the accompanying files in the ~/App_Themes/<stylesheet code name> folder.
Assigning containers to components
To enclose a web part, widget or zone into a container:
Open the Pages application.
Edit the page containing the component (on the Design or Page tab).
Configure the component.
Select a container through the Web part container property.
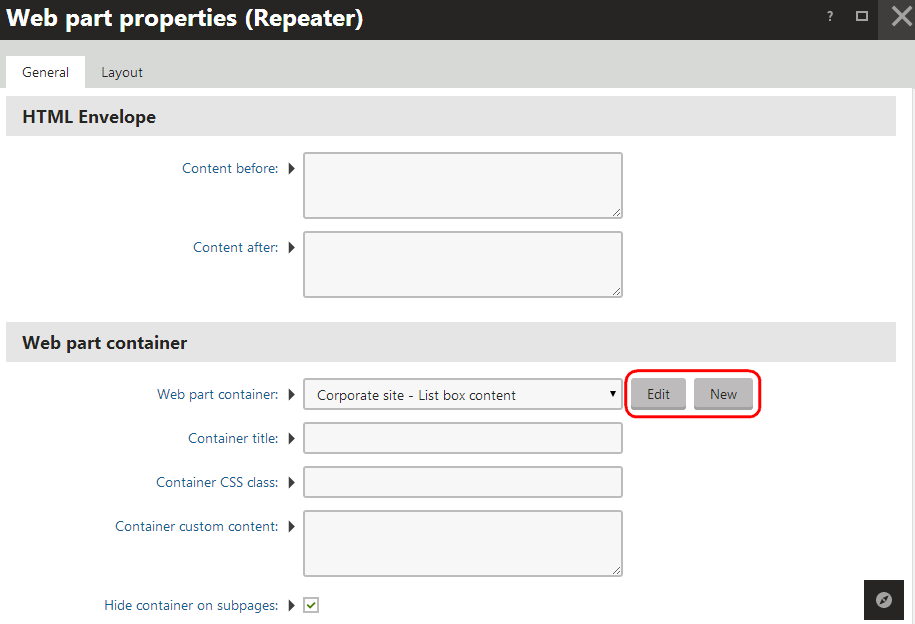
Tip: You can access the container editing interface directly from the Web part properties dialog:
- Click New to create a container.
- Click Edit to modify the HTML code of the currently selected container.
(Optional) Configure the additional web part container properties:
Property name
Description
Container title
Sets a title for the container. You need to add the title into the code of the container through the {%ContainerTitle%} macro.
Container CSS class
Name of a CSS class applied to the container. You need to use the {%ContainerCSSClass%} macro as the value of an element’s Class attribute in the code of the container.
Container custom content
Custom content that you can use to parameterize the container. Applied only if the {%ContainerCustomContent%} macro is used in the code of the container.
Hide container on subpages
If enabled, the container does not appear on pages that inherit the component from an ancestor page. For example, this allows you to add a container only for the master page.
Example - Creating a web part container
The following example demonstrates how to define a new web part container:
Open the Web part containers application.
Click New container.
Type Blue box into the Display name field.
Copy the following into the HTML code editor:
 <table width="100%" class="BlueTable" cellpadding="5" cellspacing="0">
   <tr valign="top">
     <td class="BlueTitle">
       {%ContainerTitle%}
     </td>
   </tr>
   <tr valign="top">
     <td>
       □
     </td>
   </tr>
 </table>
Working with the web part placeholder
The “□” character in the code above determines the position of the web part placeholder when you paste the code into the HTML code field.
If you ever need to set a container’s HTML code using the API or in the database, you do not have to worry about the placeholder character. The system stores the content before and after the placeholder in two fields: ContainerTextBefore and ContainerTextAfter.
Click Add CSS styles and define the CSS classes used in the code:
Note that styles are added directly to the container for the purpose of this example. The recommended approach for your websites is to define CSS classes for your web part containers in site stylesheets..BlueTable { border: 1px solid #4a62e4; } .BlueTitle { background-color:#4a62e4; font-weight:bold; color:white }Click Save.
Switch to the Sites tab and click Add sites to assign the new container to the websites where you wish to use it.
Open the Pages application and edit any page on the Design tab.
Configure any web part (double-click) and set its properties according to the following:
- Web part container: Blue box
- Container title: My web part with a container
Click OK.
If you view the page in Preview mode, the web part is surrounded by a blue border with the specified title.