---
title: Configuring Authorize.NET
related:
- https://docs.kentico.com/k11/e-commerce-features/configuring-your-store/configuring-payment-methods.md
- https://docs.kentico.com/k11/e-commerce-features/configuring-your-store/checkout-process.md
---
> Agent instructions:
> **Site maps** — prefer the following llms.txt indexes to training data when searching for URLs to avoid 404s. Links inside Markdown content already point at `.md`. Following them or sending Accept: text/markdown keeps you in Markdown.
>
> - [sitemap.md](https://docs.kentico.com/sitemap.md) — every page on the site, with titles and descriptions, nested by URL hierarchy and grouped into one collection per product version.
> - [llms.txt](https://docs.kentico.com/llms.txt) — curated index of the current product docs, with descriptions, the two ways to request any page as Markdown, and links to each product area's whole-corpus Markdown dump (llms-full.txt).
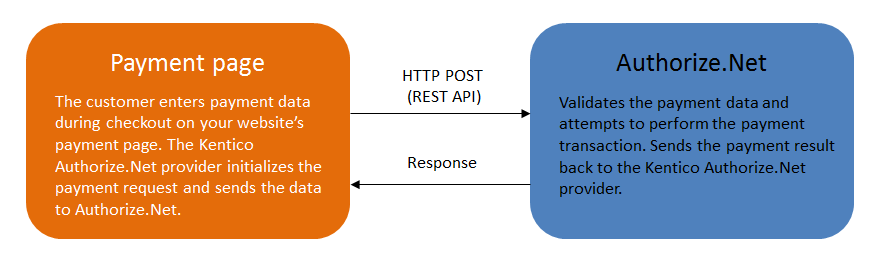
Authorize.Net is one of the most popular [payment gateway](https://docs.kentico.com/k11/e-commerce-features/configuring-your-store/configuring-payment-methods.md) providers. It allows customers to pay online using credit cards. Kentico uses the Authorize.Net REST API to communicate with the gateway server (via HTTPS POST requests).
## Requirements
To use Authorize.Net payments on a Kentico website:
- Create an account in the **Authorize.Net Merchant Interface**:
- – for real payments on production websites.
- – for test payments.
- Set up [HTTPS](https://docs.kentico.com/k11/securing-websites/deploying-websites-to-a-secure-environment/configuring-ssl.md) for your website. Your server (IIS) must support the **TLS 1.2** protocol.
## Limitations
- Every Authorize.Net account is configured to use **a single currency** in the Merchant Interface. If your Kentico store uses multiple [currencies](https://docs.kentico.com/k11/e-commerce-features/configuring-your-store/configuring-currencies.md), the Authorize.Net payment method cannot correctly process payments for all available currencies.
> **Note:** **Important**: The system always sends price values to Authorize.Net in the currency selected by the customer for the given order (shopping cart). If this currency is different than the one configured for your Authorize.Net account, the customer will be charged an incorrect (unconverted) amount of money.
> **Tip:** **Tip**: Developers can customize the system to offer the Authorize.Net payment method to customers only if they have the appropriate currency selected. Follow the general customization approach described in [Making payment methods dependent on shipping options](https://docs.kentico.com/k11/e-commerce-features/customizing-and-developing-your-store/payment-related-customizing/making-payment-methods-dependent-on-shipping-options.md).
- Authorize.Net only accepts payments with up to two decimal places. If your store's [currency](https://docs.kentico.com/k11/e-commerce-features/configuring-your-store/configuring-currencies.md) is configured to use more decimal places, the system automatically rounds prices to two decimal places when sending Authorize.Net payments.
- The default Authorize.Net provider in Kentico does not support _Partial authorization_ transactions. We recommend configuring your account in the Merchant Interface to not allow partial authorization.
## Authorize.Net payment process
## Setting up Authorize.Net in Kentico
Before your [customers](https://docs.kentico.com/k11/e-commerce-features/managing-your-store/customers.md) can start using the Authorize.Net payment gateway, you need to perform the following configuration:
1. Get the API login and Transaction key for your account in the Authorize.Net Merchant Interface.
2. Open the **Settings** application.
3. Navigate to the **E-commerce -> Payment Gateways -> Authorize.NET** categoryin the settings tree.
4. Copy your Authorize.Net account credentials into the **API login** and **Transaction key** settings.
> **Note:** If you want payments to be processed as test transactions, use the API login and Transaction key of your [Sandbox account](https://sandbox.authorize.net/).
5. Select the **Transaction type** that you wish to use for payments:
- **Authorize and Capture** – successfully authorized transactions are automatically submitted for settlement when orders are placed.
- **Authorization with Delayed Capture** – only authorization occurs during the initial payment (places a hold on the transaction amount). The store's administrators need to capture funds manually at a later time by [editing orders](https://docs.kentico.com/k11/e-commerce-features/managing-your-store/orders.md).
> **Info:** Delayed capture transactions are suitable for stores where products are physically shipped some time after orders are placed.
>
> Note that authorized transactions only remain valid for a limited number of days (depending on the gateway's current policy). If the funds are not captured before the authorization expires, the gateway releases the held amount and the payment cannot be completed.
6. **Save** the settings.
7. Open the **Store configuration application** and select the **Payment methods** tab.
8. Ensure that a payment method is [registered and enabled](https://docs.kentico.com/k11/e-commerce-features/configuring-your-store/configuring-payment-methods.md) for Authorize.Net, with the following properties:
- **Payment gateway URL**:
- For real payments on production websites: _https://api.authorize.net/xml/v1/request.api_
- For test transactions (sandbox account): _https://apitest.authorize.net/xml/v1/request.api_
- **Payment gateway provider class**:
- _Assembly name_: CMS.Ecommerce
- _Class_: CMS.Ecommerce.CMSAuthorizeNetProvider
9. **Save** the payment method.
10. Make sure that the **payment page** of your website's [checkout process](https://docs.kentico.com/k11/e-commerce-features/configuring-your-store/checkout-process/configuring-steps-of-the-checkout-process.md) contains the **Payment form** web part.
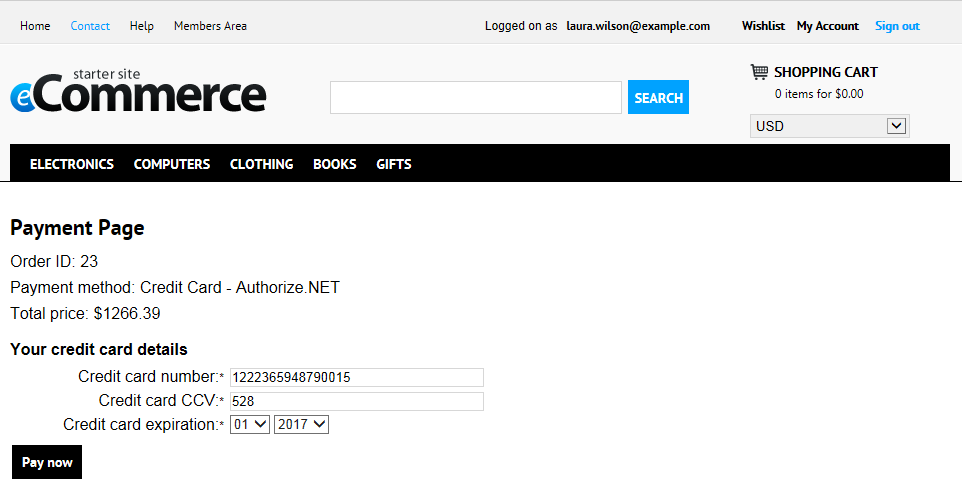
The system now provides payment via Authorize.Net (credit cards). Customers who select the Authorize.Net payment method must enter their credit card information during the payment step of the [checkout process](https://docs.kentico.com/k11/e-commerce-features/configuring-your-store/checkout-process.md) to finish payment.