
Marketing automation walkthrough - Designing the process
Kentico EMS required
Features described on this page require the Kentico EMS license.
Now that you have created the trigger that automatically runs the process for certain contacts, use the process designer to define the flow of the process:
- As Travis, open the Marketing automation application.
- Edit ()the Coffee Merchandise Lead Nurturing process.
- Switch to the Steps tab.
- You can see the two default steps, Start and Finish, connected by a line.
- Click the connection and press the Delete key to remove the connection.
Adding a Condition step
The process starts only for contacts created with UK or USA as their country attribute. Let’s assume you need to distinguish customers from New York City, so you can send them an email inviting them to your local cafes.
Place the Condition step onto the grid.
Edit the step by clicking the pencil icon next to its name.
Modify the values as follows:
Display name: New York customer
Designer label: If contact is from NY
Condition: Add Contact field contains value condition. Specify the field to City and the value to *New York.
 *
*
Connect the Start step to the New York customer step.

Adding a Send transactional email step
You are now able to distinguish users that come from New York, so you can send them an email informing about the cafes you have set up in the area.
Place the Send transactional email step onto the grid.
Edit the step by clicking the pencil icon next to its name.
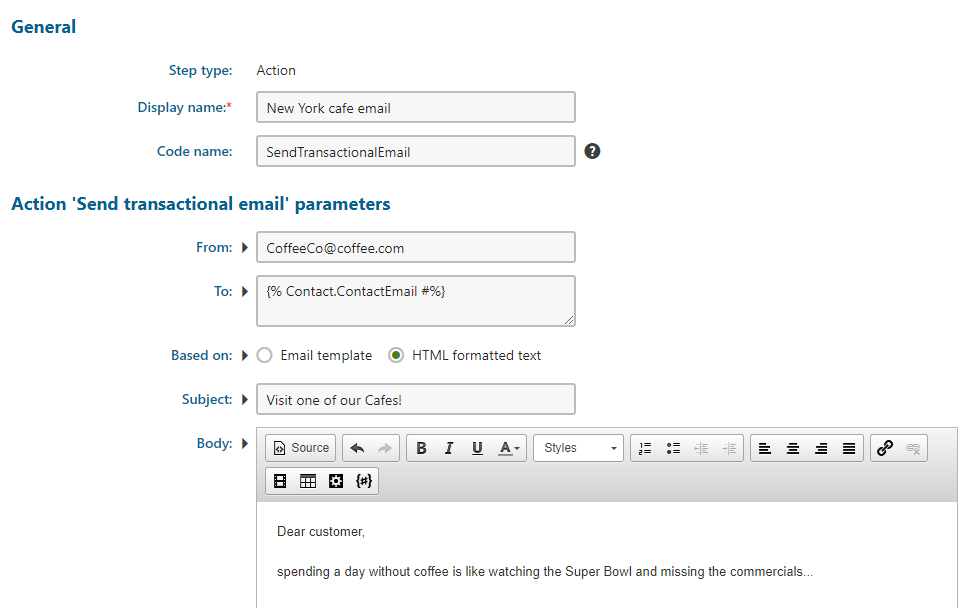
Modify the values as follows:
Display name: New York cafe email
From: CoffeeCo@coffee.com (for example)
To: {% Contact.ContactEmail %}
Based on: HTML formatted text
Subject: Visit one of our Cafes!
Body: any text
The value you entered into the To field is a macro expression that dynamically loads the email address of the contact in the process.
Click Save and Close the dialog.
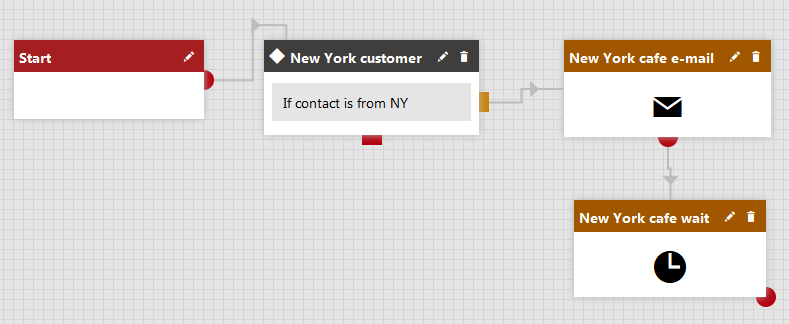
Connect the IF source point of the New York customer step to the New York cafe email step.

Adding Wait step #1
Add a waiting interval to give contacts time to receive and read the email.
Place the Wait step onto the grid.
Edit the step by clicking the pencil icon next to its name.
Modify the values as follows:
- Display name: New York cafe wait
- Timeout settings:Select Specific interval and enter 7 days. You can set a shorter interval such as 3 minutes for testing purposes.
Click Save and Close the dialog.
Connect the New York cafe email step to the New York cafe wait step.
Adding Send marketing email step #1
Now add a step that sends the first marketing email that you created earlier to both the contacts that are and aren’t from New York:
Place the Send marketing email step onto the grid.
Edit the step by clicking the pencil icon next to its name.
Modify the values as follows:
- Display name: Merchandise issue #1
- Site: choose the correct site, Coffee and Co Merchandise Newsletter
- Email: choose the correct email, Coffee Co Merchandise #1
Click Save and Close the dialog.
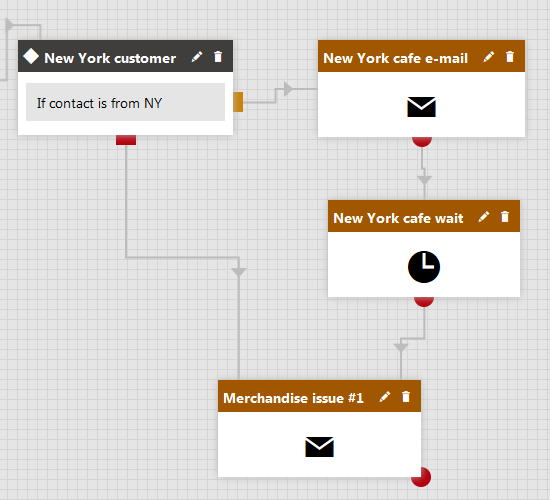
Connect the ELSE source point (red) of the New York customer step to the Merchandise issue #1 step.
Connect the New York cafe wait step to the Merchandise issue #1 step.
Adding Wait step #2
Add another Wait step into the process to give contacts time to receive the issue:
Place the Wait step onto the grid.
Edit the step by clicking the pencil icon next to its name.
Modify the values as follows:
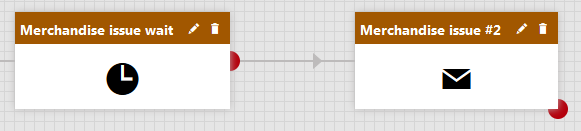
- Display name: Merchandise issue wait
- Timeout settings:Select Specific interval and enter 3 days. You can set a shorter interval for testing purposes (e.g. 3 minutes).
Click Save and Closethe dialog.
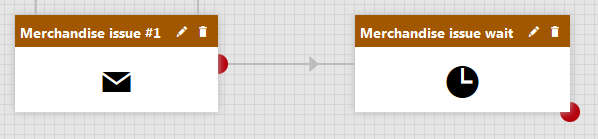
Connect the Merchandise issue #1 step to the Merchandise issue wait step.
Adding Send marketing email step #2
Add a step that sends the second marketing email from the newsletter that you created earlier:
- Place the Send marketing email step onto the grid.
- Edit the step by clicking the pencil icon next to its name.
- Modify the values as follows:
- Display name: Merchandise issue #2
- Site: choose the correct site, Coffee and Co Merchandise Newsletter
- Email: choose the correct email, Coffee Co Merchandise #2
- Click Save and Close the dialog.
- Connect the Merchandise issue wait step to the Merchandise issue #2 step.
Adding Wait step #3
Add another Wait step into the process to give contacts time to receive the second email:
Place the Wait step onto the grid.
Edit the step by clicking the pencil icon next to its name.
Modify the values as follows:
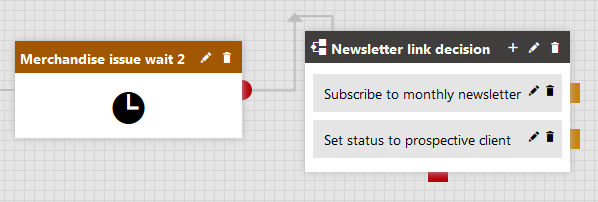
- Display name: Merchandise issue wait 2
- Timeout settings:Select Specific interval and enter 3 days.You can set a shorter interval for testing purposes (e.g. 3 minutes).
Click Save and Closethe dialog.
Connect the Merchandise issue #2 step to the Merchandise issue wait 2 step.
Adding a Multi-choice step
Add a Multi-choice step to decide where the process moves next based on whether the contact clicked on the links in the previous email:
Place the Multi-choice step onto the grid.
Edit the step by clicking the pencil icon next to its name.
Modify the values as follows:
- Display name: Newsletter link decision
- User action text: Choose the next step
- User action tooltip: Choose whether you want to subscribe the contact to the Coffee Co monthly newsletter or set the contact’s status to Prospective client.
Click Save.
Modifying the first case
Switch to the Cases tab.
Edit () Case 1 and modify the values as follows:
- Designer label: Subscribe to monthly newsletter
- User action tooltip: Subscribe the contact to the Coffee Co monthly newsletter
Click Edit next to the Condition field.
Add the Contact has clicked a link in marketing emailrule. Specify the Coffee Co Merchandise #1 issue under the Coffee Co Merchandise Newsletter.
Confirm by clicking Save & Close andclose the dialog.
Save the changes for the case.
Modifying the second case
Edit () Case 2 and modify the values as follows:
- Designer label: Set status to prospective client
- User action tooltip: Set the contact’s status to Prospective client
Click Edit next to the Condition field.
Add the Contact has clicked a link in marketing email rule. Specify the Coffee Co Merchandise #2 issue under Coffee Co Merchandise Newsletter.
Confirm by clicking Save & Close and OK.
Save the changes for the case.
Configuring security for the Multi-choice step
- Switch to the Security tab.
- Under Roles which can move object to different step, select Only listed and your website in the Select site drop-down list.
- Click on Add roles and select the Process administrator role.
- Click Save and Close.
- Connect the Merchandise issue wait 2 step to the Newsletter link decision step.
The multi-choice step automatically decides how the process continues. Users in the Process administrator role can decide how the process continues for contacts that satisfy both conditions (by clicking on both newsletter links). You can modify security for each case separately, but by default both cases inherit the settings of the main step.
Adding an alternative Finished step
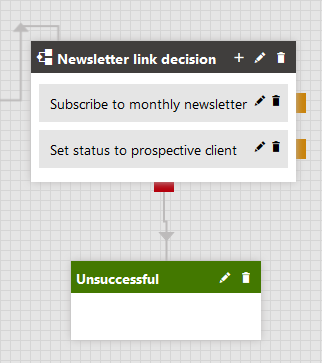
Add a Finished step that concludes the marketing process for contacts who don’t click any of the newsletter links:
- Place the Finished step onto the grid.
- Double-click the step’s name in the header.
- Rename the step to Unsuccessful and press Enter.
- Connect the ELSE source point (red) of the Newsletter link decision step to the Unsuccessful step.
Adding a Newsletter subscription step
Add a step that subscribes the contact to the Coffee Co monthly newsletter email feed:
Place the Newsletter subscription step onto the grid.
Edit the step by clicking the pencil icon next to its name.
Modify the values as follows:
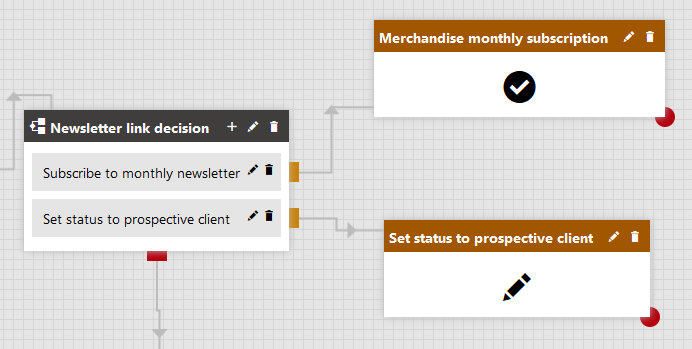
- Display name: Merchandise monthly subscription
- Newsletter: Select the Coffee Co monthly newsletter
- Action: Subscribe to newsletter
Click Save and Closethe dialog.
Connect the first source point of the Newsletter link decision step to the Merchandise monthly subscription step.
Adding a Set contact status step
Add a step that sets the contact’s status to Prospective client:
Place the Set contact status step onto the grid.
Edit the step by clicking the pencil icon next to its name.
Modify the values as follows:
- Display name: Set status to prospective client
- Contact status: Select Prospective client status
Click Save and Close.
Connect the second source point of the Newsletter link decision step to the Set status to prospective client step.
Finishing the process design
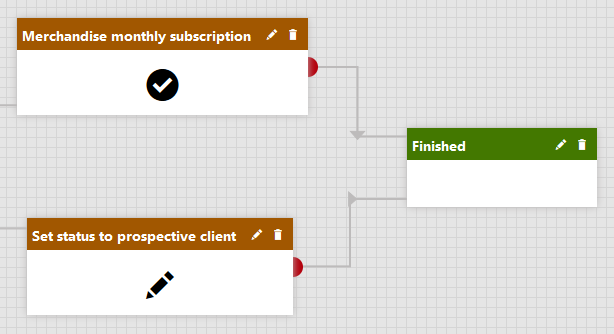
You have now finished creating all the necessary steps. You only need to connect the last two steps to the original Finished step.
- Connect the first source point of the Merchandise monthly subscription step to the Finished step.
- Connect the first source point of the Set status to prospective client step to the Finished step.
The design of the process is now complete.
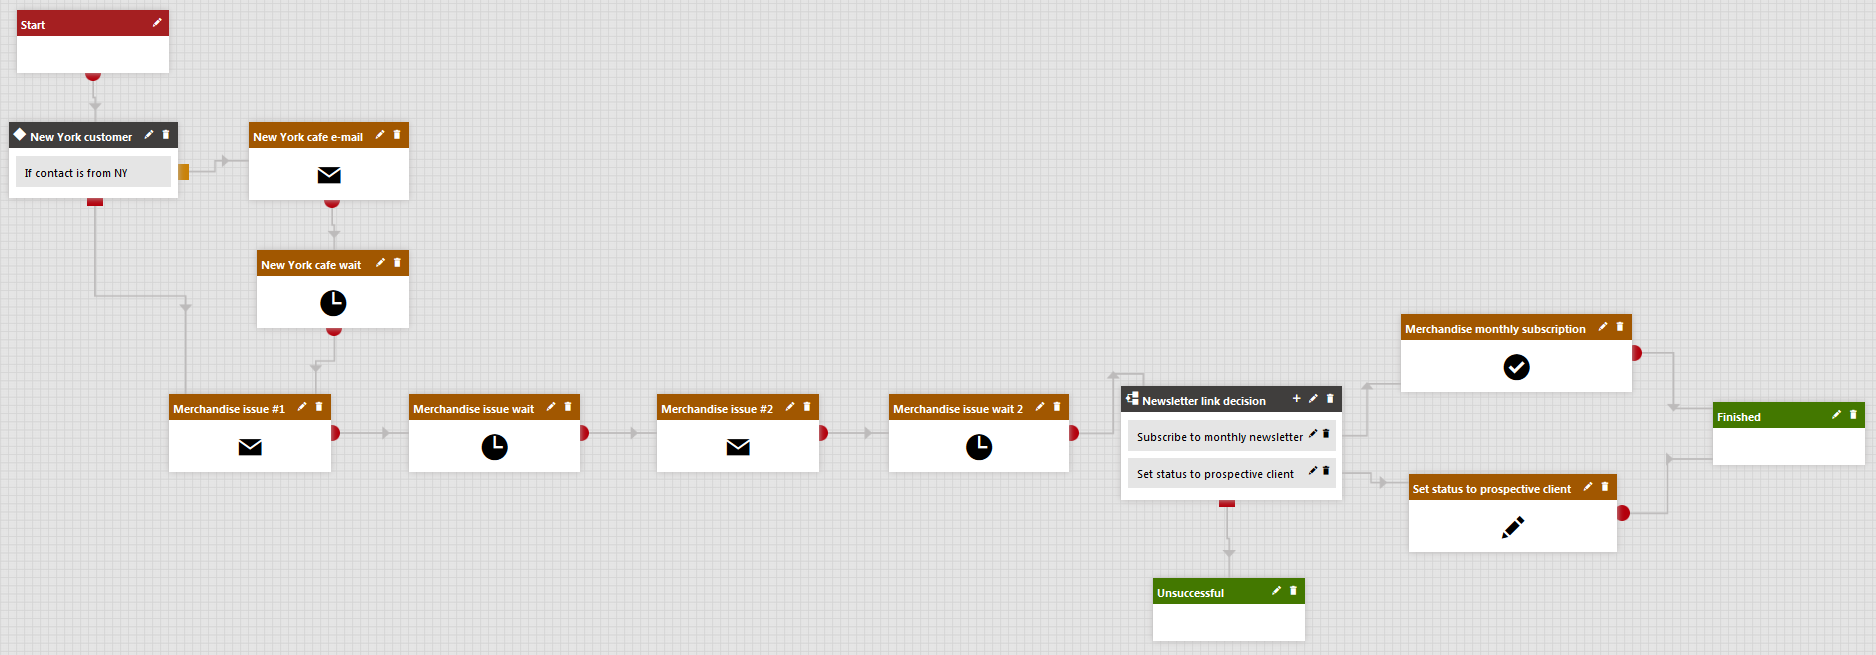
Now that you have finished this part of the walkthrough and created a whole marketing automation process, you can see the process in action.
Next page: Managing the process