
Creating banners
You can manage banners and their categories in the following ways:
- Creating a new banner category
- Editing an existing banner category
- Creating a new banner
- Editing an existing banner
Creating a new banner category
To create a new banner category:
- Open the Banners application.
- In the Site selector, select whether the new category will be site-specific or global.
- Click New banner category and fill in the following properties:
- Display name – the name of the banner category displayed in the user interface.
- Enabled – select the checkbox to allow the banners from this category to be displayed on the live site.
- Click Save.
Editing an existing banner category
To edit an existing banner category:
- Open the Banners application.
- In the Site selector, select whether you want to modify a global or a site-specific banner category.
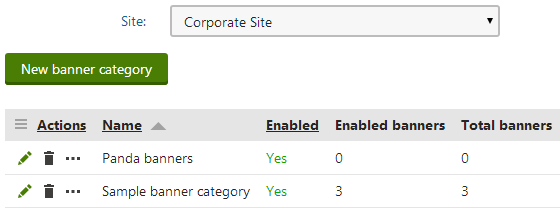
- Edit() the banner category you want to modify.
- Switch to the General tab, where you can edit the properties.
Creating a new banner
To create a new banner:
Open the Banners application.
Edit() the banner category in which you want to create a new banner.
On the Banners tab, click New banner.
In the General and Visibility categories, fill in the following properties:
- Display name – the name of the banner displayed in the user interface.
- URL – URL of the resource you want the banner to link to.
- Weight – decimal number that represents the probability of the banner being displayed relative to other banners in the same category. For example, if a category contains 3 banners with weights of 2, 4 and 4, the first banner will be displayed approximately 2 times out of 10 views.
- Open in new window – when selected, the banner link opens in a new browser window.
- Enabled – when selected, the banner is displayed on the live site.
- Valid from – date and time from which the banner is displayed on the live site.
- Valid to – date and time after which the banner is no longer displayed on the live site.
- Impressions left – specifies how many times the banner will be displayed on the live site:
- Number of impressions is not limited – when selected, the number of times the banner can be displayed is not limited.
- Allow only specific number of impressions – when selected, specifies how many times the banner can be displayed before the system stops displaying it.
- Clicks left – specifies how many times the banner will be clicked on the live site:
- Number of clicks is not limited – when selected, the number of times the banner can be clicked is not limited.
- Allow only specific number of clicks – when selected, specifies the number of times the banner can be clicked before the system stops displaying it.
In the Content category, select one the of following options in the Banner type drop-down list:
- Plain text – the banner content consist of plain text only.
- HTML – the banner content can be edited using the built-in text editor.
- Image – the banner consist of a selected image.
Fill in the additional configuration options depending on the selected type of banner:
Banner type
Configuration options
Plain text
- Banner content – plain text, which will represent the banner. You can also enter HTML tags.
HTML
- Banner content – any HTML content, which can be edited using the text editor.
Image
- Banner image – allows you to select an image from the content tree, a media library, or enter a URL of any image on the web.
- Image title – text which will be rendered into the title attribute of the image tag.
- Alternative text – text which will be rendered into the alt attribute of the image tag.
- Image CSS class – CSS class of the image tag.
- Image CSS style – in-line CSS style that will be rendered for the image tag.
Click Save.
Editing an existing banner
To edit an existing banner:
- Open the Banners application.
- In the Site selector, select the site under which you want to edit a banner.
- Edit () the banner category in which you want to edit a banner.
- On the Banners tab, edit () the banner.

Now that you have created and modified your banners, you can add banners to pages as widgets or web parts.