Configuring customer credit
Your customers can purchase products and services that you offer in your on-line store using credit. If you decide to grant your customers credit, they receive the credit amount on their store account.
Typically, customers’ credit finds its application in various customer loyalty competitions. For example, the customers can receive bonus points/credit for their previous purchases, and can order some products once they achieve appropriate credit amount.
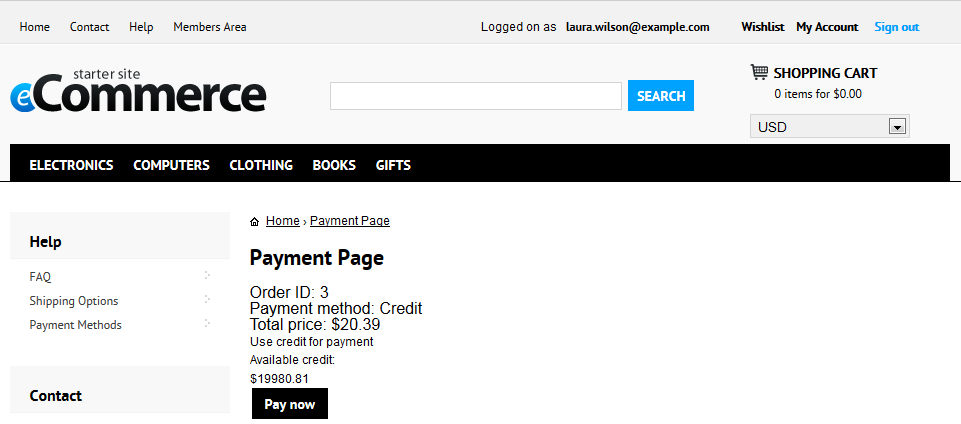
Your customers can pay for the purchased products using one payment method only, i.e. they cannot combine credit payment with some other form of payment.
This means that if the customers choose credit payment as the payment method, they must pay the whole order with their customer credit.
Using global or site credit
Kentico allows you to create a credit system that keeps the amount of credit globally or for every site separately.
Open the Store configuration application (if you want to set the setting for the current site) or the Multistore configuration application (if you want to set the setting globally).
Navigate to the Store settings -> Global objects tab.
In the Use global settings forcategory, configure the Customers credit field:
- Clear the Inherit from global settings option (only if you work in the Store configuration application).
- Select the field below if you want to use global credit (one credit for all sites). Clear the field below if you want to use site credit (separate credit for every site).
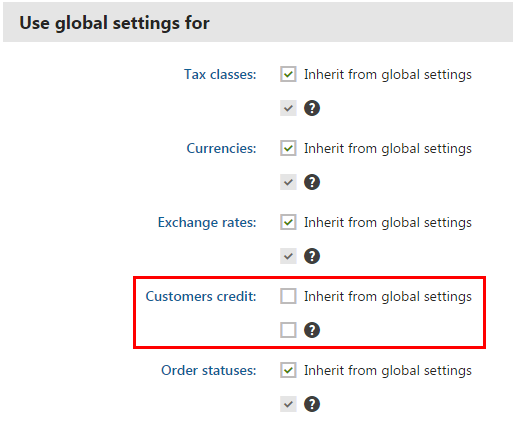
Click Save.
The system now uses the credit that you chose.
Enabling payment with credit
Before your registered customers can pay with their credit, you need to create a new payment method.
Open the Store configuration application (if you want to specify the payment method for the current site) or the Multistore configuration application (if you want to specify the method globally for all your sites).
Switch to the Payment methods tab.
Click New payment method.
Specify the following properties:
Display name: type a name of the payment method
Enabled: Yes (selected)
Payment gateway URL: leave blank
Payment gateway provider class:
- Assembly name: CMS.Ecommerce
- Class: CMS.Ecommerce.CMSCreditPaymentProvider
You can enter values to the other fields according to Reference - Payment methods.
Click Save.
The system now offers the payment method according to the properties you set.
You need to place the Payment form web part on the payment page when configuring the checkout process to be able to automatically subtract the credit after making an order.