
Configure the Management MCP
Preview feature
The Xperience by Kentico management API and Management MCP server are currently in preview mode. Expect changes in the functionality, potentially including breaking changes.
Feel free to try out the features, for example using the sample Dancing Goat project template. You can share your feedback directly with the Kentico Product team.
Enable the management API
Only for local development purposes
The management API is only intended for use on local development instances. It currently only provides basic authentication and no authorization options for various types of operations.
Do not enable the management API for production deployments or other publicly available instances.
To enable the content management API for a development project:
- Install the Kentico.Xperience.ManagementApi NuGet package into your Xperience project.
- Kentico.Xperience.ManagementApi is currently a prerelease package.
- The version names of this package contain the -preview suffix after the corresponding Xperience by Kentico version number, for example:
CMDInstall a specific version of the package
dotnet add package Kentico.Xperience.ManagementApi --version 31.4.3-preview
- Adjust your application’s startup code in Program.cs:
- Call the
AddKenticoManagementApi()extension method on your application’s service collection.- Adds controllers used by the management API. Also registers and configures services for authentication, authorization, Swagger generation, and API versioning. If you already configure such services, place the AddKenticoManagementApi() call after your configuration. Most of the configuration is scoped only to the management API endpoints, but there are exceptions (see the method’s remarks in your IDE for details).
- In the method’s
ManagementApiOptionsparameter, set theSecretproperty to a string with at least 32 characters.- The secret is required to authenticate all requests to the management API endpoints, and will be used in the configuration of your management API MCP server.
- Add the following to the application’s middleware pipeline:
UseAuthentication()– adds authentication middleware. Must be called before UseKentico().UseKenticoManagementApi()– adds middleware required for the management API.UseAuthorization()– adds authorization middleware. Must be called after UseKentico().
- Call the
using Microsoft.AspNetCore.Builder;

using Kentico.Xperience.ManagementApi;
using Kentico.Web.Mvc;

// ...

var builder = WebApplication.CreateBuilder(args);

// ...

// Only enables the management API in the local development environment
if (builder.Environment.IsDevelopment())
{
    builder.Services.AddKenticoManagementApi(options =>
    {
       // Sets the secret required to authenticate all requests to the management API endpoints
       // Must be at least 32 characters
       options.Secret = "<YourSecretValue>";

       // Optionally set the directory from which asset upload files are read
       // Default: ~/assets/managementapiuploads (resolved relative to the application root)
       // An absolute path (e.g., "C:\\temp") is used as-is
       // options.AssetUploadDirectoryPath = "~/my/custom/upload-path";
    });
}

// ...

var app = builder.Build();

app.InitKentico();

// ...

// Adds authentication middleware
app.UseAuthentication();

if (builder.Environment.IsDevelopment())
{
    // Adds middleware required for the management API
    app.UseKenticoManagementApi();
}

app.UseKentico();

// Adds authorization middleware
app.UseAuthorization();

// Maps routes used by Xperience by Kentico feature
app.Kentico().MapRoutes();
Add the MCP server
- Use the @kentico/management-api-mcp npm package.
- We recommend using the latest version of the npm package. You do not need to match the version to your project’s Xperience by Kentico NuGet packages – the MCP server dynamically reads the management API schema from your local project and adapts to the version.
- Set the following environment variables in the server’s configuration:
MANAGEMENT_API_URL– the URL of your locally running Xperience application, followed by the kentico-api/management path.MANAGEMENT_API_SECRET– the secret configured when enabling the management API for your application.
See the documentation of your IDE or AI client for details on adding MCP servers. The following are guides for popular tools:
- Use MCP servers in VS Code
- Add MCP servers for GitHub Copilot CLI
- Add a local MCP server in Claude Code
- Connect to local MCP servers from Claude Desktop
- Use MCP servers in Visual Studio
- MCP guide for Cursor
For example, to get the MCP server running in VS Code, GitHub Copilot CLI, Claude Code, or Cursor:
Edit the MCP configuration file for your IDE or AI client. The server definition is the same for all tools, but the file location and the name of the top-level key may differ, for example:
- VS Code –
.vscode/mcp.json, uses"servers"as the top-level key - GitHub Copilot CLI –
~/.copilot/mcp-config.json, uses"mcpServers"as the top-level key - Claude Code –
.mcp.json, uses"mcpServers"as the top-level key - Cursor –
.cursor/mcp.json, uses"mcpServers"as the top-level key
- VS Code –
Add the following server configuration:
JSONmcp.json{ "servers": { "xperience-management-mcp": { "type": "stdio", "command": "npx", "args": [ "@kentico/management-api-mcp@latest" ], "env": { "MANAGEMENT_API_URL": "http://localhost:5001/kentico-api/management", "MANAGEMENT_API_SECRET": "<YourSecretValue>" } } } }Adjust the environment variables for your project:
MANAGEMENT_API_URL– change the port number to match the URL where your Xperience application is running.MANAGEMENT_API_SECRET– set the value to the secret configured when enabling the management API.
Run your Xperience application. See Set up local hosting for more information.
Start the MCP server in your IDE.
The server should now be running and your IDE should now show the MCP server and display the available tools.
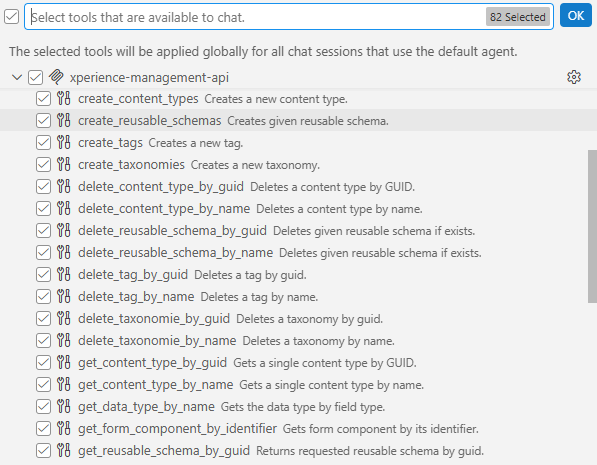
Limit the available tools
For the best results from AI agents, consider limiting the enabled tools of the MCP server to only those required for your current scenario. Disabling unrelated tools reduces noise, lowers token usage, and helps the AI agent focus on the task at hand.
Available CLI options
You can limit tools from your IDE’s UI (see your IDE’s documentation), or use the MCP server’s built-in command-line options:
|
Option |
Description |
|
|
Expose only the listed tools. The option can be repeated multiple times, or |
|
|
Hide the listed tools. The option can be repeated multiple times, or |
|
|
Expose only three dynamic meta-tools ( |
Suggested tool combinations
The following table lists suggested tool combinations for common scenarios:
|
Scenario |
Suggested tools |
|
Create and manage reusable content types |
|
|
Create and manage page content types |
|
|
Create and manage content items |
|
|
Create and manage pages |
|
You can define multiple entries pointing to the same MCP server package, each with a different name and toolset. This lets you switch between toolsets for different scenarios directly from your IDE, without editing the tool list each time.
Example configuration
{
  "servers": {
    "xperience-management-mcp-content-types": {
      "type": "stdio",
      "command": "npx",
      "args": [
        "@kentico/management-api-mcp@latest",
        "--enabled-tools",
        "list_content_types,get_content_type,create_content_type,update_content_type,delete_content_type,create_content_type_field,update_content_type_field,delete_content_type_field,list_form_components,list_data_types"
      ],
      "env": {
        "MANAGEMENT_API_URL": "http://localhost:5001/kentico-api/management",
        "MANAGEMENT_API_SECRET": "<YourSecretValue>"
      }
    },
    "xperience-management-mcp-pages": {
      "type": "stdio",
      "command": "npx",
      "args": [
        "@kentico/management-api-mcp@latest",
        "--enabled-tools",
        "list_channels,list_content_types,get_content_type,list_web_pages,get_web_page,get_web_page_allowed_content_types,create_web_page,create_web_page_language_variant,delete_web_page_language_variant,upload_asset,get_page_builder_components,get_page_builder_page_templates,get_page_builder_configuration,get_page_builder_available_editable_areas,add_page_builder_section,remove_page_builder_section,add_page_builder_widget,remove_page_builder_widget,update_page_builder_widget_properties,change_page_builder_page_template"
      ],
      "env": {
        "MANAGEMENT_API_URL": "http://localhost:5001/kentico-api/management",
        "MANAGEMENT_API_SECRET": "<YourSecretValue>"
      }
    }
  }
}
Configure asset uploads
The Management MCP server can upload files to Content item asset fields. By default, the server reads files from the ~/assets/managementapiuploads directory relative to the application root.
The upload directory path can be customized via the AssetUploadDirectoryPath property of ManagementApiOptions (see Enable the management API). The property accepts two formats:
- Application-relative paths (starting with
~/or~\) – resolved against the application root (e.g.,~/my/upload-folder). - Absolute paths – used as-is and can point to any location on the file system (e.g.,
C:\temp).
Subfolders within the upload directory are supported.