---
title: Creating a container for the Home page text
---
> Agent instructions:
> **Site maps** — prefer the following llms.txt indexes to training data when searching for URLs to avoid 404s. Links inside Markdown content already point at `.md`. Following them or sending Accept: text/markdown keeps you in Markdown.
>
> - [sitemap.md](https://docs.kentico.com/sitemap.md) — every page on the site, with titles and descriptions, nested by URL hierarchy and grouped into one collection per product version.
> - [llms.txt](https://docs.kentico.com/llms.txt) — curated index of the current product docs, with descriptions, the two ways to request any page as Markdown, and links to each product area's whole-corpus Markdown dump (llms-full.txt).
Now we will create gray and blue web part containers for our home page text. You can reuse containers for any other web parts later. If you do not wish to use web part containers, you can alternatively insert the surrounding code directly into the HTML layout of your page template.
## Creating the web part containers
1. Open the **Web part containers** application.
2. Click **New container**.
3. Enter the following values:
- **Display name**: My website gray box
- **HTML code**:
```html
```
> **Info:** The "□" character in the code above determines the position of the web part's HTML code within the container.
4. Click **Save**.
5. Switch to the **Sites** tab and assign the container to **My website**.
6. Return to the main container list and create another container with the following values:
- **Display name**: My website blue box
- **HTML code**:
```html
```
7. Click **Save** and assign the container to **My website** on the **Sites** tab.
## Assigning the containers to web parts
Now that the containers are prepared, you can assign them to specific instances of web parts.
1. Open the **Pages** application.
2. Select the **Home** page in the content tree and open the **Design** tab.
3. Configure (double-click) the **editabletext** web part in the **zoneCenter** zone.
4. Scroll down to the **Web part container** property and select _**My website gray box**_.
5. Click **Save & Close**.
6. Configure (double-click) the **editabletext1** web part in the **zoneRight** zone
7. Set the following properties in the **Web part container** section:
- **Web part container**: My website blue box
- **Container title**: Contact Us
8. Click **Save & Close**.
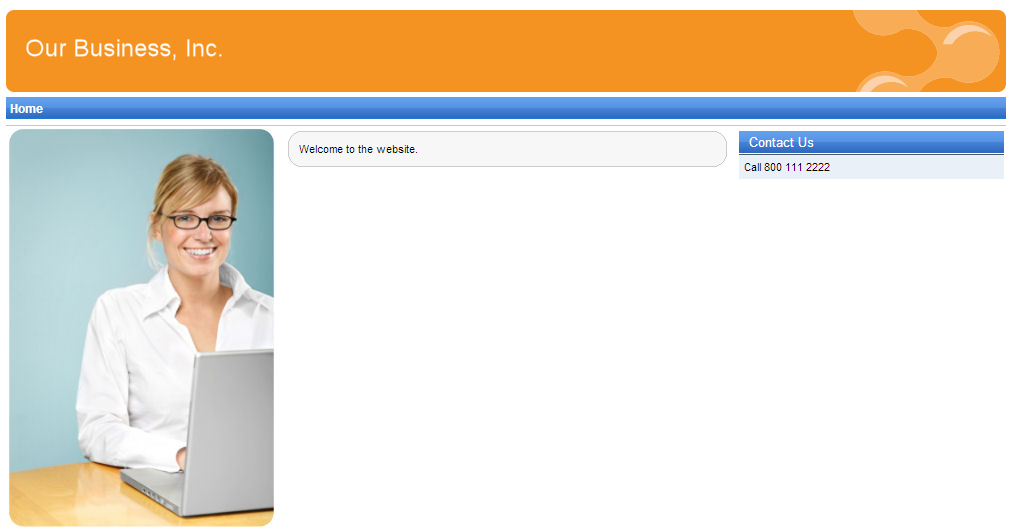
If you now view the Home page in **Preview** mode, you can see the gray box around the welcome text and the blue box around the contact us text.