Creating the Products page (ASPX)
This page describes how to create the product list page and publish computer specifications on the website.
Preparing the ASPX source file for the products template
Edit your web project in Visual Studio.
Right-click the CMSTemplates/MySite folder in the Solution Explorer and click Add -> Add New Item.
Create a Web Form named ProductList.aspx and check Select master page.
Click Add and choose the MyMaster.master page from the CMSTemplates/MySite folder.
Drag the following controls inside the <asp:Content> element of the product list page:
- CMSBreadCrumbs
- CMSDataList
Set the properties of the CMSDataList control according to the table below:
Property
Value
Description
ClassNames
custom.computer
Configures the datalist to display only pages of the custom.computer type.
OrderBy
ComputerName ASC
Sets the SQL ORDER BY clause that the control uses when loading data. As a result, the control displays items in ascending alphabetical order based on the ComputerName values.
TransformationName
custom.computer.preview
Assigns the transformation that the datalist uses to display the list of computer products.
SelectedItemTransformationName
custom.computer.default
When a user selects a specific computer page on the website, the control displays the details according to the specified transformation.
RepeatColumns
2
Configures the datalist to display 2 items per row in list mode.
Switch to the code behind of the product list page (ProductList.aspx.cs) and add a reference to the CMS.UIControls namespace:
using CMS.UIControls;Change the class definition so that it inherits from the TemplatePage class:
public partial class CMSTemplates_MySite_ProductList : TemplatePageSave the files.
Registering the page template
The source files of the products page are ready. Now you need to register the page template in Kentico.
- Switch to the Kentico administration interface in your browser.
- Open the Page templates application.
- Select the My website category.
- Click New template and type Product list into the Template display name field.
- Click Save.
- Set the following values on the General tab:
- Template type: ASPX page
- File name: ~/CMSTemplates/MySite/ProductList.aspx
- Click Save.
- Switch to the Sites tab and assign the page template to My website.
Adding the products section
Open the Pages application.
Select the root of the content tree (My website).
Click New ().
Choose the Page (menu item) page type.
Type in Products as the Page name and choose the Use existing page template option. Select the My website category and the Product list page template.
Click Save to create the page.
Select the Products page in the content tree.
Click New () and choose the Computer page type.
Fill in the computer page fields with the following values:
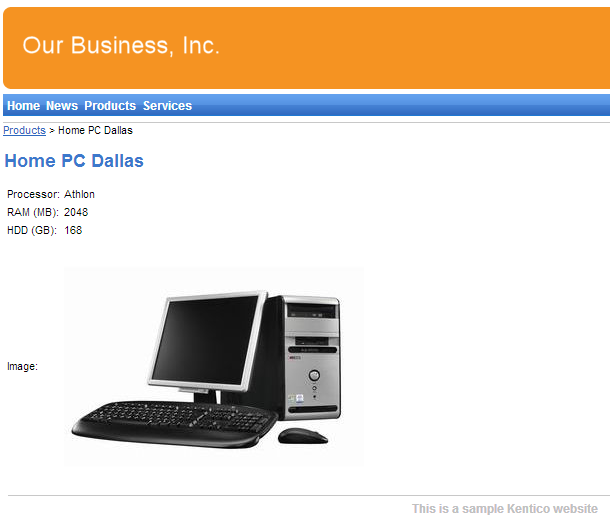
- Computer name: Home PC Dallas
- Processor type: Athlon
- RAM (MB): 2048
- HDD (GB): 160
- Image: upload an image (you can find images in the sample web template - SampleWebTemplate\Computer_Images)
- Publish from/Publish to: leave the values blank
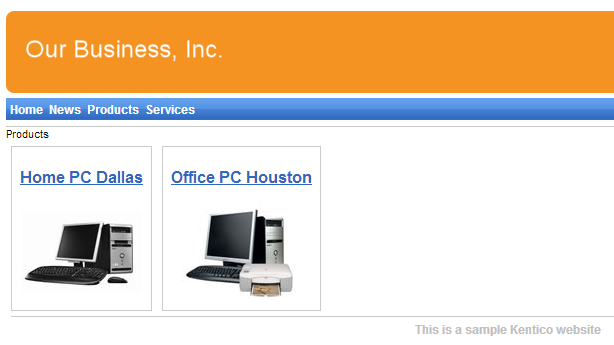
Click Save and create another and enter the following values:
- Computer name: Office PC Houston
- Processor type: Pentium Core 2 Duo
- RAM (MB): 4096
- HDD (GB): 200
- Image: upload an image (you can find images in the sample web template - SampleWebTemplate\Computer_Images)
- Publish from/Publish to: leave the values blank
Click Save.
If you view the /Products page in Preview mode, you can see a list of the two computer products (formatted according to the custom.computer.preview transformation).
When you click the title of a specific computer, the page displays the detail view (using the custom.computer.default transformation).