
Writing transformations
Now that you have created the new page type, you need to prepare the transformations that page components will use to display computer products on the website.
Open the Page types application.
Edit () the Computer page type.
Switch to the Transformations tab.
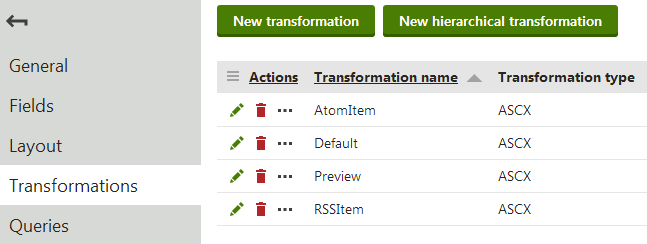
The New page type wizard has created several default transformations, which you can use as a base for your own transformations.
Edit () the Default transformation, clear the original code and replace it with the following:
 <h1>
     <%# Eval("ComputerName") %>
 </h1>
 <table>
     <tr>
         <td>
             Processor:
         </td>
         <td>
             <%# Eval("ComputerProcessorType") %>
         </td>
     </tr>
     <tr>
         <td>
             RAM (MB):
         </td>
         <td>
             <%# Eval("ComputerRamSize") %>
         </td>
     </tr>
     <tr>
         <td>
             HDD (GB):
         </td>
         <td>
             <%# Eval("ComputerHddSize") %>
         </td>
     </tr>
     <tr>
         <td>
             Image:
         </td>
         <td>
             <%# GetImage("ComputerImage") %>
         </td>
     </tr>
 </table>
ASCX transformation code is similar to standard ItemTemplate elements that you may already be familiar with from from using ASP.NET Repeater or DataList controls. The transformation code combines HTML with ASP.NET commands and data binding expressions (Eval). You can also use built-in methods that simplify various tasks, such as GetImage. For more information about the available transformation methods, click the Available transformation methods link above the code editor.
You will use the Default transformation for displaying the details of individual computer products.
Click Save.
Return to the transformation list and edit the Preview transformation. Clear the default code and add the following code instead:
 <div style="text-align:center;padding: 8px;margin: 4px;border: 1px solid #CCCCCC">
   <h2>
     <a href="<%# GetDocumentUrl() %>"><%# Eval("ComputerName") %></a>
   </h2>
   <%# GetImage("ComputerImage", 120) %>
 </div>
Click Save.
Note the code used to create the link to specific pages. It consists of a standard HTML link tag and inserts the appropriate URL and link text dynamically:
<a href="<%# GetDocumentUrl() %>"><%# Eval("ComputerName") %></a>
You can generate an image tag containing the file uploaded into the given page’s ComputerImage field using the GetImage method. The sample code calls the method with a parameter that ensures automatic server‑side resizing of the image’s longest side to 120 pixels:
<%# GetImage("ComputerImage", 120) %>
You will use the Preview transformation for displaying the list of computer pages on the main products page.
Entering field names in transformations
When writing ASCX transformations, you often need to specify the names of data fields as parameters of the Eval data binding expression or other methods, such as ComputerName and ComputerImage in the examples above.
You can press CTRL + SPACE to access a list of available page fields and related objects instead of typing them manually.