Module: Work with assets
10 of 21 Pages
Exercise 1 -- Upload and manage multiple images in Content hub
Imagine that you’re running a flash promotional push to promote a new product – Family Savings Account. The promo push will involve a whole batch of images, but uploading them one by one would be slow and a bit frustrating.
That’s why Content hub allows you to upload and prepare multiple images at the same time. With some help from AIRA, you’ll also ad the correct tags, and automatically generate image variants in different sizes. By the end, you’ll have a clean, well-organized folder of assets ready to be used across your promo push.
To follow along with the exercise, download a zipped file of 11 images we prepared for you.
Download and prepare your images
- Download the sample images ZIP from the course resources and extract it to a local folder on your device.
- Review the file names and remove duplicates if necessary to keep the library clean.
If your team has a file-naming convention, rename files to ensure consistency with internal rules.
Open Content hub and choose your target folder
- In Xperience, go to Content management and open Content hub.
- Ensure you are working in the Personal Banking workspace.
- Navigate the Folders tab and locate or create the folder where your campaign images should live.
- Let’s also create a subfolder like Family Savings Campaign to keep assets easy to find later.
- In Xperience, go to Content management and open Content hub.
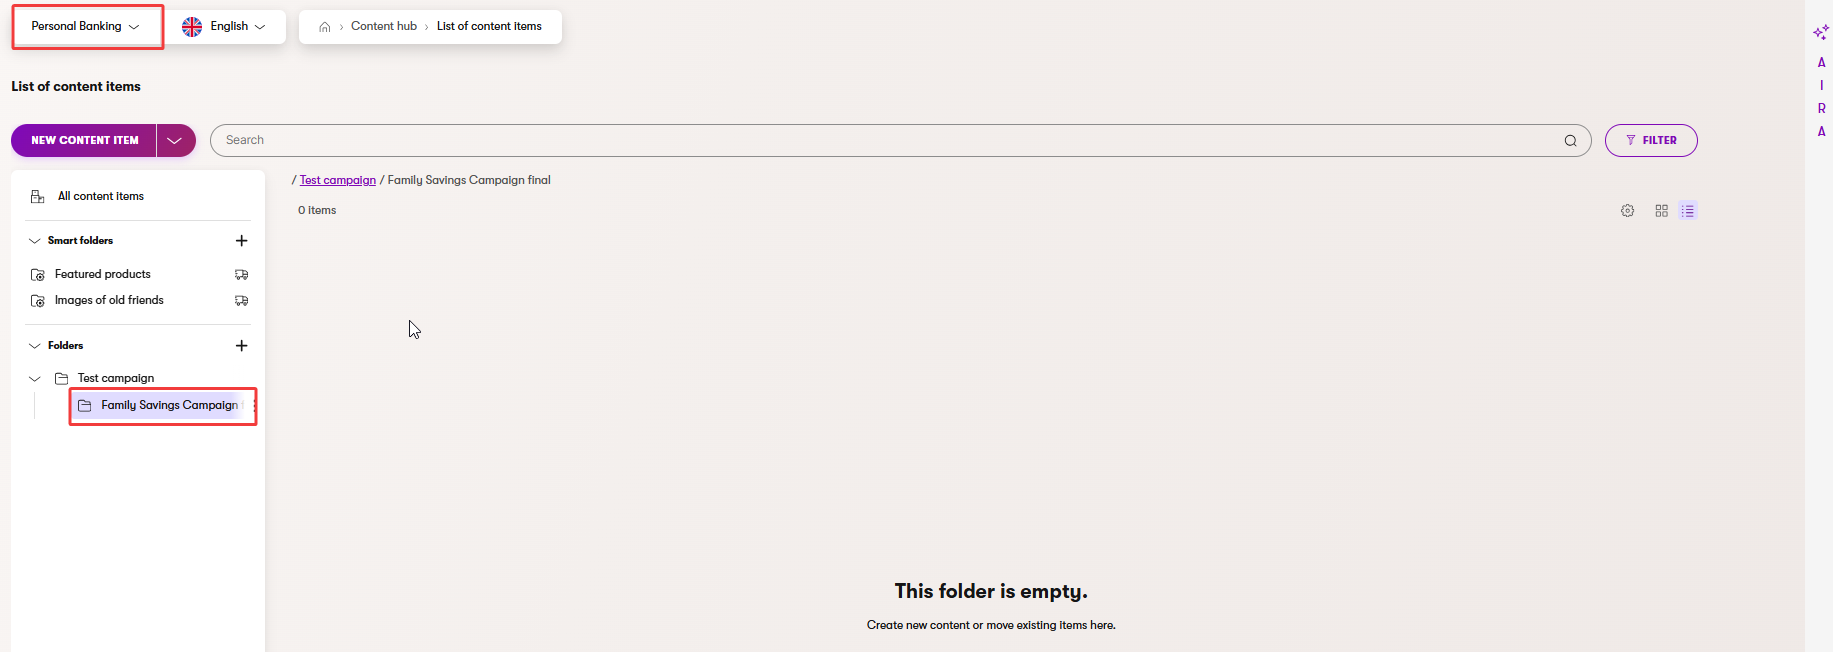
Why does it matter? A logical folder hierarchy makes browsing and permissions simpler for everyone.
Start a bulk upload
- Next to the New content item button, use the arrow to open dropdown menu and select Upload files.

- Select the files you want to upload from your source folder in the upload dialog.
- Use Open to confirm selected files and begin the upload.
- Once the files are successfully uploaded, you can Close the upload dialog.
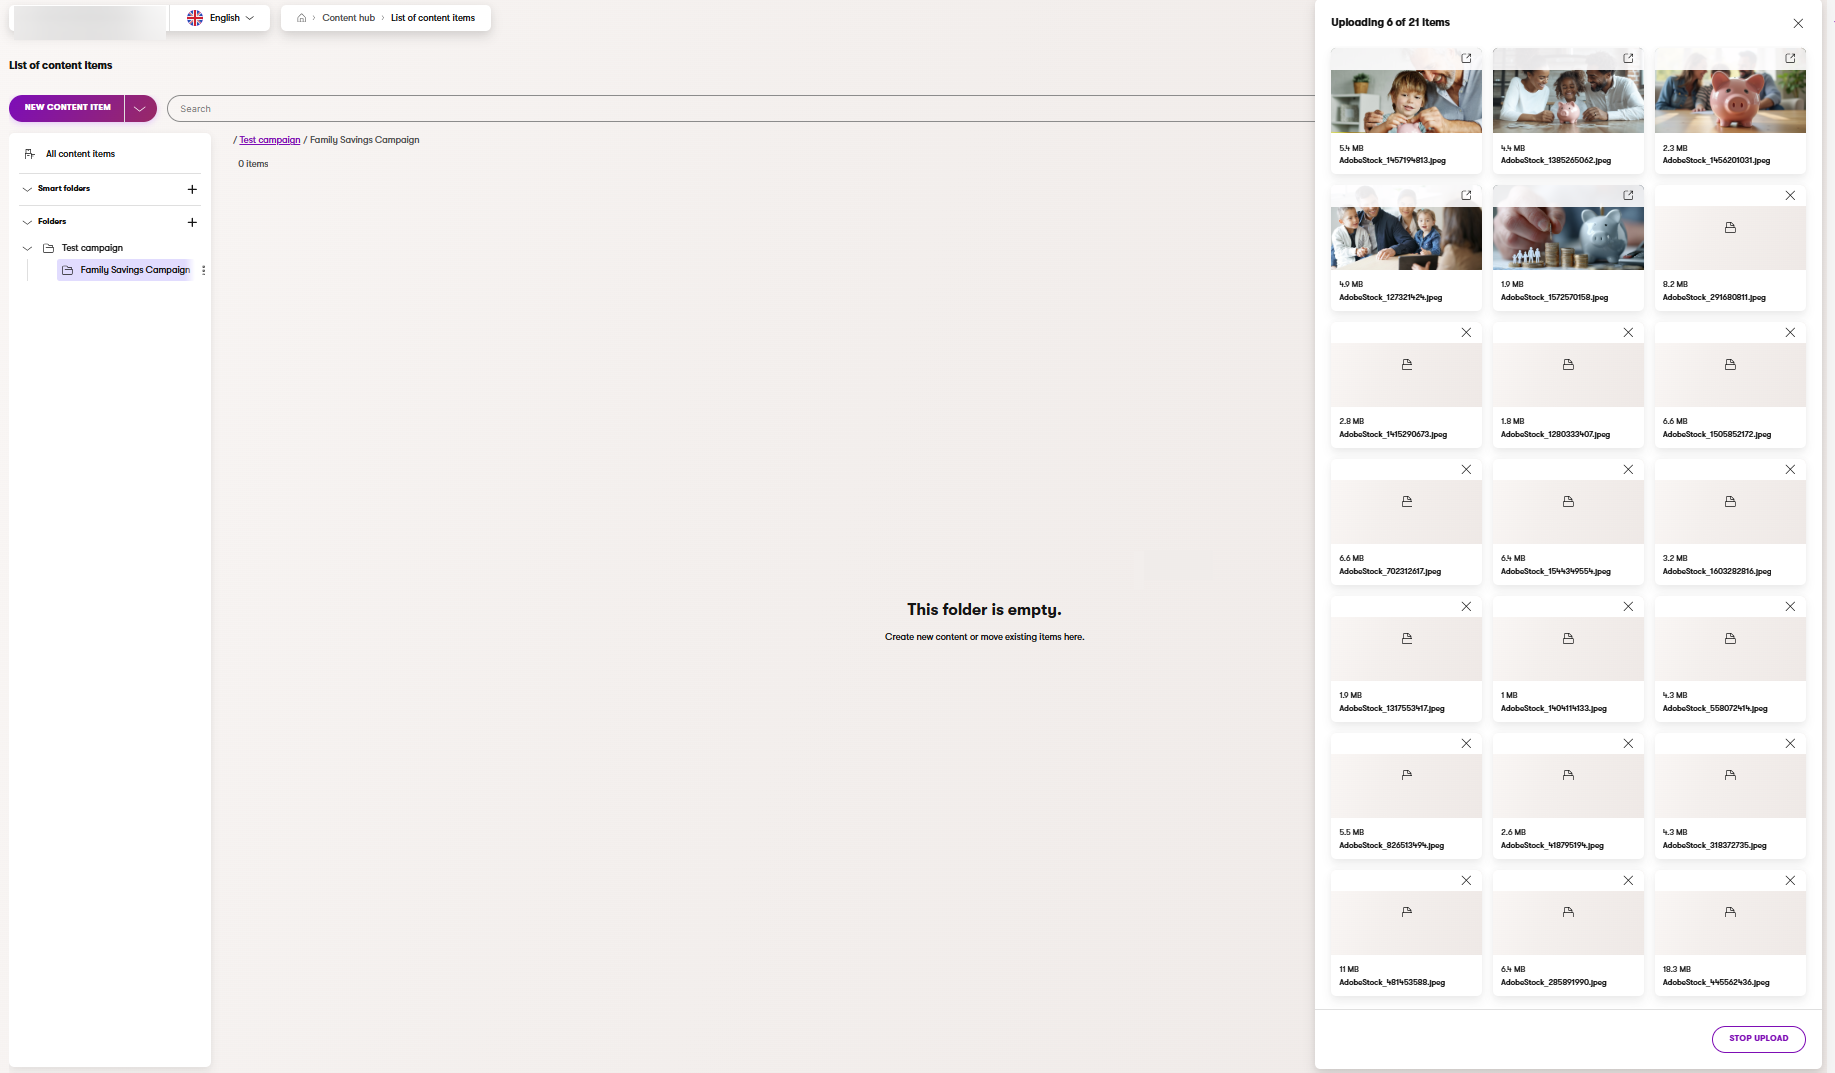
- The Assets are now in the Draft (Initial) status, and you can check them and make further adjustments before you publish the assets.
- Next to the New content item button, use the arrow to open dropdown menu and select Upload files.
During the upload, AIRA automatically tags and optimizes the images. You can then start adjusting them manually.
Check and adjust images
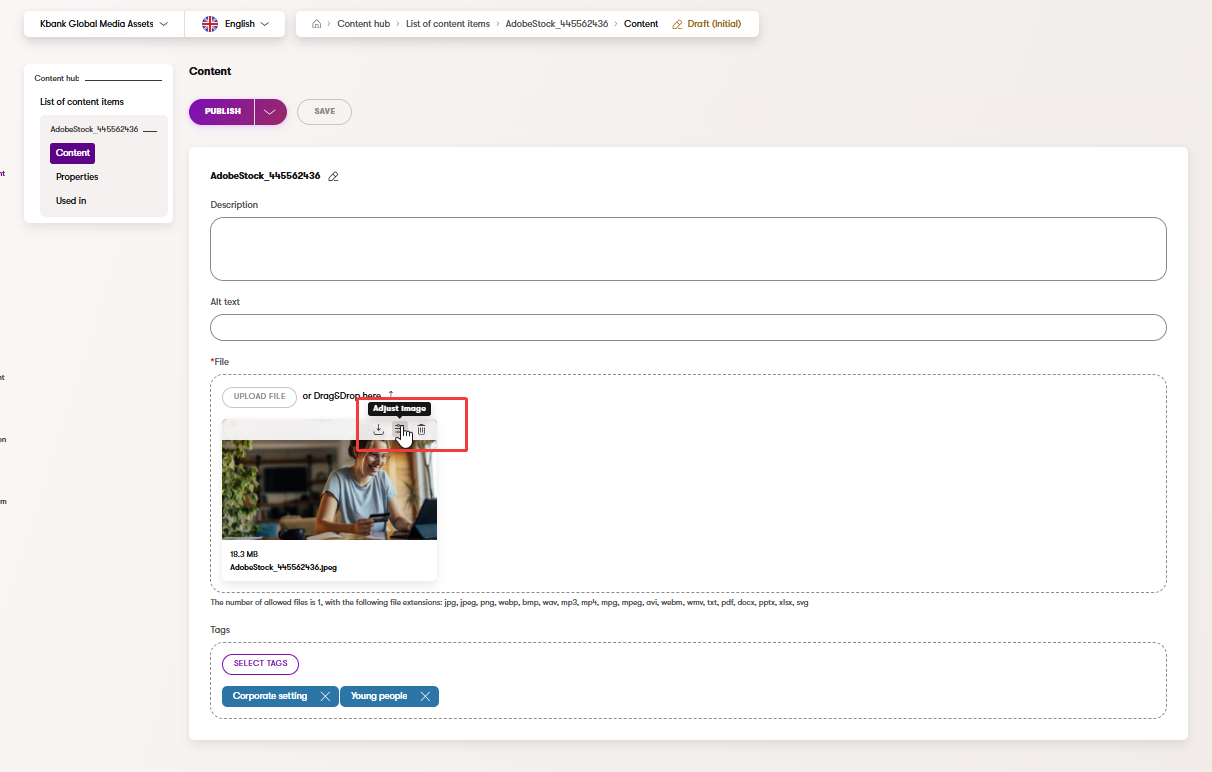
- Open the image with the original filename AdobeStock_445562436.jpeg and adjust:
- Description: Image of a smiling woman with a credit card and laptop.
- Alt text: Smiling woman holding a credit card, looking into an open laptop computer.
- Click the Adjust image icon to update the image variant.
- Primary Image changes to make:
- Image format: Change from JPEG to JPG.
- Quality: adjust the quality to Medium 80%
- Save the changes.
- Manually adjust the focal point of the Primary image.

- Check and adjust the crop in Image variants if needed.
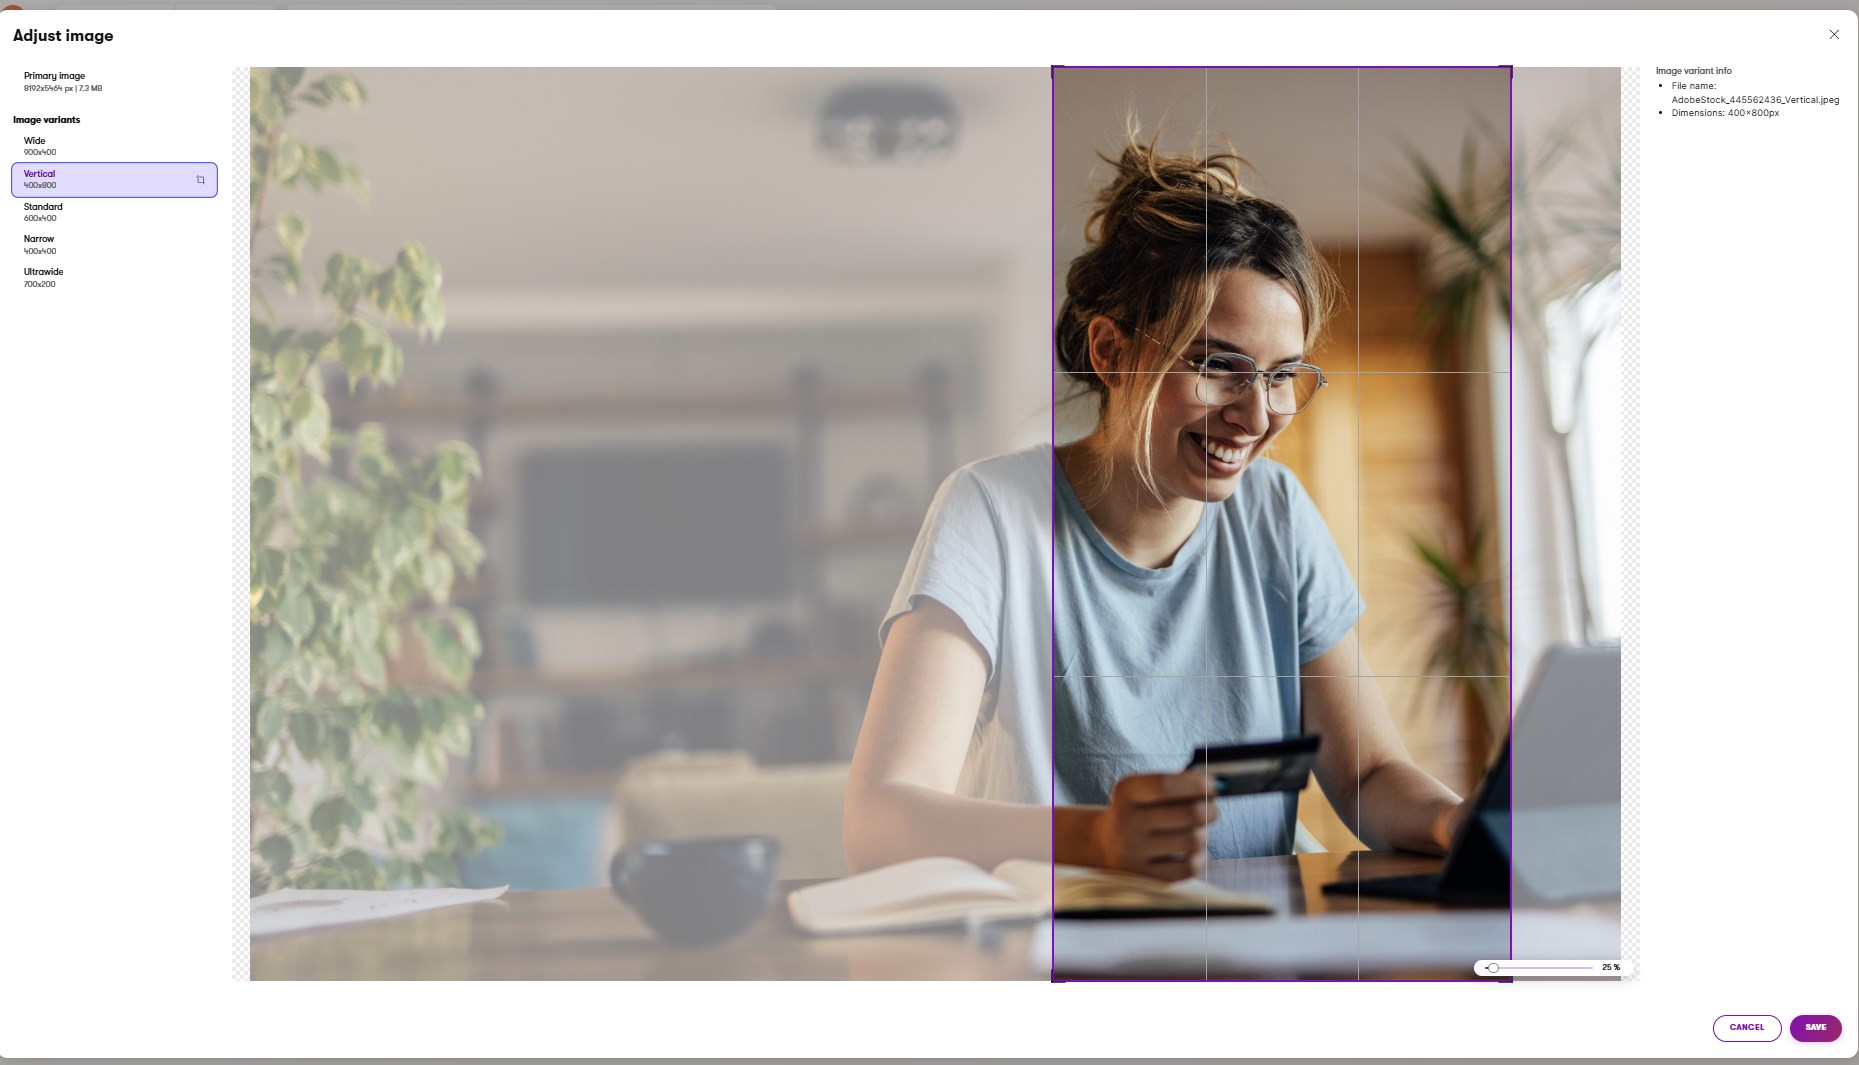
- Save your latest updates.
- Open the image with the original filename AdobeStock_445562436.jpeg and adjust:
Variant notes:
Follow any team internal rules you might have on the image quality settings or where the focal point should typically go, such as “don’t lower the quality of the image below 50%” and “keep the focal point on people’s faces.”
- Manually adjust predefined tags:
- Use the tag selector to add relevant tags from your project’s predefined list, such as Young people and Family setting.
- Save your changes to apply tags.
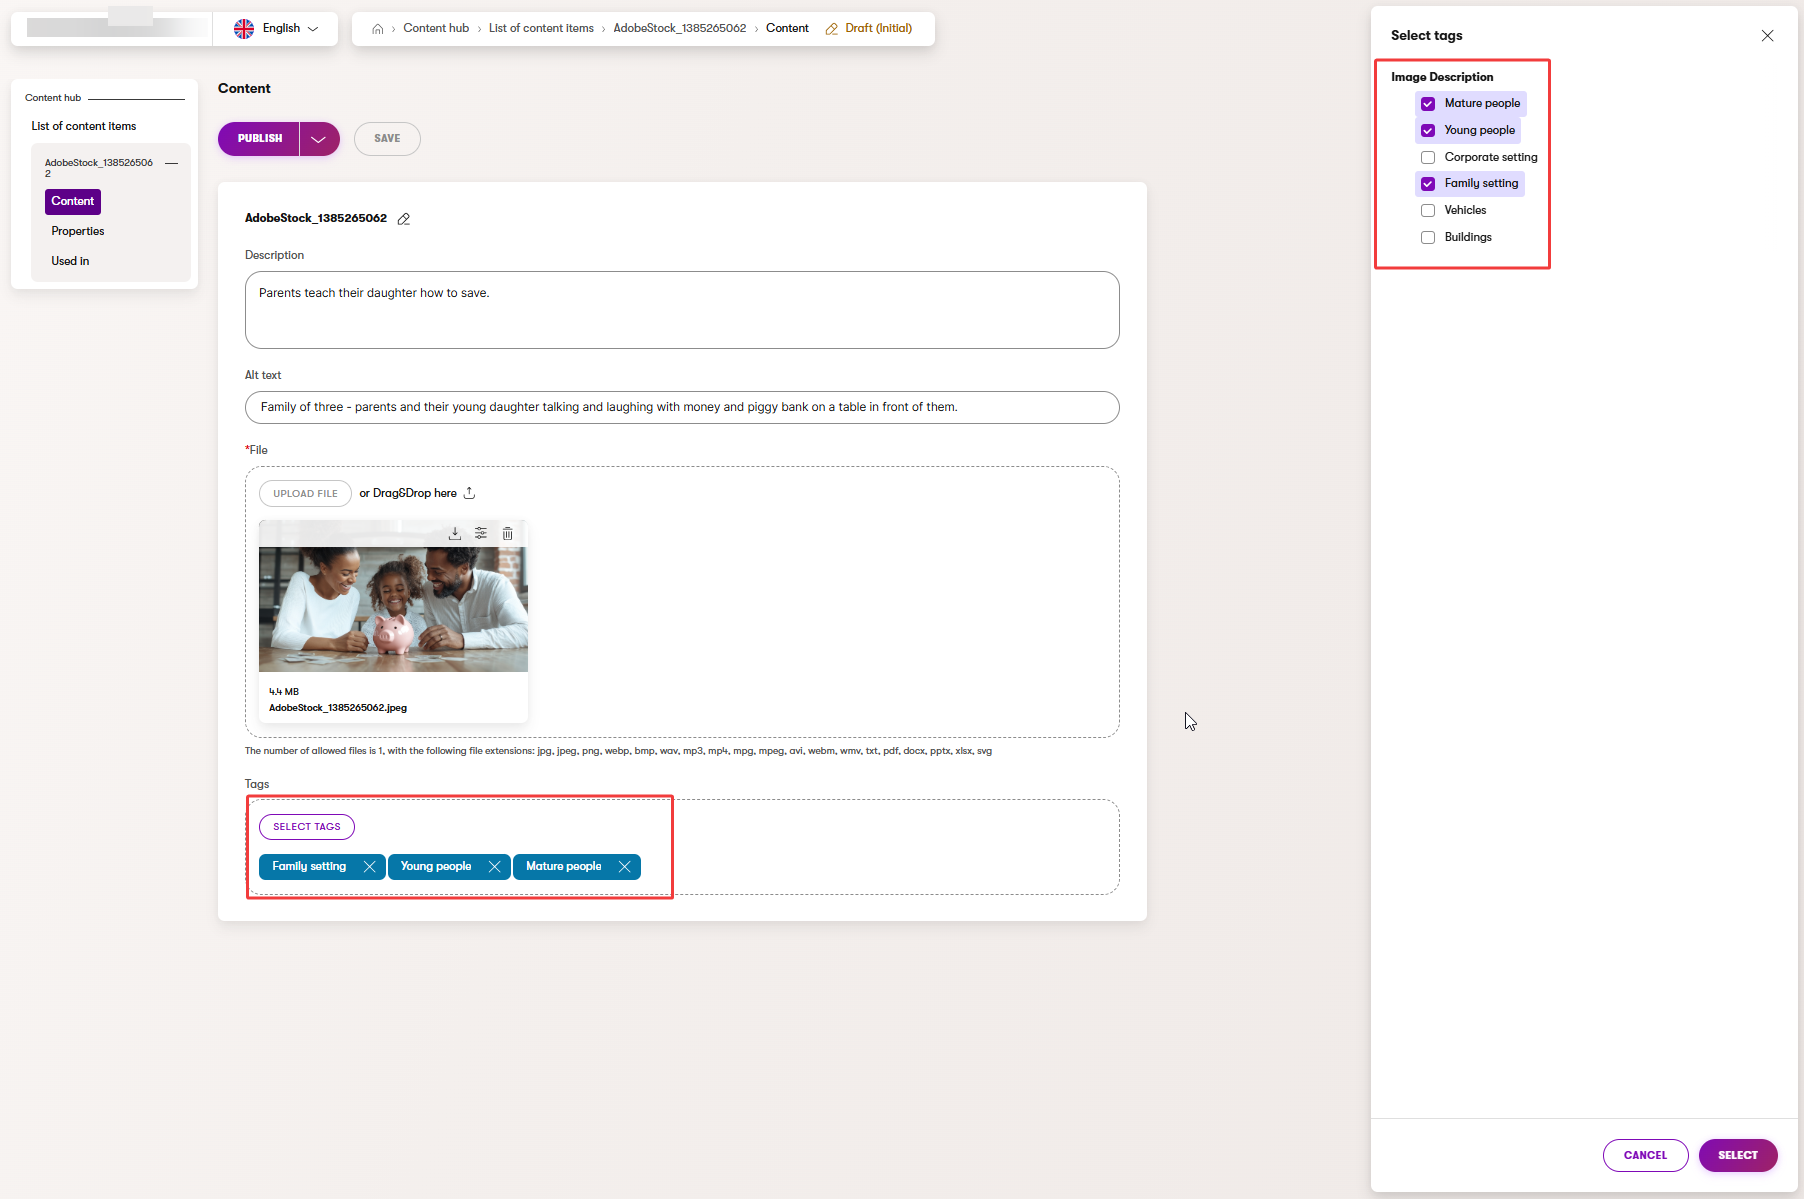
Currently, you can only choose from predefined tags configured by your developer. You cannot create new tags in the Content hub at the moment. However, it is still beneficial to follow a few best practices when it comes to tagging.
- Prefer specific tags over vague labels like misc or general.
- Reuse existing tags rather than inventing near-duplicates (for example, choose Buildings over adding a new tag House).
- Keep it focused: aim for 3 to 6 precise tags per asset to improve search accuracy.
- Follow team conventions for consistency.
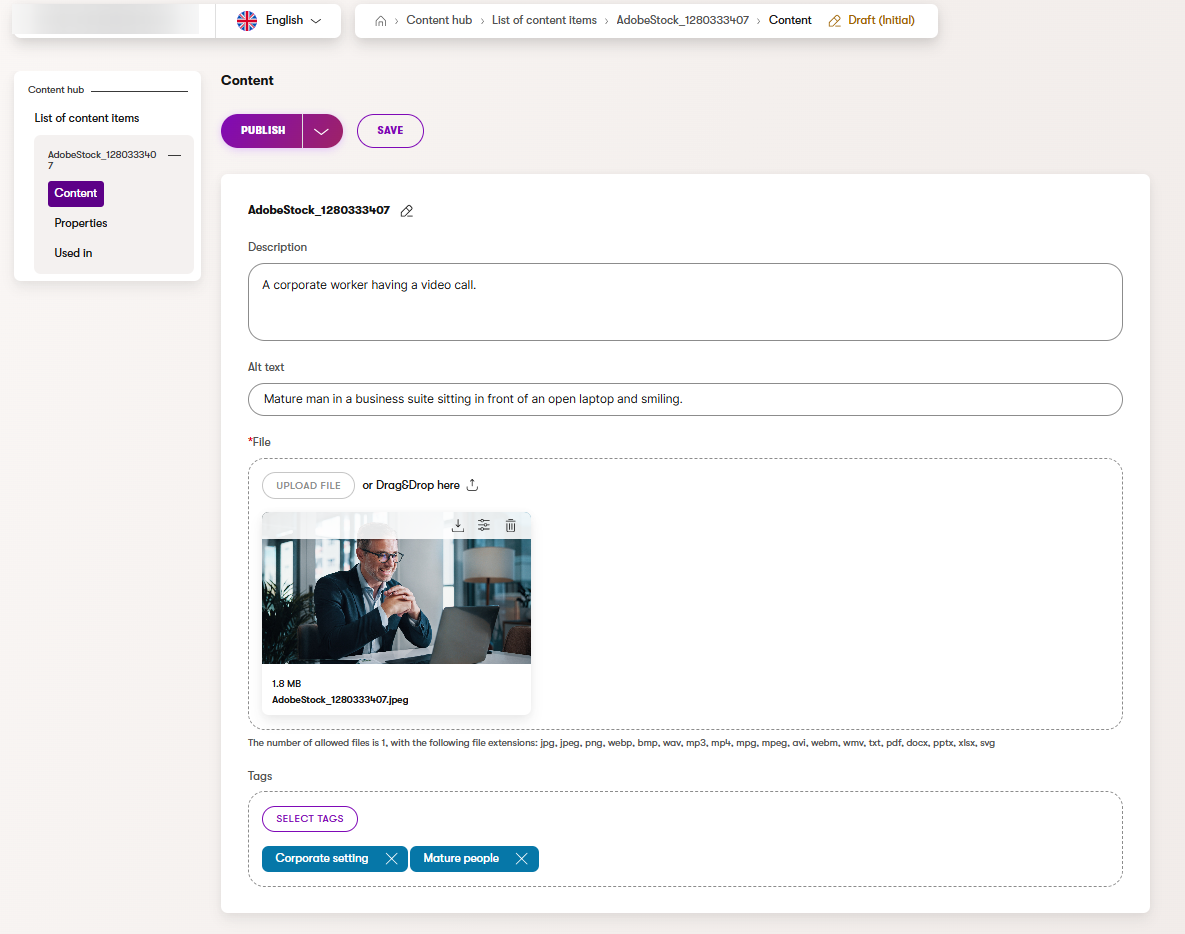
Inspect another image to verify results
- Open newly uploaded image.
- Confirm it has the expected tags and a clear description.
- Make minor edits if needed, then Save.
- Open newly uploaded image.
Final tidy-up and quality check
- Ensure all images reside in the correct folder with the proper naming and tags.
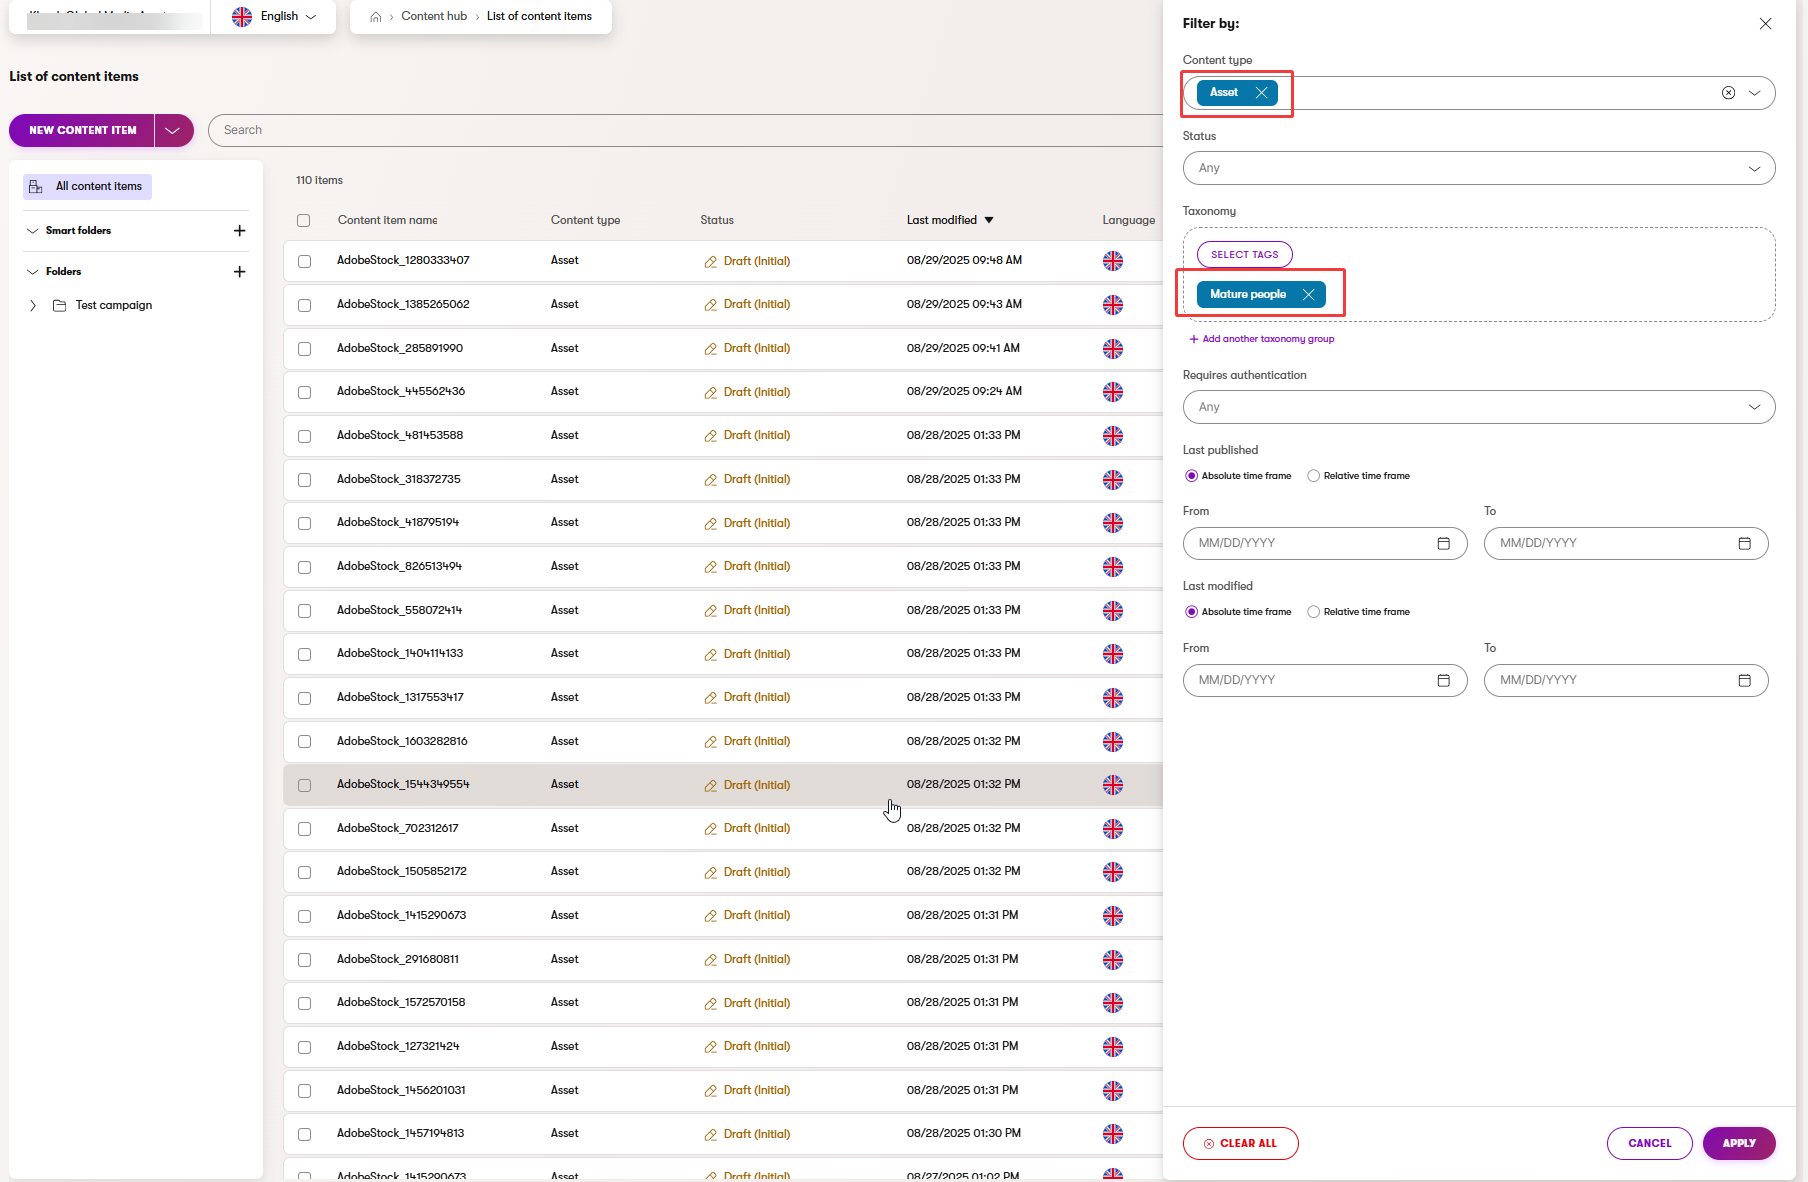
- Use Filters in the folder, for example, filter by Content type (Asset), or by Taxonomy tags you just applied (to confirm your tagging works as expected).
- If an image does not fit this campaign, move it to a more suitable folder, or make any last adjustments now.
- Ensure all images reside in the correct folder with the proper naming and tags.
Publish your assets
- Select all assets in the folder by checking off the Content item name checkbox, or one by one if you want to select only some.
- Publish all selected items in bulk.
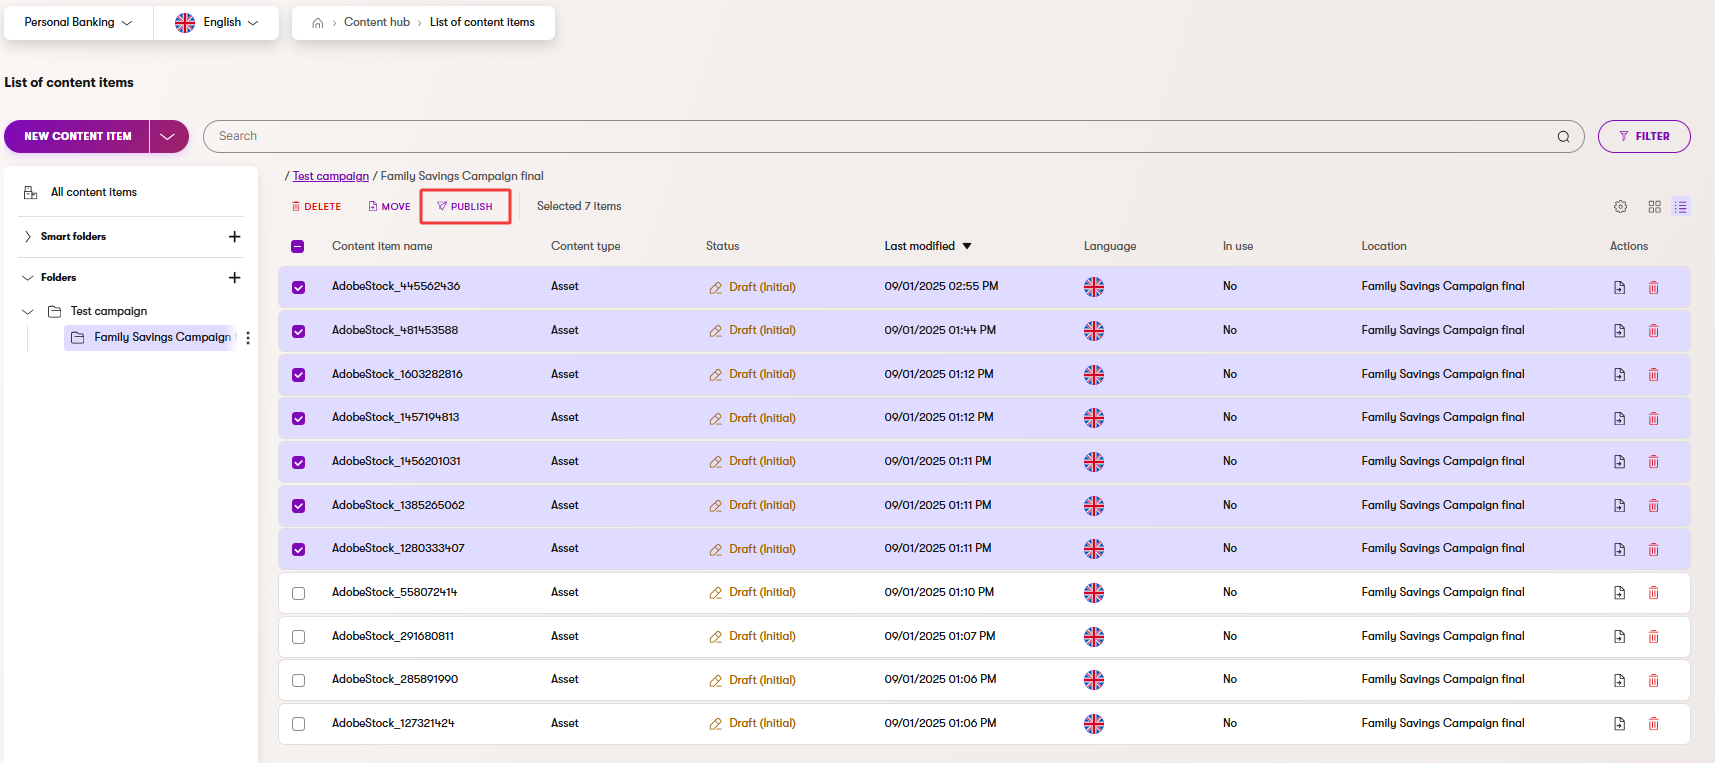
- If unsure about the result, verify that the status of the selected assets has changed from Draft (Initial) to Published.
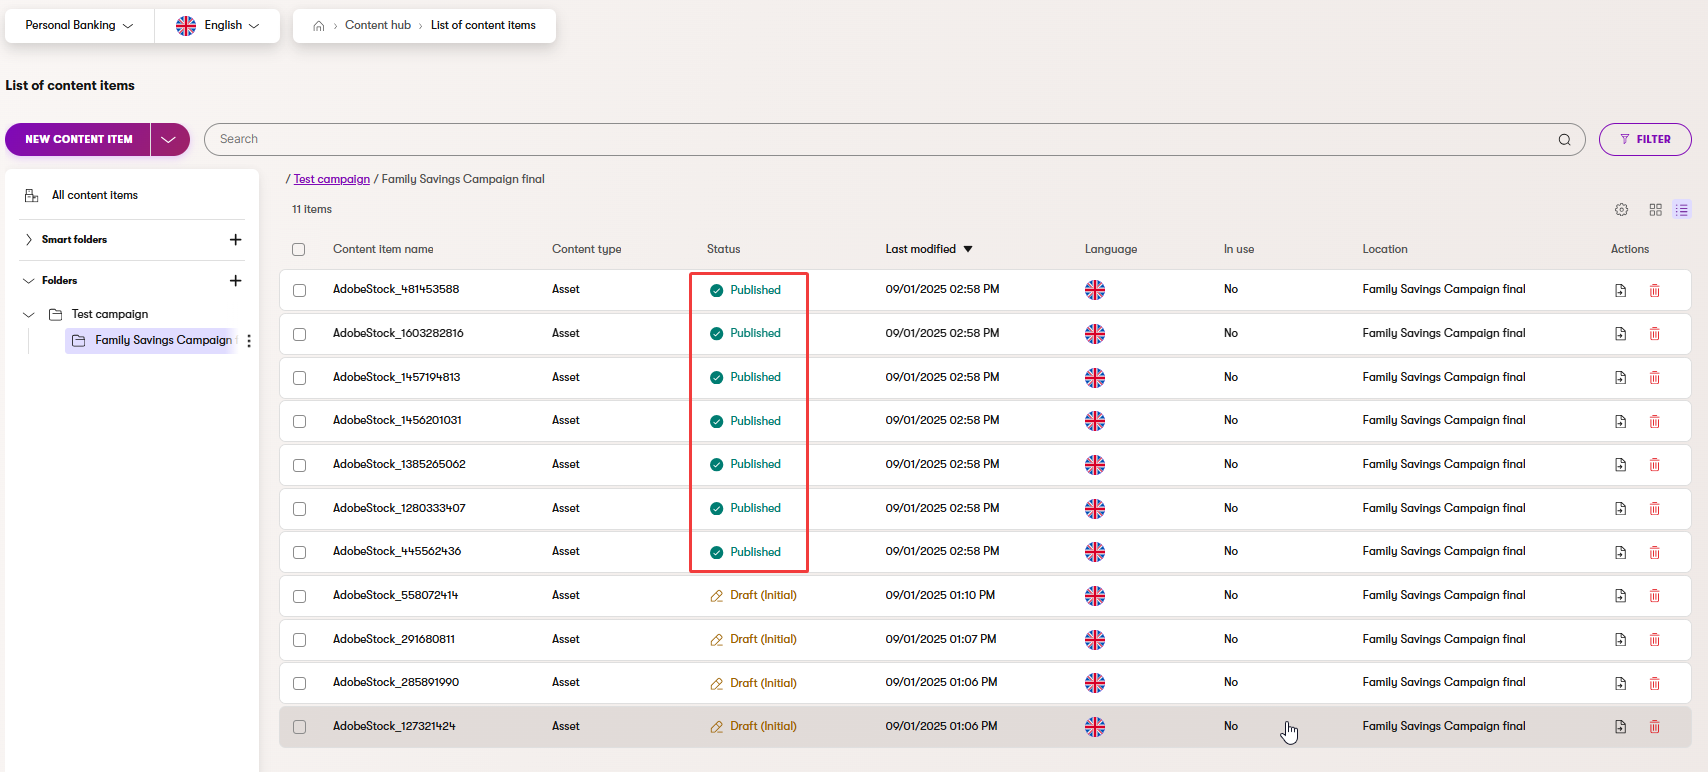
Nice work! You’ve just uploaded and organized a larger set of images in one smooth process. By using bulk upload, AIRA-assisted tagging and adding alt description, and creating manually updated variants, you’ve built a tidy, reusable library that will save you and your team time later.