
Module: Work with emails
13 of 24 Pages
Create emails in Email Builder
Email license requirements
The license tier required for email features depends on the size of the email channels that you use:
- Email microchannels – available for all license tiers
- Standard size email channels – require the Advanced license tier
To learn more, see the description of the Channel size property for email channels.
Email Builder is a user-friendly interface that allows you to compose emails using configurable components prepared by developers.
See Emails to learn how to work with emails in general. Information, such as the description of the Email lifecycle and instructions for Sending draft emails or Cloning emails, applies even when using Email Builder.
Prerequisites and limitations
Your project’s developers need to set up the Email Builder feature and prepare Email Builder components. Email Builder becomes available if you select an Email Builder template when creating your email.
Currently, Email Builder is only available for emails with the Automation, Regular and Order status change purposes.
Email appearance in Email Builder mode
In some cases, there may be differences in the appearance and styling of Email Builder components when they are viewed in the Email Builder mode. Switch to Preview mode to get an accurate reference for how recipients will see the email.
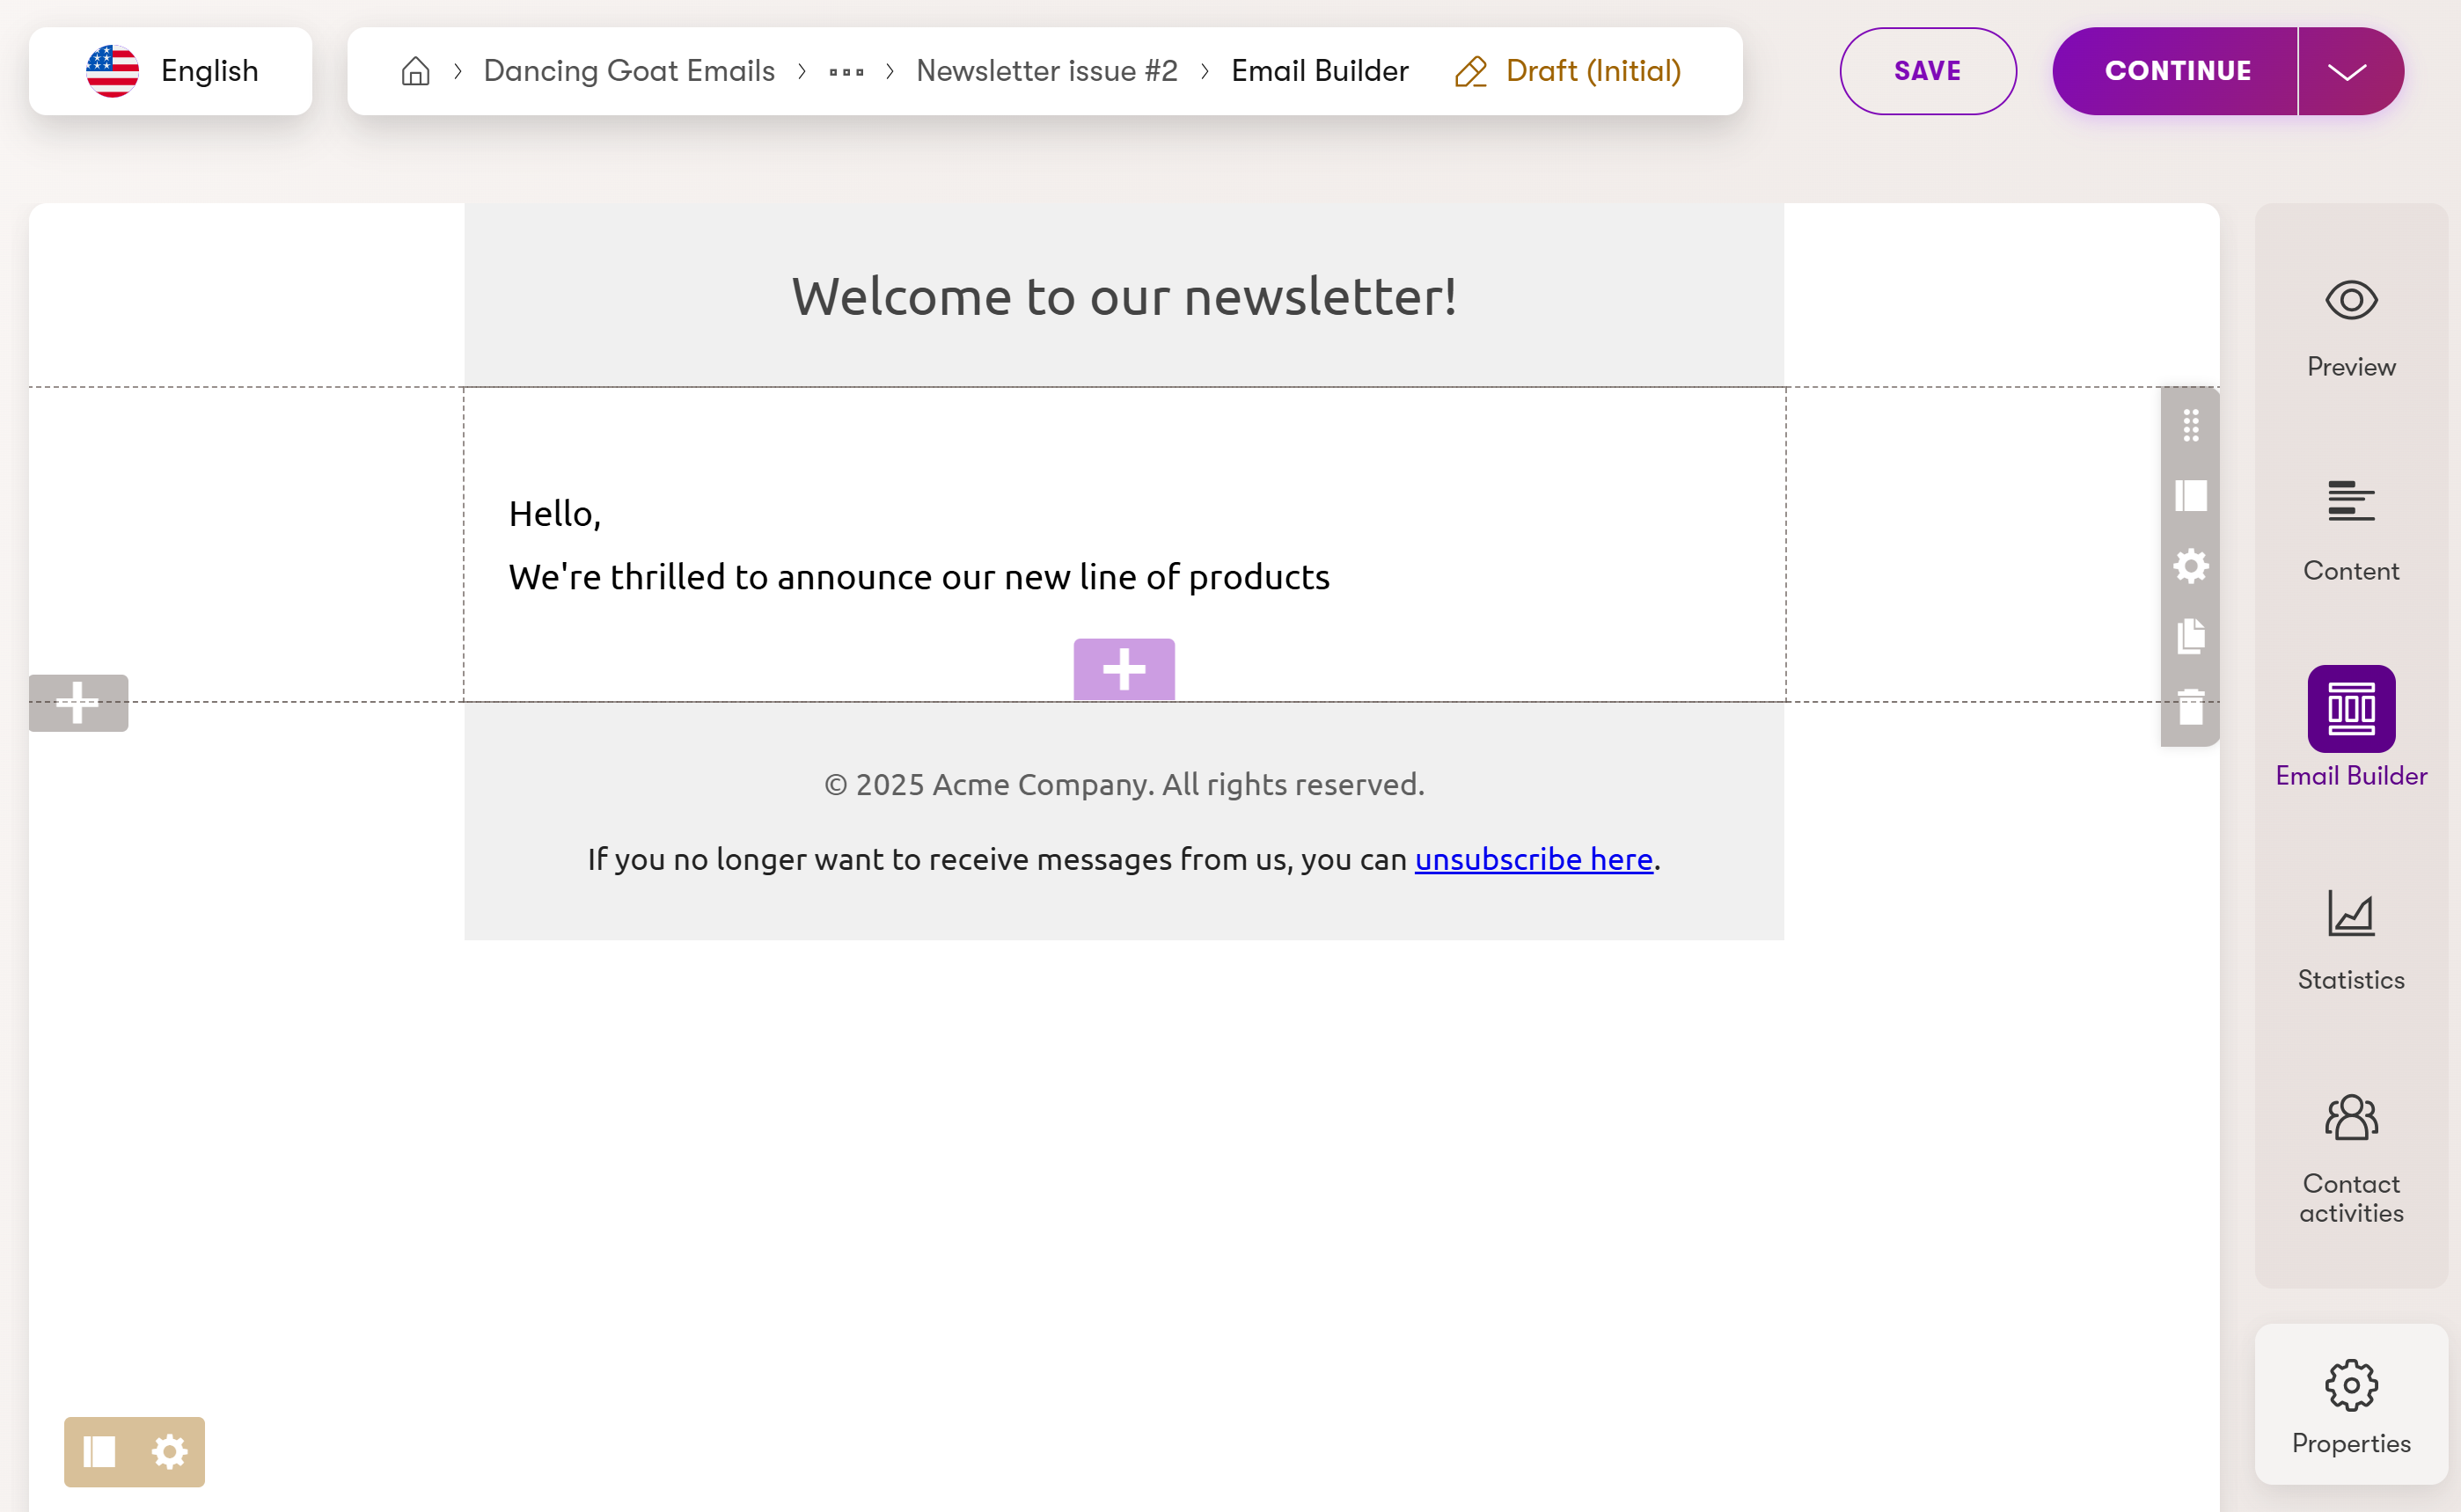
Email Builder components
Emails created in Email Builder consist of components that fit together in the following way:
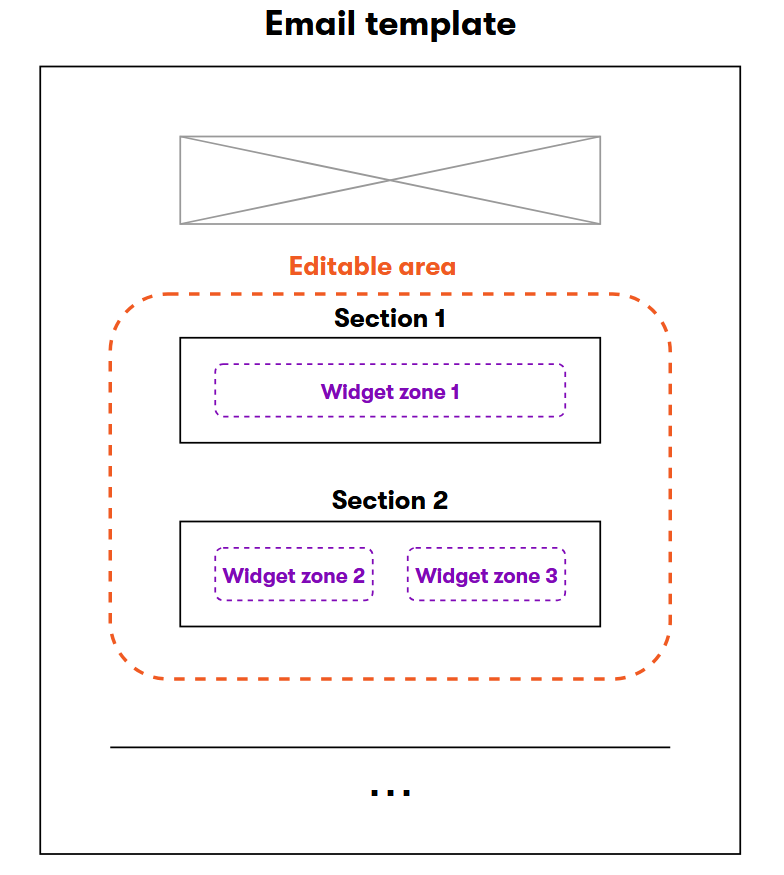
- Email template – the top-level component that sets the email’s overall design, as well as any fixed content, such as a header and footer. You select the template when initially creating the email. Some templates may have properties that you can configure to adjust the email’s appearance or content. See Email Builder templates for more information.
- Sections – sections set a layout for email content, typically with one or more columns. You can add or remove sections, but each editable area in the template must always contain at least one section. Sections contain one or more widget zones. See Adjust the email layout using sections to learn how to work with sections.
- Widget zones – places where you can add widgets. Each zone can contain any number of widgets (depending on the design of the template and section).
- Widgets – reusable components that represent individual pieces of email content, such as text, images, CTA links, etc. See Add content using widgets to learn how to work with widgets.
Adjust the email layout using sections
You can modify an email’s layout by adding, configuring or removing sections. Manage sections in the following way:
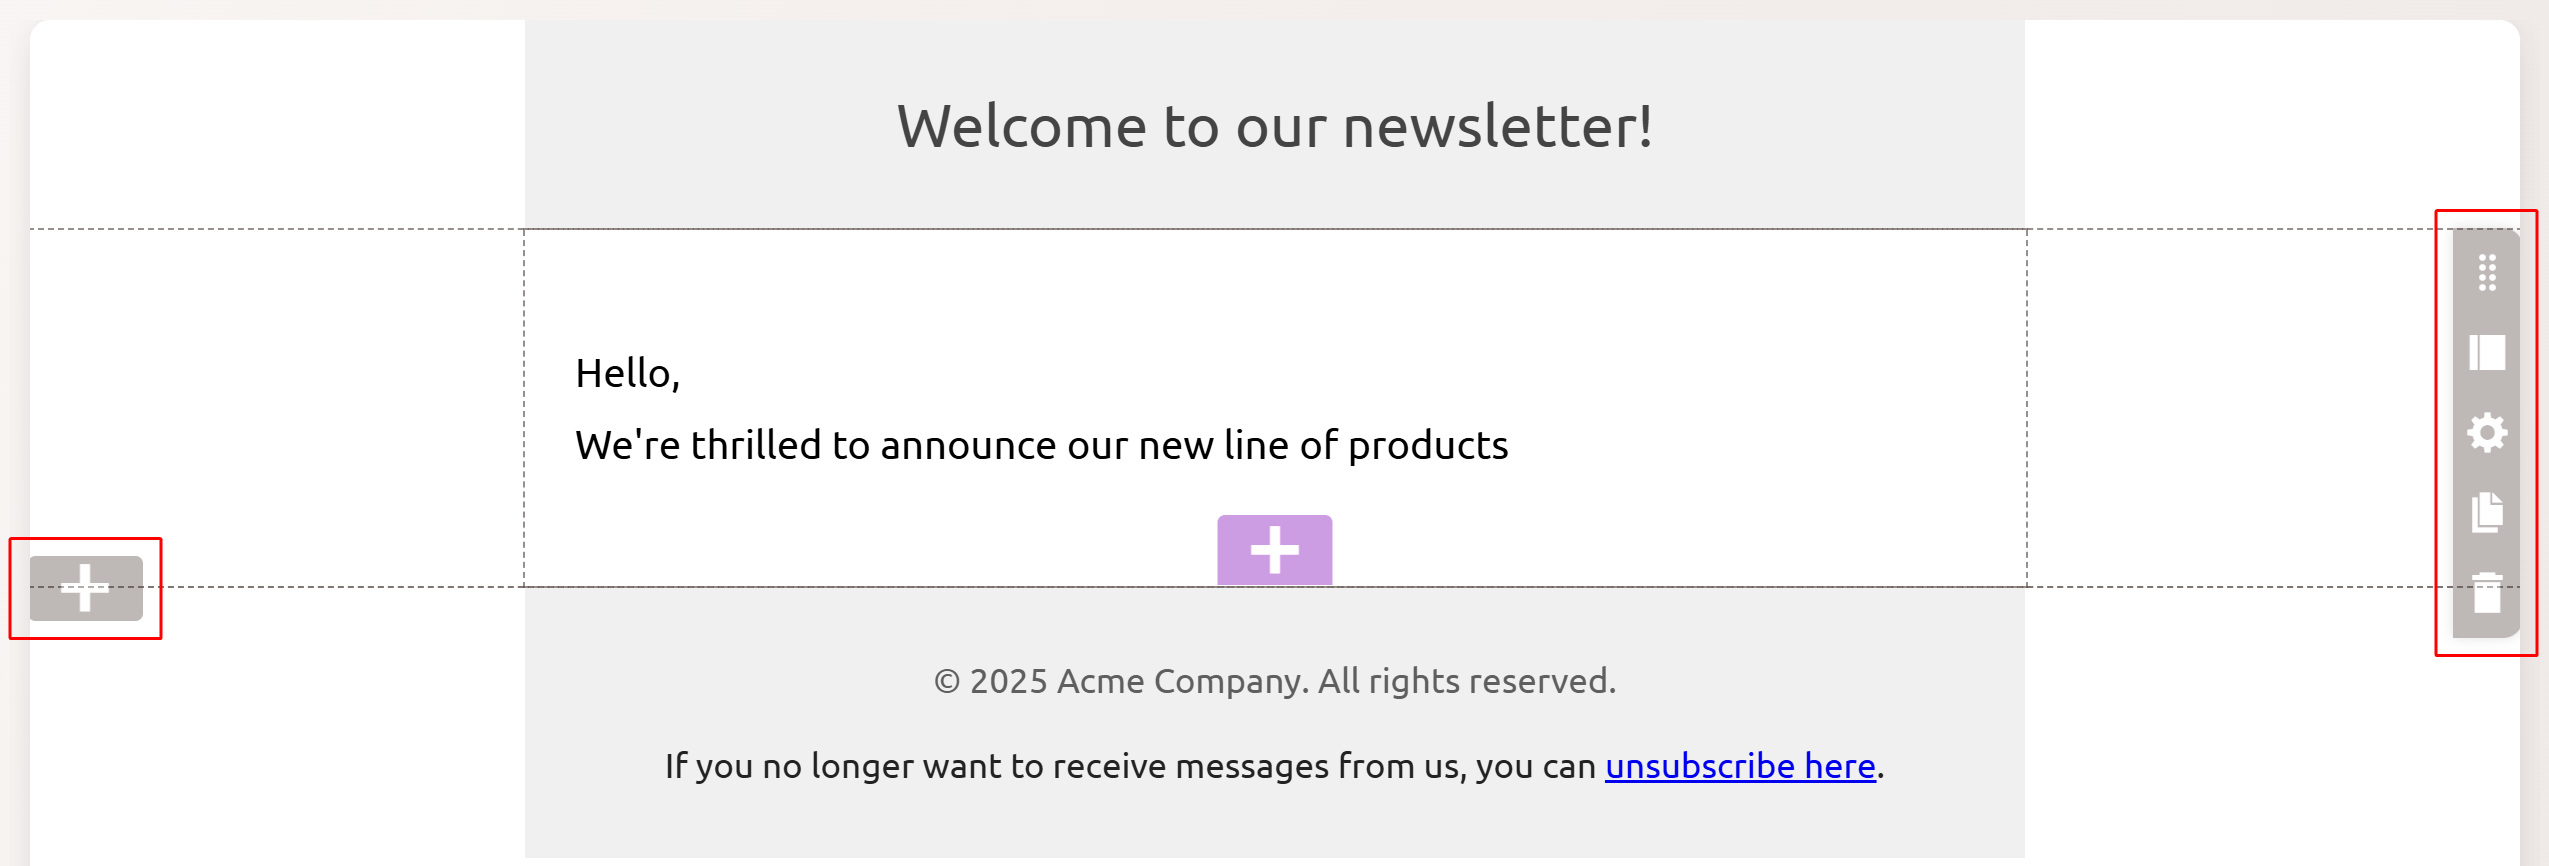
- Add sections – select a gray plus button located on the left side of an editable area to insert a new section. The list of available sections depends on the implementation of your project.
- Move sections – hover over a section and drag it by the drag handle.
- Change section type (only displayed if multiple section types are available) – allows you to replace an existing section with a different section. Any widgets within the section remain, but may be automatically moved if the sections have different widget zones. Hover over the section you want to modify, select the change section type button, and select the new section type you want to use.
- Configure sections (only displayed for configurable sections) – select the configure button, edit the section properties in the configuration dialog, and select Apply. Check with your site’s developers for more information about the section types and their properties.
- Copy sections – hover over the section you want to copy and select the copy button in the upper right corner of the section to copy a section with all widgets in the section.
- You can paste the copied sections onto any email that uses Email Builder using the Add section button.
- A section can only be pasted into an editable area if all widgets in the copied section and the section itself are allowed in the area.
- The copy feature allows you to store up to 10 sections for 12 hours.
- Delete sections – hover over the section you want to remove and select the delete button in the upper right corner of the section.
Each section defines one or more zones, where you can add widgets.
After making any changes in the email, do not forget to select the Save button. Changes made to the sections can be previewed in the Preview mode.
Add content using widgets
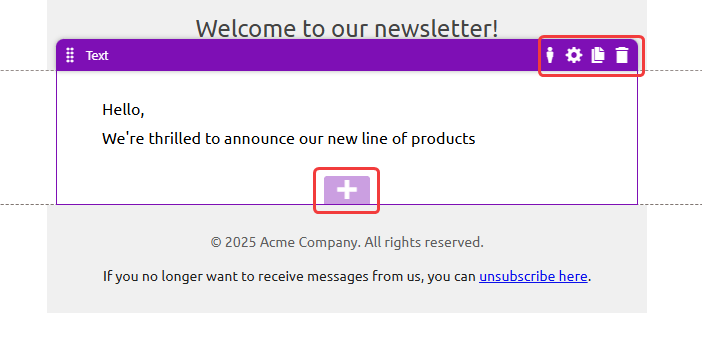
Widgets allow you to add individual pieces of email content, such as text, images, CTA links, etc. Manage widgets by interacting with the purple UI elements in Email Builder:
- Add widgets – select a purple plus button to insert a widget to the desired location. The list of available widgets depends on the implementation of your project.
- Move widgets – select a widget and drag it to a different position by its handle or full header.
- Personalize widgets – select the or personalize button. See Personalize widgets to learn more.
- Configure widgets (only displayed for configurable widgets) – select the configure button, edit the widget properties in the configuration dialog, and select Apply.
- Note: Widget configuration options and property editors are implemented individually with each widget. For more information, visit your project’s documentation or contact your developers.
- Copy widgets – hover over a widget you want to copy and select the copy button in the upper right corner of the widget. You can then paste the copied widget on emails that use Email Builder via the Add widget functionality. This feature allows you to store up to 10 widgets for 12 hours.
- Delete widgets – select a widget you want to remove and select the delete button in the upper right corner of the widget.
After making any changes in the email, do not forget to select the Save button. Changes made to the widgets can be previewed in the Preview mode.
Personalize widgets
Advanced license required
Widget personalization requires the Xperience by Kentico Advanced license tier.
Personalization allows you to send different email content based on the contact groups to which individual recipients belong. This can help you provide more accurately targeted information and increase the effectiveness of your emails. For example, you can use personalization to adjust the email text or display additional relevant offers.
Personalization works by creating multiple variants of widgets. Each variant can have its own configuration of properties or different content added through inline editors. When the system sends emails to individual recipients, the appropriate widget variants are used according to the recipient’s contact groups.
Prerequisite
Your project’s developers need to prepare Email Builder widgets that change their content based on their property configuration.
To personalize a widget:
- Open an email channel application in Xperience.
- Select an email with an Email Builder template.
- Switch to the Email Builder view mode.
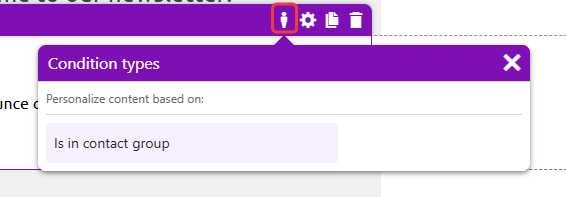
- Select the Personalize () button in the widget header, and select Is in contact group.
- Enter a Variant name and choose the Contact groups to which recipients need to belong to get this variant of the widget.
- Select Apply.
- Modify the properties or content of the new widget variant. Consider the target audience when preparing the modified content.
- Save the email to confirm the personalization.
The new personalization variant of your widget is now created. In the Email Builder view mode, you can switch between personalization variants of a widget by selecting the Personalize () button and choosing the desired variant.
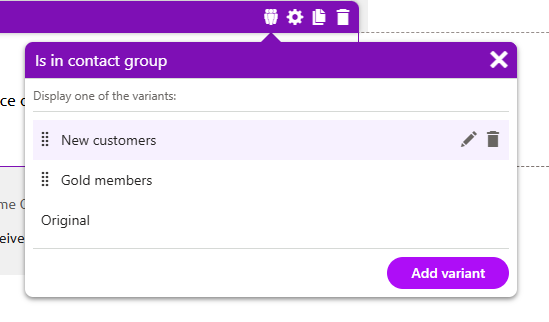
You can add further variants to a personalized widget:
- Select Personalize () in the widget header to open the variant list.
- Select Add variant under the list.
- Enter a Variant name and choose the Contact groups to which recipients need to belong to get this variant of the widget.
- Select Apply.
- Modify the properties or content of the new widget variant. Consider the target audience when preparing the modified content.
- Save the email to confirm the changes.
Priority of variants
Widget variants are evaluated from top to bottom according to their position in the variant list. The email uses the first variant for which the contact group condition is satisfied for the given recipient.
Recommended number of variants
You can create an unlimited number of variants for a single widget. However, for optimal displaying of the variant list, we do not recommend creating more than 10 variants per widget.
You can manage widget variants in the following ways by hovering over them in the variant list:
- Change the variant name or contact group condition via the Edit variant () button
- Adjust the priority of variants by dragging them using the Change priority () handle on the left of the list
- Remove variants via the Delete variant () button
Remember that you need to Save the email to confirm any changes to widget variants.