
Module: Work with emails
20 of 24 Pages
Test the notification you set up
Let’s verify that the notification works as expected.
Submit the form
- Open a private (Incognito) browser window.
- Go to the Electric Car Loan page.
- Fill out the form at the bottom of the page to test-apply for a loan for an electric car.
- Close the private browser window.
Check the result
The Kbank demo website is not connected to any SMTP server, so your test email will be marked as Waiting or similar, but the hosted training environment will not send it to any real-life email address.
You can, however, open such an email and check its contents.
- Return to the Kbank admin interface.
- Go to Configuration and open the Email queue app.
- Open the most recent email sent to Linda or to the test user you’ve specified.
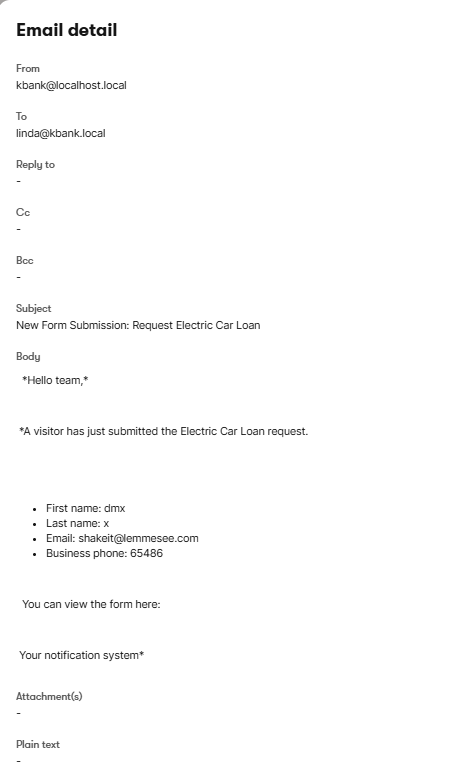
Review the following:
- Does the subject line show the correct form name?
- Does the body contain the form data?
- Were the correct recipients notified? (Ensure the message went to everyone you listed in the Recipients section.)
If all checks out, then congratulations! You’ve just built your first successful internal notification in Xperience by Kentico.
Wrap-up
You’ve created a fully working internal notification tied to a form submission – no developer required.
Notifications like this can help your team stay responsive, informed, and aligned with incoming interest from your website. The faster your team can react, the better you can stay on top of the customer’s needs and the more likely you are to increase the number of conversions. A looked-after customer is a happy customer, after all.
Now that you’ve got the basics, you can:
- Set up notifications for other forms.
- Customize the content to fit your processes.
- Add or remove recipients depending on the use case.
Feeling confident? Try creating a notification for a different form – like Newsletter signup or Contact sales – thus tailoring the message to your team’s needs.