Module: Work with emails
19 of 24 Pages
Exercise -- Send a notification after form submission
Let’s walk through a practical example. You can either watch an interactive demo, or continue with the tutorial below the video and put your editing skills to a test.
Imagine you’re part of a marketing team handling incoming requests for electric car loans. Timely follow-up is key because every form submission could represent a qualified lead. Setting up an internal notification ensures that no customer interest goes unnoticed or unanswered.
In this tutorial, you’ll create an internal notification that alerts your team when someone submits the Electric Car Loan form.
This exercise uses a built-in form and template from the Kbank demo site, with no coding needed.
What you’ll learn
By the end of this walkthrough, you’ll know how to:
- Create a notification email.
- Assign it to a specific form.
- Add internal recipients.
- Test that the email sends correctly and contains the data you need.
Before you start
Make sure you’ve logged into the Kbank demo site as an editor or administrator.
Step-by-step: Set up a form notification
Create and send a notification in an interactive walkthrough
Not a fan of reading? Fast-forward with our interactive demo that directly walks you through creating your own notification, step by actionable step.
Ensure you access the video in full screen mode to make the most out of its interactive features.
Not interested? That’s okay. Continue reading to learn the full details of the process. You can even try it out on your Training website to get most of this guide.
1. Create a new notification
- In the Configuration > Notifications app, create a New notification.
- Configure the notification properties:
- Notification name: Electric Car Loan Form Submission
- Event type: Form submission
- Forms: Request Electric Car Loan
Make sure to connect your notification to the correct form.
2. Define recipients and select a template
- Under the Delivery section, add the following:
- Recipients: administrator (e.g. your test admin account) and linda@kbank.localhost (a teammate)
- Notification template: General email template
- Sender email address: kbank@localhost.local

This part of the process ensures that key team members receive the email notification and that it goes out from the right sending domain (@localhost.local).
Note: General email template is the only template usable for email notifications in the Kbank demo. Your live site may have branded options.
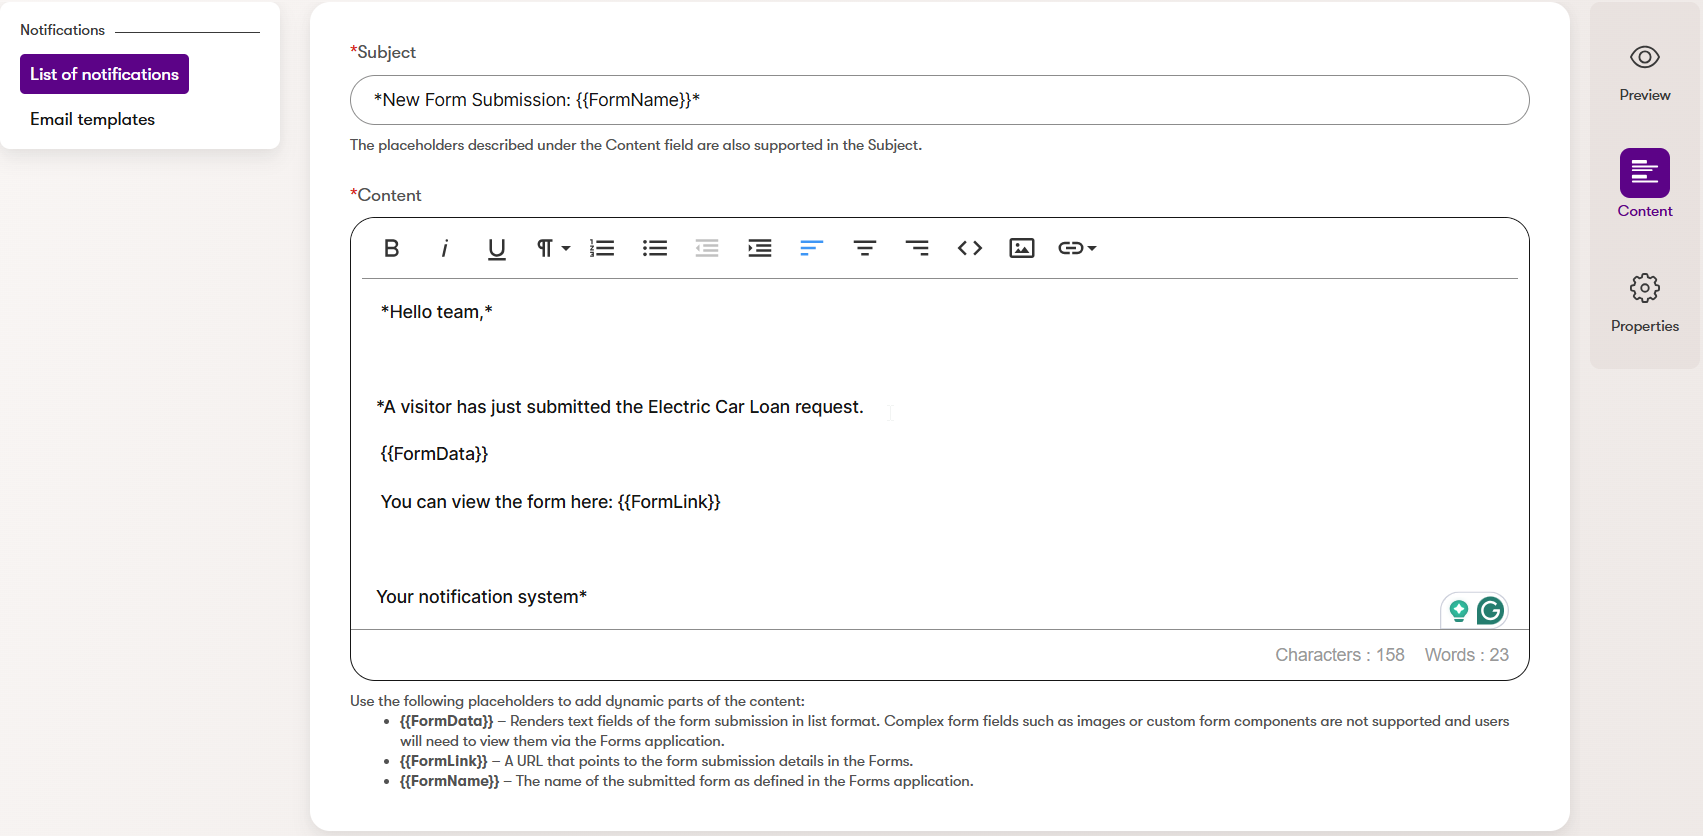
3. Compose your message
Now it’s time to write the subject line and body of the email. You can use macros to include dynamic content, like the form name and the visitor’s input.
Subject:
New Form Submission:{{FormName}}Body:
Hello team,
A visitor has just submitted the Electric Car Loan request. {{FormData}}
You can view the form here: {{FormLink}}
Your notification system
This message will display the actual submitted data and include a link (though in the Kbank demo, this link may not be functional – more on that below).
In the Kbank demo, the link filled in for the {{FormLink}} placeholder may not lead anywhere. That’s an expected behaviour because Kbank is a sandboxed demo environment. In a real-life application, this link would take you or your recipient directly to the submitted form in the admin interface.
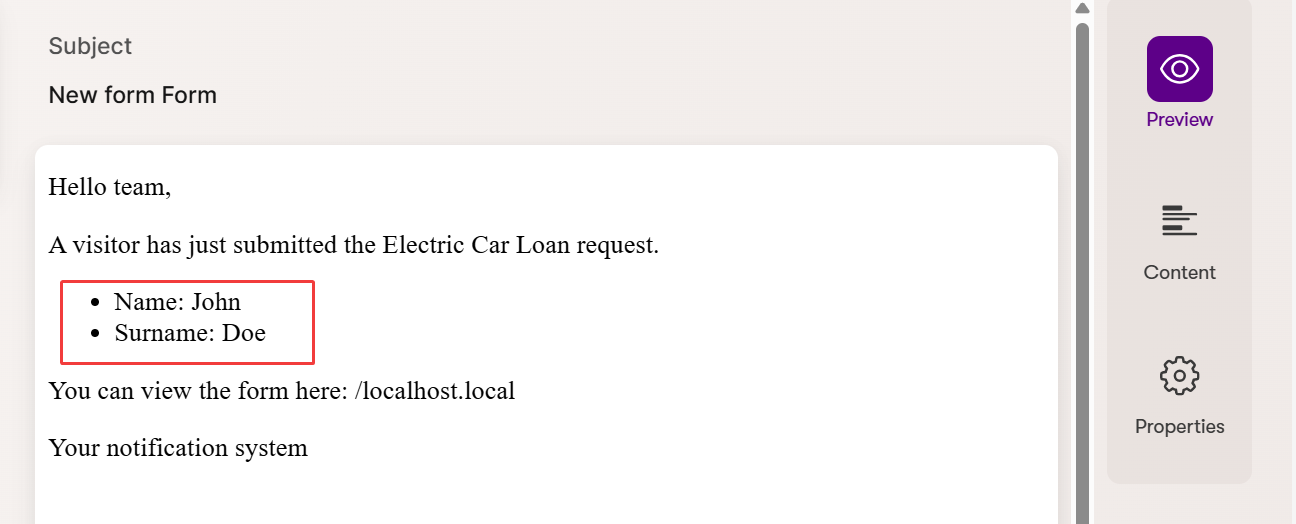
4. Save and preview your notification
- Save the email notification draft.
- Preview your notification, and if you’re happy with the result, let’s get to testing.
Note that Xperience by Kentico adds a placeholder contact name for the demo visitor to help you visualize what the notification data will look like. The preview of your notification may therefore look something like this: