
Module: Custom modules: custom settings
2 of 9 Pages
Define the module in the Xperience UI
The individual settings in our custom settings module (e.g., the Email notification sender from the video above) correspond to objects of a custom class.
Each class must belong to a Module – a container that groups related data classes. We recommend organizing your custom classes into separate modules for different features.
Create custom module
- Navigate to your Xperience administration.
- Create a new module, entering these values:
- Module name: Project settings
- Identifiers → Code name: TrainingGuides.ProjectSettings
Note, that in order to fill out the Code name manually, you need to uncheck the Pre-fill the code name automatically checkbox (checked by default).
We recommend including the namespace of your client or organization in the code name (TrainingGuides in this example). It will help you easily differentiate the custom modules and their purpose.
Create data class
Create new class within your new module. Use the following parameters:
- Class name: Global settings key
- Namespace: TrainingGuides
- Name: GlobalSettingsKey
Now if you check the CMS_Class table of the database, you’ll see a row representing your new class.

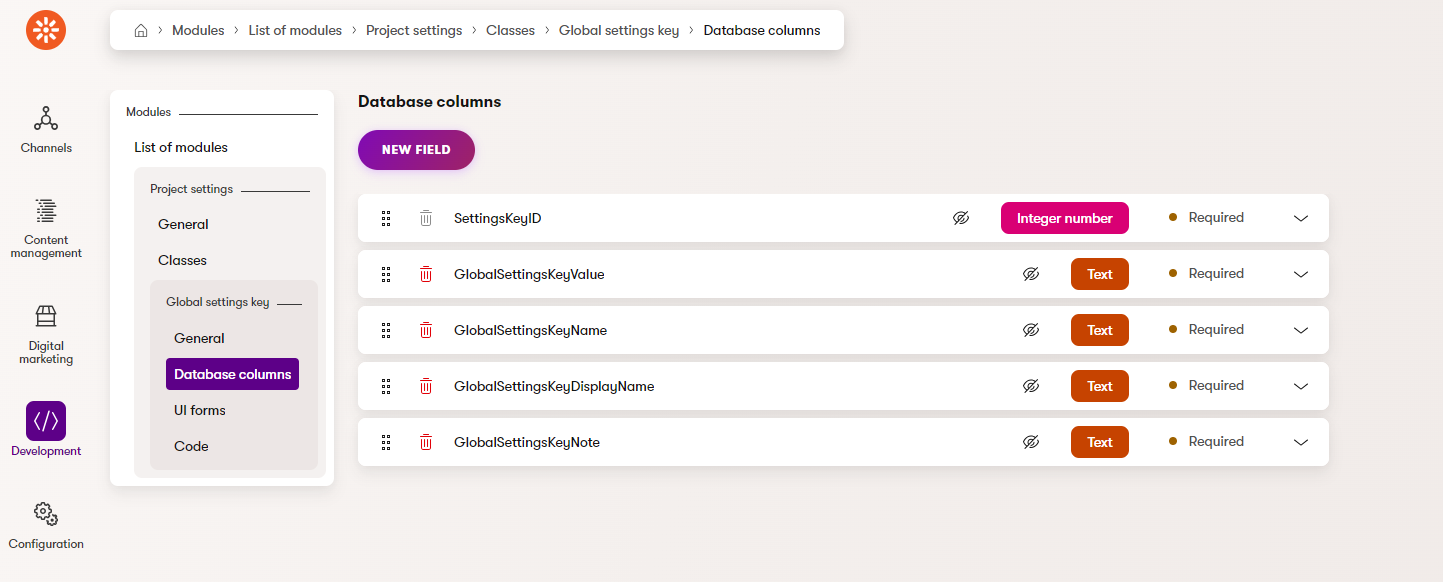
Specify Database columns for the class. Add columns with the following properties:
- The value of the setting, which you will access in code and used to influence functionality
- Field name: GlobalSettingsKeyValue
- Data type: Text
- Size: 1000
- Required: True (Enabled)
- The code name of the setting, which you will use to find the setting and its value
- Field name: GlobalSettingsKeyName
- Data type: Text
- Size: 200
- Required: True (Enabled)
- The display name of the setting, which provides a human-readable name for the listing page
- Field name: GlobalSettingsKeyDisplayName
- Data type: Text
- Size: 200
- Required: True (Enabled)
- A note field, which tells editors how to use the setting and provides additional context
- Field name: GlobalSettingsKeyNote
- Data type: Text
- Size: 2000
- Required: True (Enabled)
Column roles designations
Create fields whose names end in DisplayName, Name, and LastModified with appropriate data types to automatically map them to the Display name column, Code name column, and “Last modified” column roles, respectively.
Binary and Guid fields will automatically map to the GUID column and Binary column of the class.
These settings are important for code generation, which we will discuss later on.
Switch to the Code tab to see that your new fields have been automatically mapped:
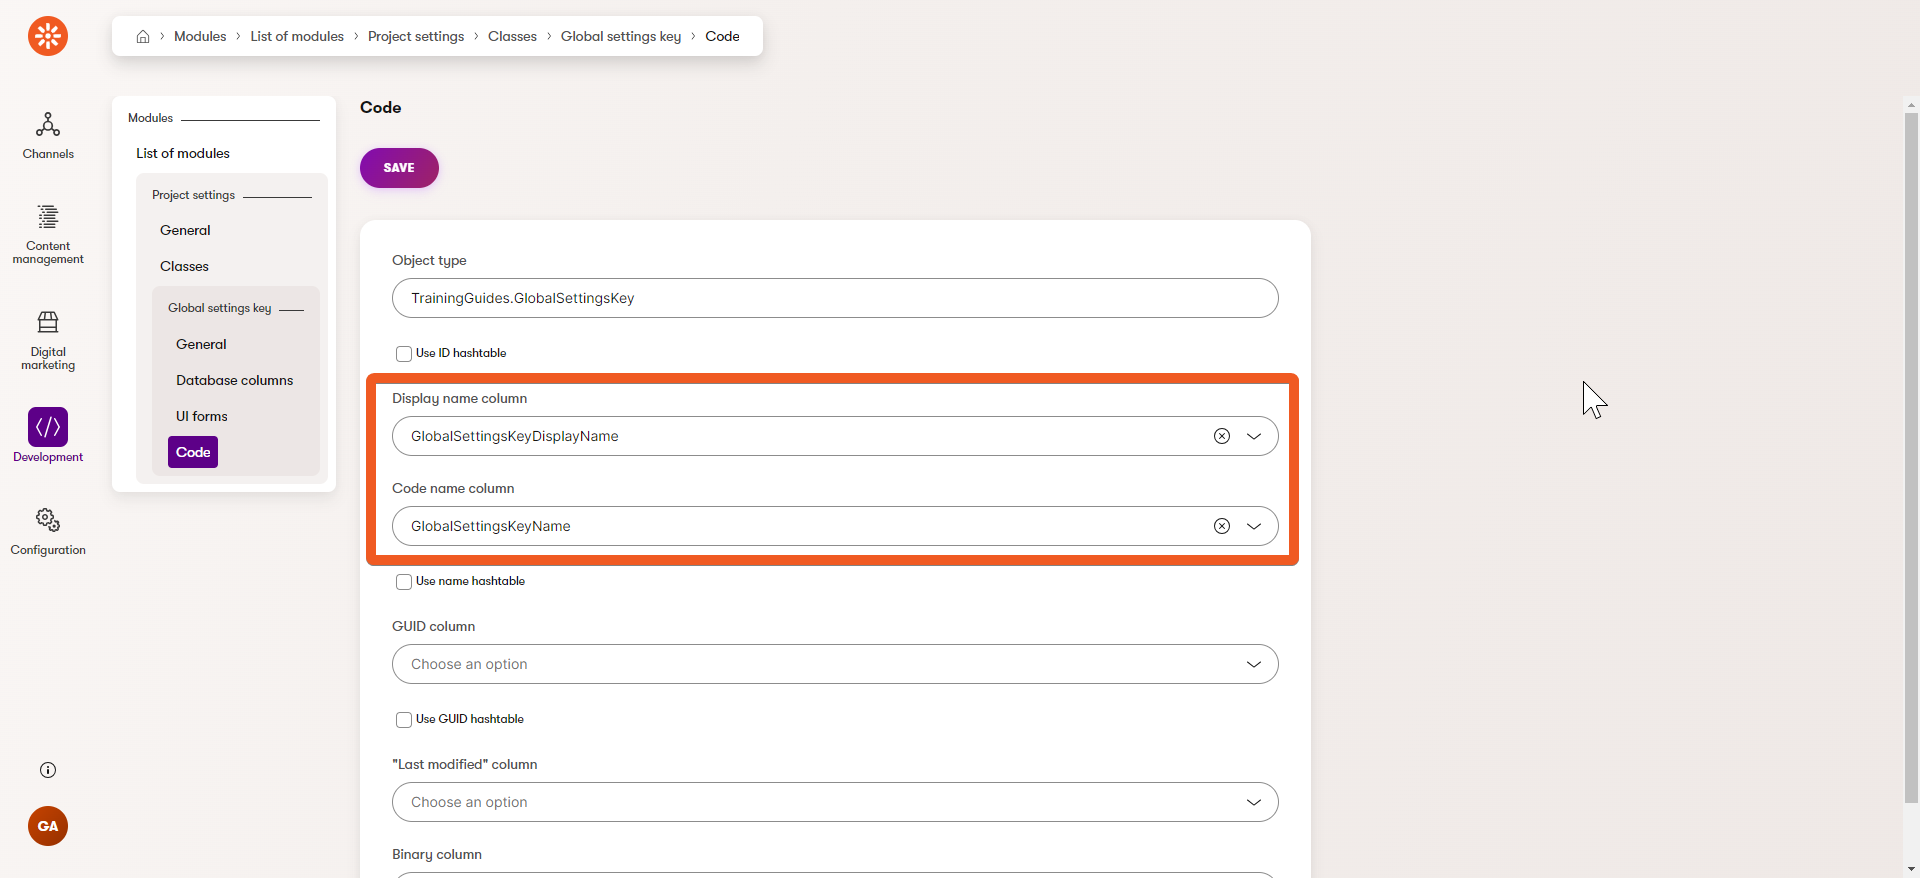
Note that you can always manually change the designations on the Code.
- The value of the setting, which you will access in code and used to influence functionality
Add a UI form for the class
To enable editors or administrators to create items of your class in the admin UI, you need a UI form.
- Create a new edit form for your class:
- UI form name: Global settings key edit
- Identifiers → Code name: GlobalSettingsKeyEdit
In this case, you can simply leave Pre-fill code name automatically checked instead of typing the code name manually. The system-generated code name will be identical.
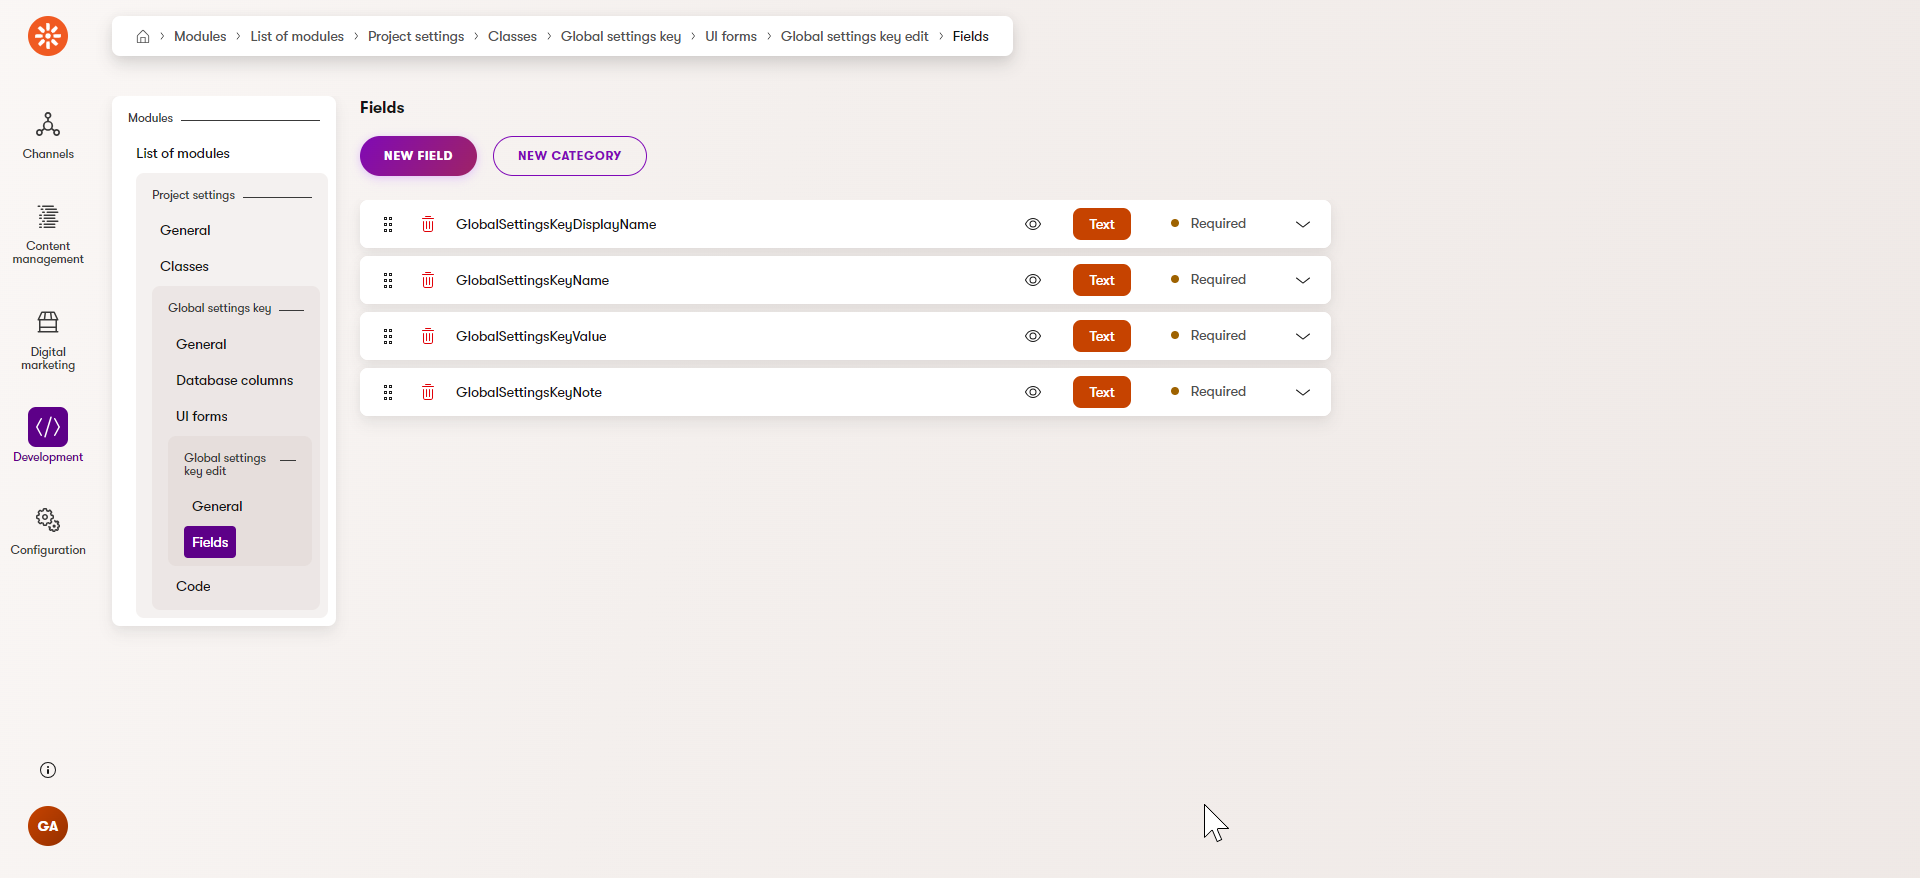
- Switch to the Fields tab in the left menu.
- Add a new UI field for each of your class database fields:
- Click New field.
- Select a database column you want to map the field to. The available columns are sorted alphabetically.
- Fill out field settings as desired and hit Save.
- GlobalSettingsKeyDisplayName
- Field caption: Display name
- Enabled: True (Enabled)
- Form component: Text input
- GlobalSettingsKeyName
- Field caption: Settings key code name
- Enabled: True (Enabled)
- Form component: Text input
- GlobalSettingsKeyValue
- Field caption: Value
- Enabled: True (Enabled)
- Form component: Text area
- Minimum number of rows: 3
- Maximum number of rows: 5
- GlobalSettingsKeyNote
- Field caption: Notes
- Tooltip text: Explain the purpose of this settings key.
- Enabled: True (Enabled)
- Form component: Text area
- Minimum number of rows: 3
- Maximum number of rows: 15
Your custom class and edit form are now ready.
Generate code files
The next step toward accessing your class and its objects in your code in a strongly typed manner is to generate code files for it.
Info providers
We recommend using the --with-provider-class "false" parameter to avoid generating a dedicated provider for your class.
You should use a generic provider, based on IInfoProvider<TInfo> to access the objects of your class - see an example later on in this series.
This is the best practice unless you specifically need to retrieve your objects in a context where dependency injection is not yet available. In such cases, use Provider<T>.Instance to access the generic provider.
Only generate dedicated providers if dependency injection is not possible and using Provider<T>.Instance doesn’t work for your specific scenario.
If you’ve previously generated classes that do require dedicated providers, use the --include or --exclude parameters to ensure that the new command does not overwrite them.
If you are working in the Training guides repository, you can use the following command.
dotnet run --no-build -- --kxp-codegen --type "Classes" --location "../TrainingGuides.Entities/{type}/{name}/ " --with-provider-class "false"
As a result, the system will generate a partial GlobalSettingsKeyInfo class under the namespace matching the module name (TrainingGuides.ProjectSettings) inside the TrainingGuides.Entities project.

Visit our documentation page for more information on the code generation parameters.
Enable CI for the new class
If your project uses Continuous integration, you need to enable the feature for the newly generated GlobalSettingsKeyInfo class. You can achieve this by overriding the object type configuration of the class.
Rather than editing the generated files directly, we recommend performing the configuration in a new partial class file. This way, you won’t accidentally overwrite your changes the next time you generate code files.
In the TrainingGuides.Entities/Classes/Overrides folder create a partial GlobalSettingsKeyInfo class and override its TYPEINFO definition:
namespace TrainingGuides.ProjectSettings;

public partial class GlobalSettingsKeyInfo
{
    static GlobalSettingsKeyInfo()
    {
        TYPEINFO.ContinuousIntegrationSettings.Enabled = true;
    }
}