
Module: Work with website content
26 of 27 Pages
Secure access to pages
This page describes how to restrict access to pages on the live site. For restricting access to pages in the Xperience administration, see Page permission management.
Pages in the content tree are accessible to all visitors by default. Use the Membership access section to restrict access on the live site. These settings require a site that already supports member registration and authentication.
Open a website channel application.
Select a page in the content tree.
Go to Properties → Membership access.
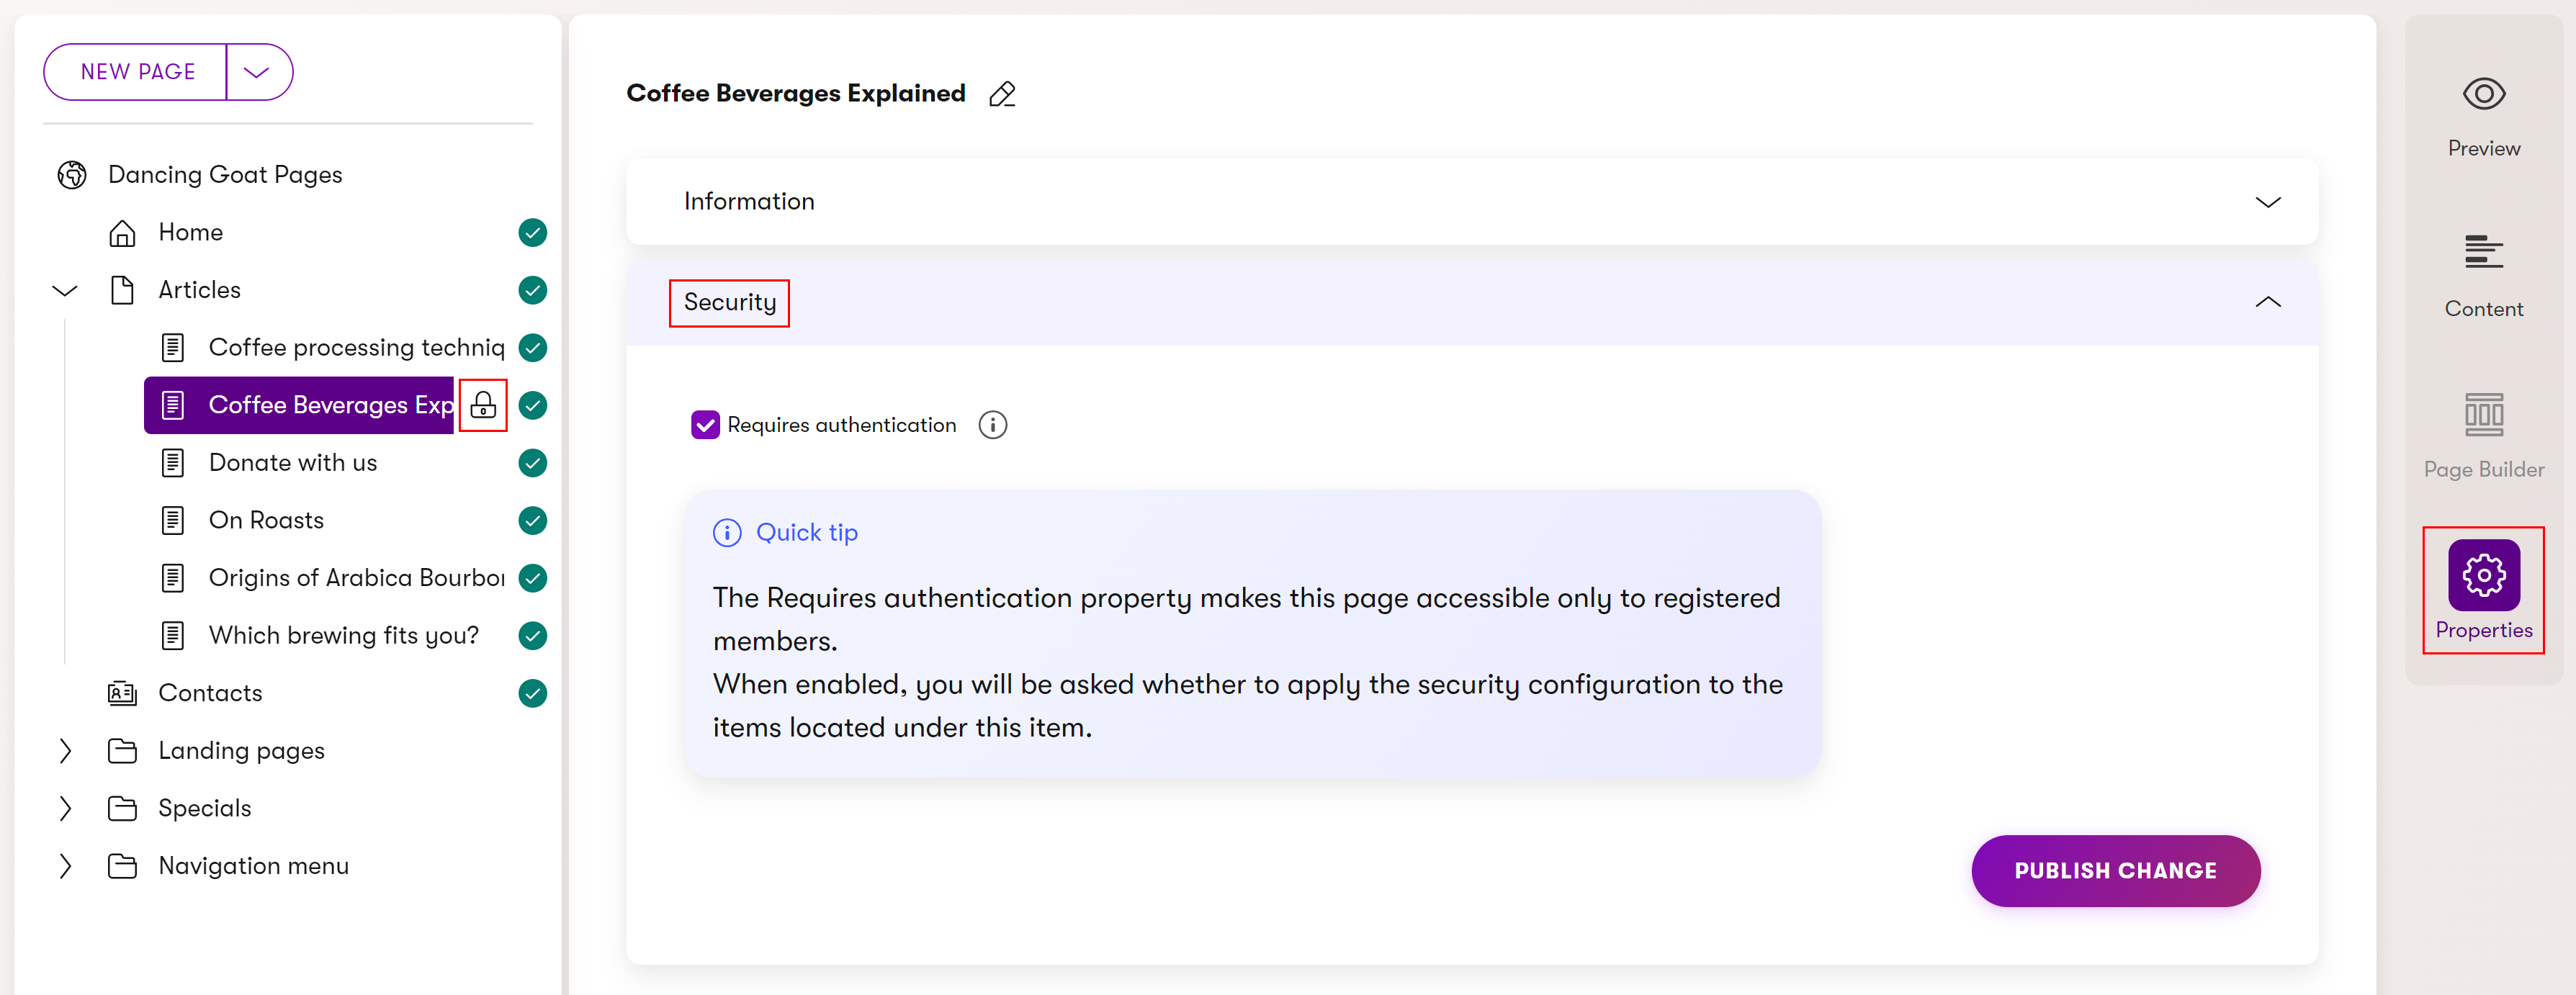
Configure the page’s security settings.
- Requires authentication – select this option to require visitors to sign in before they can view the page.
- Membership roles – this field appears after you select Requires authentication. Select one or more member roles to restrict access to those roles. If you leave the field empty, all authenticated members can view the page.
Select Publish change.
- If securing a page with subpages, a dialog prompts you to decide whether the changed settings should apply to all subpages as well. Both the authentication requirement and the selected roles propagate to child pages.
The updated access restrictions take effect on the live site after you publish the page. Secured pages display a diamond icon in the content tree.
When previewing pages in the Xperience administration, all secured content is visible regardless of member role assignments. This allows editors to review content without restriction.
Access restriction inheritance
Newly created pages inherit access restrictions from their parent page.
Automated member role assignments
Developers typically set up automatic role creation and assignment during implementation. For one-off adjustments, use the Members application to manage roles and assign them to members.