
Adding a secured section for partners (ASPX)
Kentico provides a way to create secured site sections that can only be viewed by users who have a valid user name and password. This page describes how to create a logon web page for the purposes of user authentication and registration, as well as a secured page accessible only by logged in users.
Adding the secured partners page
Start by adding a new secured page that requires authentication. The page reuses the template originally created for the website’s Services page.
- In the Kentico administration interface, open the Pages application.
- Select the root of the content tree (My website).
- Click New ().
- Choose the Page (menu item) page type.
- Type in Partners as the Page name and choose the Use existing page template option. Select the My website category and the Left menu with right text page template.
- Click Save to create the page.
- Open the Page tab and type the following text into the editable region: This is a secured page for partners.
- Click Save.
- Open the Properties -> Security tab of the Partners page.
- Select Yes for the Requires authentication property in the Access section
- Click Save.
This ensures that only authenticated (logged in) users can access the page.
Creating the logon page
Build a page where users can sign in to the website and anonymous visitors can register as new users.
Preparing the source files
Edit your web project in Visual Studio
Right-click the CMSTemplates/MySite folder in the Solution Explorer and click Add -> Add New Item.
Create a Web Form named LogonPage.aspx and check Select master page.
Click Add and choose the MyMaster.master page from the CMSTemplates/MySite folder.
Enter the following HTML layout code into the <asp:Content> element on the page:
 <table border="0" style="width: 100%">
     <tr style="vertical-align: top">
         <td style="width:50%">
             <h2>Log on</h2>
         </td>
         <td style="width:50%">
             <h2>Not a member yet? Sign up now!</h2>
         </td>
     </tr>
 </table>
Drag the following web parts (user controls) from the Solution Explorer into the left and right table cells respectively:
- ~/CMSWebParts/Membership/Logon/LogonForm.ascx
- ~/CMSWebParts/Membership/Registration/RegistrationForm.ascx
Set the following properties for the controls:
LogonForm:Property
Value
Description
AllowPasswordRetrieval
true
Configures the logon form to display a link that allows users to recover forgotten passwords or generate new ones via e-mail.
SendEmailFrom
no-reply@localhost.local
Sets the sender address for the password recovery e-mails.
RegistrationForm:
Property
Value
Description
EnableUserAfterRegistration
true
Configures the control to automatically enable new user accounts after registration.
Switch to the code behind of the logon page (LogonPage.aspx.cs) and add a reference to the CMS.UIControls namespace:
using CMS.UIControls;Change the class definition so that it inherits from the TemplatePage class:
public partial class CMSTemplates_MySite_LogonPage : TemplatePageSave the files.
Registering the logon page template
- Switch to the Kentico administration interface in your browser.
- Open the Page templates application.
- Select the My website category.
- Click New template and type Logon page into the Template display name field.
- Click Save.
- Set the following values on the General tab:
- Template type: ASPX page
- File name: ~/CMSTemplates/MySite/LogonPage.aspx
- Click Save.
- Switch to the Sites tab and assign the page template to My website.
Adding the logon page page
- Open the Pages application.
- Select the root of the content tree (My website).
- Click New ().
- Choose the Folder page type.
- Type in Special pages as the Page name and click Save.
- Click New () again and select the Page (menu item) page type.
- Type in Logon as the Page name and choose the Use existing page template option. Select the My website category and the Logon page template.
- Click Save to create the page.
Because you placed the Logon page under a folder, it does not show up in the website’s navigation menu. The menu control on the master page is configured to only display pages of the Page (menu item) type. You can use folders to store pages that have a specific purpose on the website, but are not part of the regular content.
Setting the website’s logon page
When an anonymous visitor attempts to access a secured page that requires authentication (such as the Partners page on your sample website), the system redirects them to a logon page. By default, websites use the system page that appears when signing into the Kentico administration interface. However, you can configure each website to use its own custom logon page.
- Open the Settings application.
- Select the Security & Membership category in the settings tree.
- Select My website in the Site drop-down menu.
- Clear the Inherit from global settings check box next to the Website logon page URL setting and type in ~/Special-pages/Logon.aspx. This is the relative URL of the logon page that you added to the website.
- Click Save.
The website’s logon page is now ready.
Adding a sign out button to the website
The website now allows users to log in, so you should also provide a way to log out. You can do this by adding components to the website’s master page.
Open your web project in Visual Studio.
Edit the MyMaster.master master page (in the CMSTemplates/MySite folder).
Drag the following web parts (user controls) from the ~/CMSWebParts/Membership/Logon/ folder in the Solution Explorer and place them before the CMSMenu control (inside the <div class=“MainMenu”> element):
- SignOutButton.ascx
- CurrentUser.ascx
Set the following properties for the controls:
SignOutButton:Property
Value
Description
ShowOnlyWhenAuthenticated
true
Ensures that master page only displays the sign out button when the site is being viewed by an authenticated users.
CssClass
Right
Sets the name of the CSS class applied to the button.
CurrentUser:
Property
Value
Description
ShowOnlyWhenAuthenticated
true
Ensures that master page only displays the current user information when the site is being viewed by an authenticated users.
CssClass
CurrentUser Right
Sets the names of the CSS classes applied to the label.
Save the changes.
Return to the Kentico administration interface in your browser and open the CSS Stylesheets application.
Edit the My site stylesheet.
Add the following class definitions to the stylesheet:
 .CurrentUser
 {
   color: white;
   padding-top: 4px;
 }
 .Right
 {
   float: right;
   padding-right: 5px;
 }
Click Save.
The Sign out button and CurrentUser control are now visible for signed in users on all pages on the website.
Result - Logging in to the website
Now that you have added the logon page, secured section and sign out button to the website, you can test the new functionality from the perspective of a live site user.
Open the user menu on the right of the Kentico administration interface header, and select Sign Out.
Click Partners in the main menu. The page is restricted, so the website redirects you to the logon page.
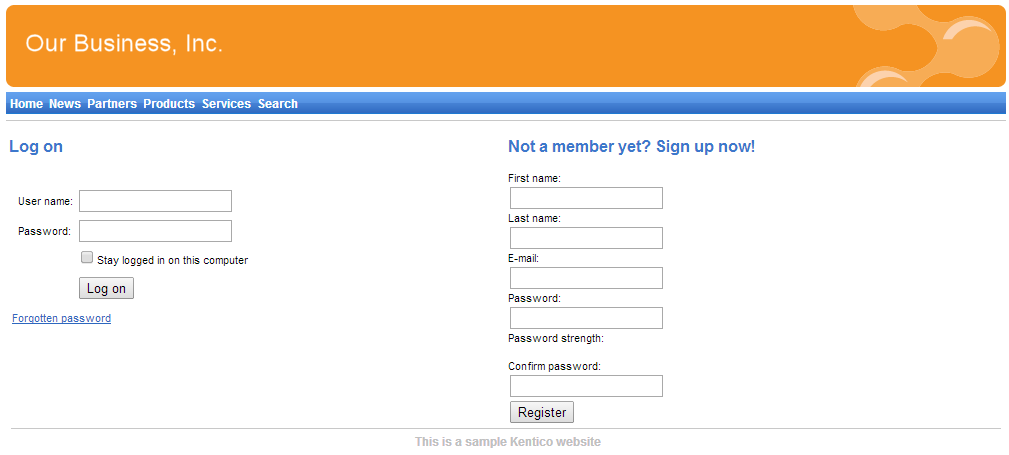
Log on as the administrator again or try registering a new account.
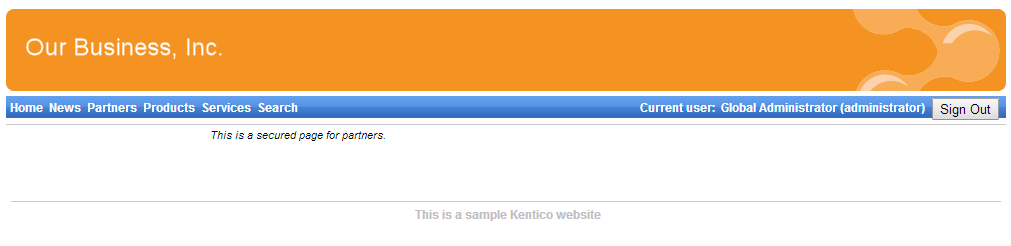
After you sign in successfully, the site automatically redirects you back to the Partners page. Here you can see the content of the secured page, as well as the name of the current user and the Sign Out button.
Kentico also allows you to display content according to the read permissions of users. For example, you can grant the Read permission for a Gold partners section to members of the Gold partners role, so that only gold partners are able to see the corresponding menu item and page content.
See Configuring permissions in the main documentation for more information.