
Module: Work with assets
19 of 24 Pages
Exercise -- Upload and adjust an image
Let’s put the practices mentioned in the first section to the test by working with an image in the Content hub.
Imagine you’re a content editor, working on an ad push for Kbank’s sponsorship of a celebrated English football club. The club’s marketing team wants to commemorate the occasion by holding a flash sale of the club’s jersey dresses, and they have provided you with a batch of images to work on.
After selecting an image for the promo banners, you have to ensure that it will display correctly on all users’ devices and channels.
To follow along, download zipped sample images from the exercise resources.
The exercise we’re showing uses our Kbank demo website that lets you try out what it’s like working with Xperience by Kentico in a safe, sandbox environment.
If you don’t have your demo site yet, request it through the form at Kentico website and request the Xperience by Kentico – Business Tutorial Kbank demo site. Once you approve the request, we will automatically send you a link to the demo site.
1. Upload images to Content hub
- Open Content hub.
- Upload the sample image assets. Xperience automatically optimizes the files when uploading, and variants are generated based on your project’s predefined sizes.
- Select the image you want to update, in our case, it’s player-in-red-jersey.jpeg.
2. Check image optimization
The Primary image is already resized and compressed by the system. This keeps your pages fast to load without making images look blurry.
- Click the Adjust image icon to update the image variant.
- Now you can manually adjust:
- Format (for example, to WEBP or AVIF) – check the project documentation or check with your administrator to see which formats your project supports. In our case, we’ll change the .jpeg format to .jpg.
- Quality – to balance sharpness and file size, let’s change quality to Medium 70%. (Note that an option to adjust quality isn’t available for lossless formats like PNG.)
- Save your changes.
For more details on how to manunally adjust an image, see how to optimize image assets.
3. Preview variants
- Open the uploaded image asset in Content hub.
- Switch between its variants (e.g., wide, vertical, narrow).
- Notice how the system has cropped the image. Is the player wearing the red jersey always fully visible in all variants?
- If not, it’s time to adjust the focal point.
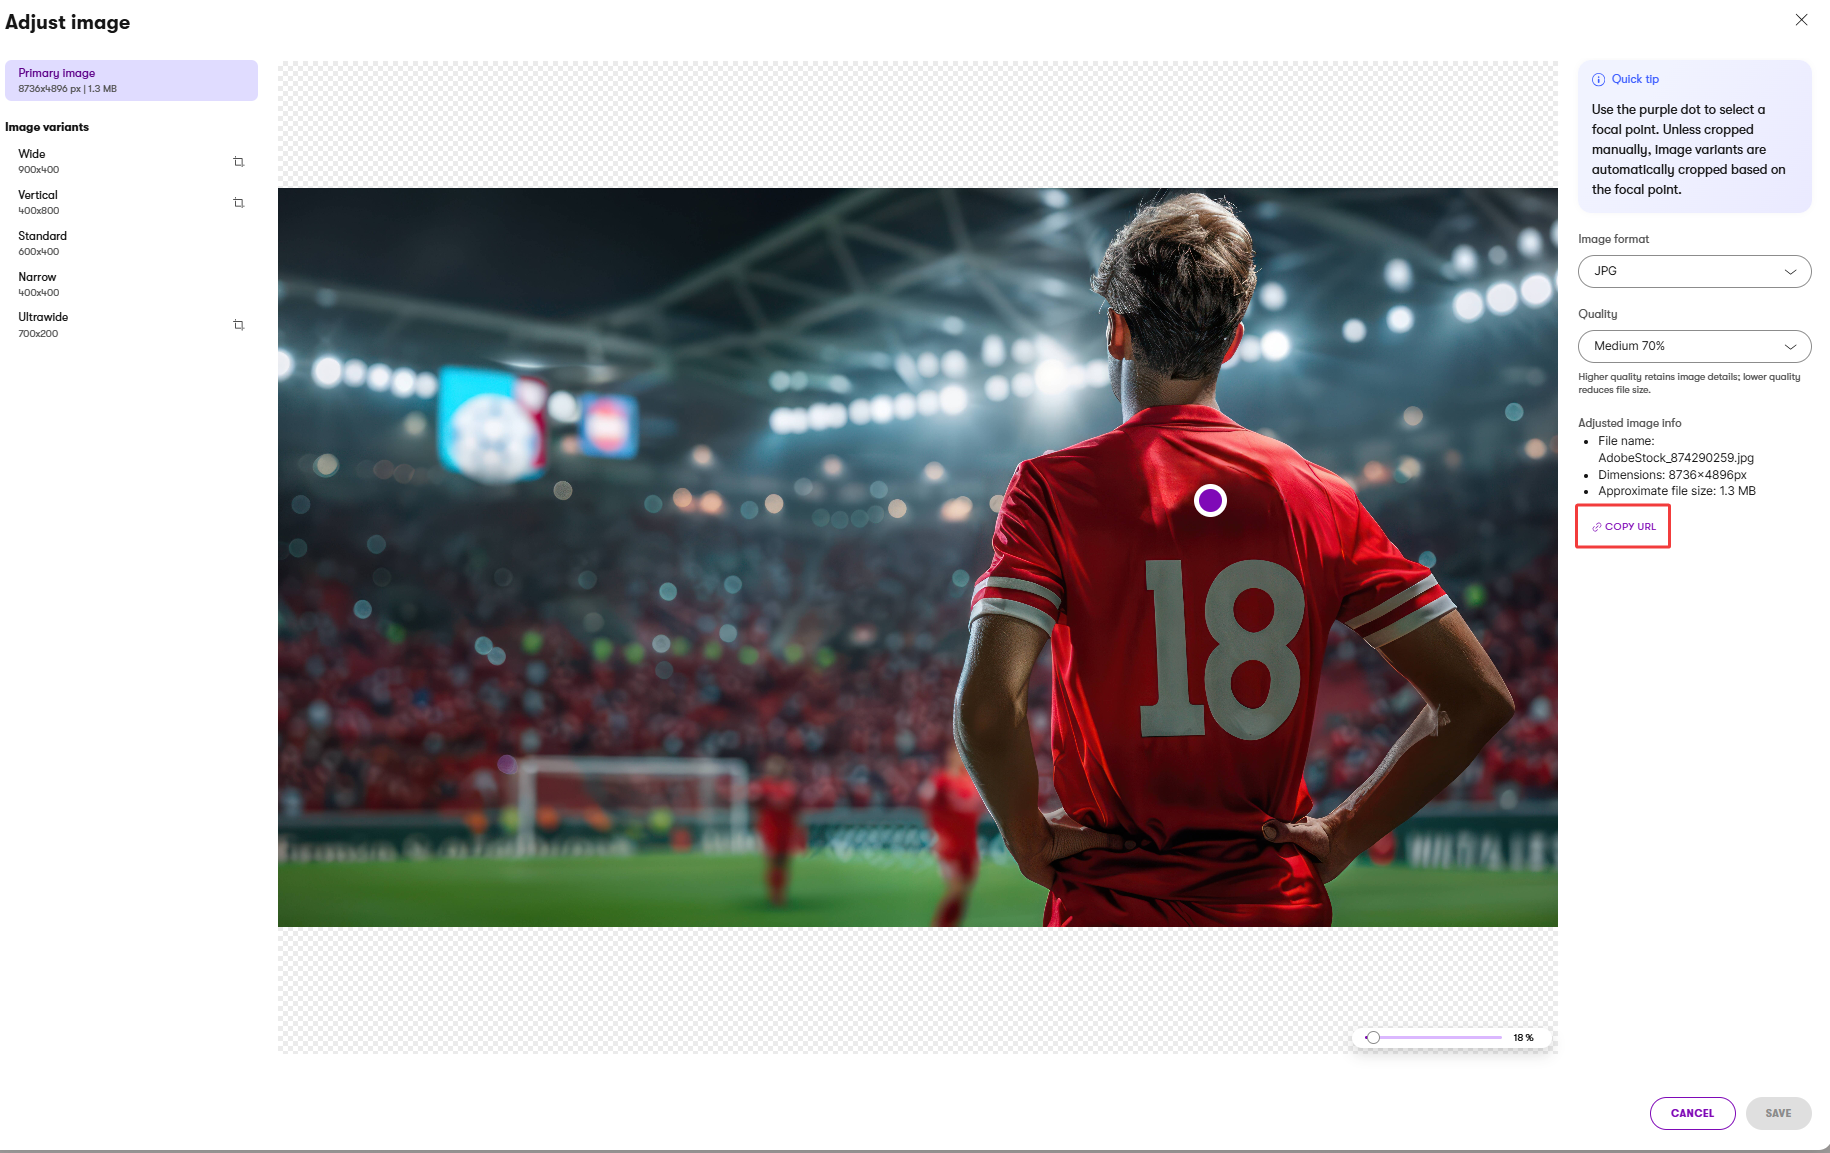
4. Adjust the focal point
- Open the Primary image in the asset.
- Move the purple dot (the focal point) to the most important part of the image – in our case, the middle of the player’s back. We want to keep the red jersey the star of your ad.
- Preview how each image variant looks with the new focal point.
- Save changes.
- All variants update automatically, except for those that you cropped manually.
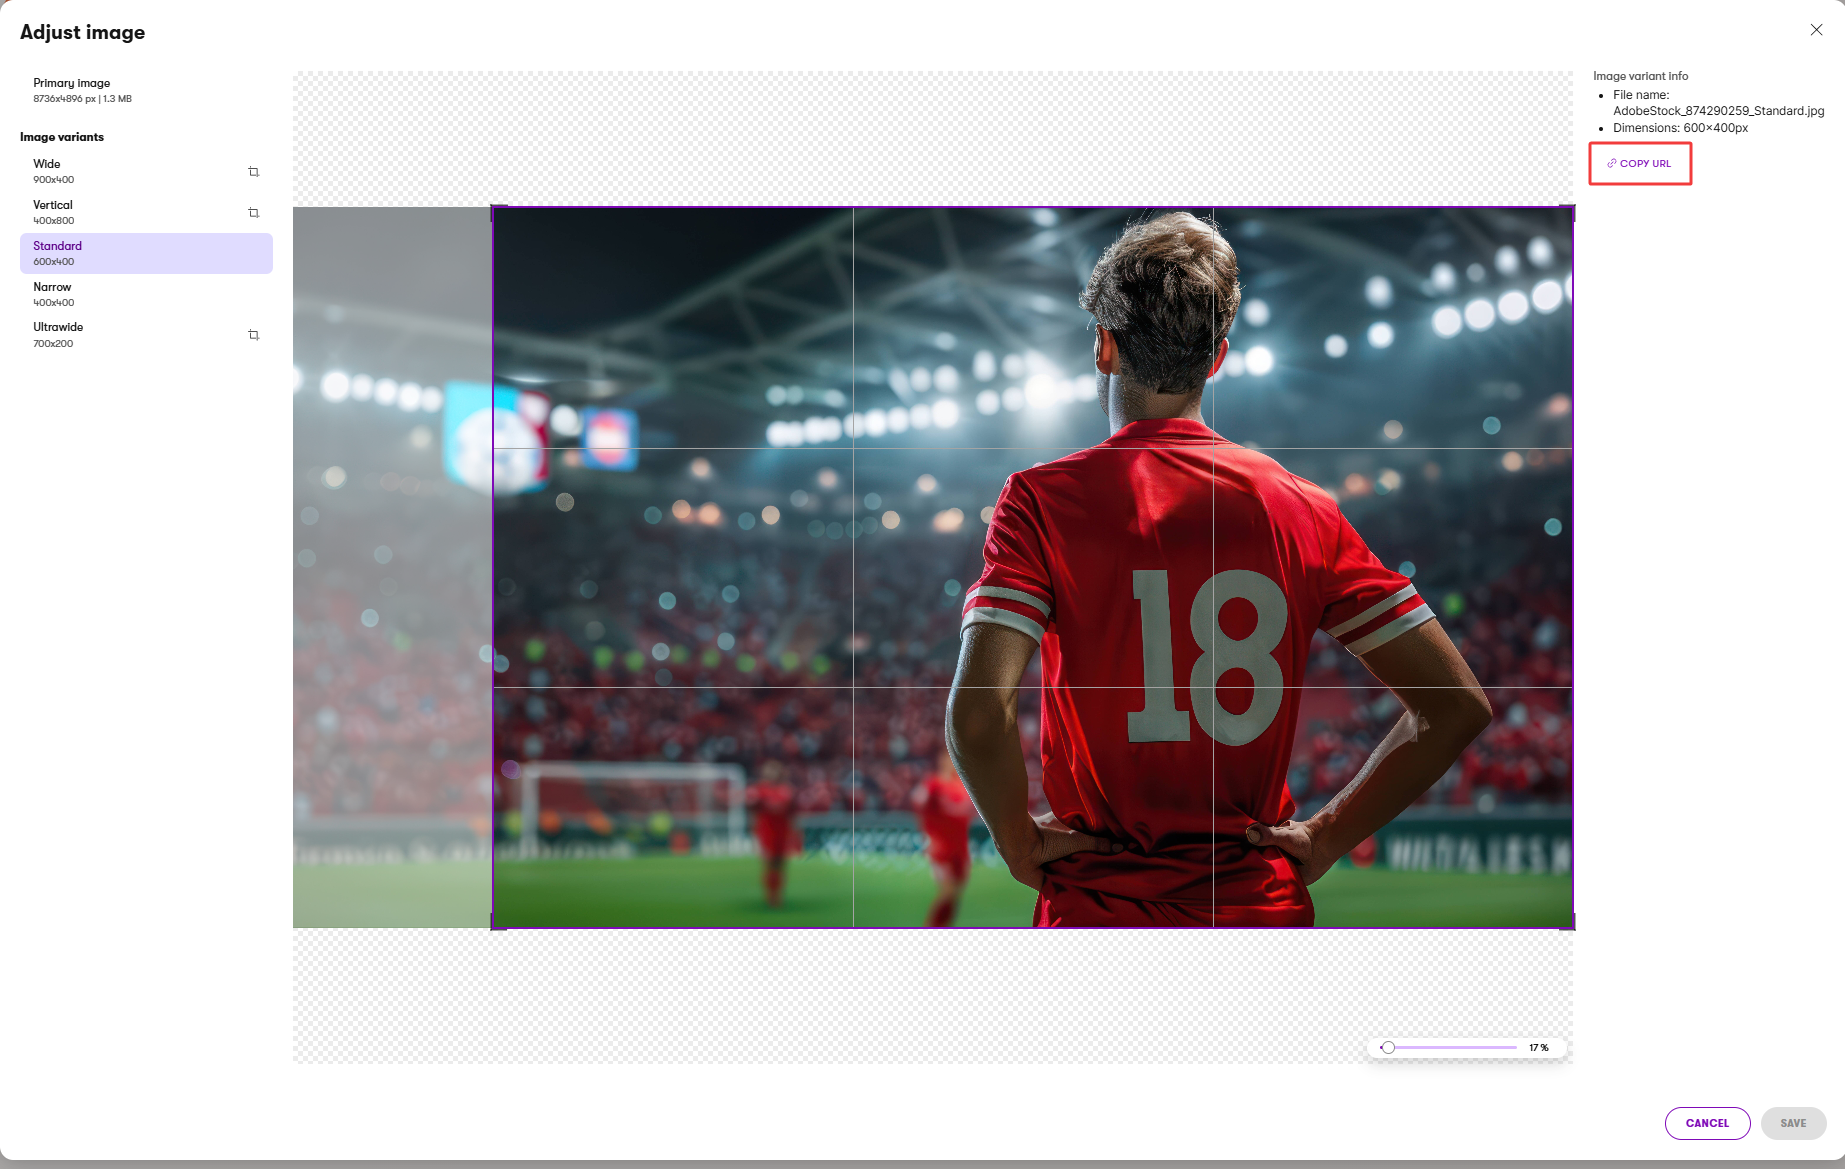
5. Manually crop a variant
- Open the image asset.
- Select the variant you want to adjust.
- Drag the corners of the crop box to reposition it – make sure that the important part of the image is not cropped out.
- Save your changes. The variant is now fixed in place and won’t change if you adjust the focal point later.
- Publish the adjusted content item.
You cannot share the image variant via URL without publishing it, so always publish it when you’ve finished working on the asset and are ready to share it with the world.
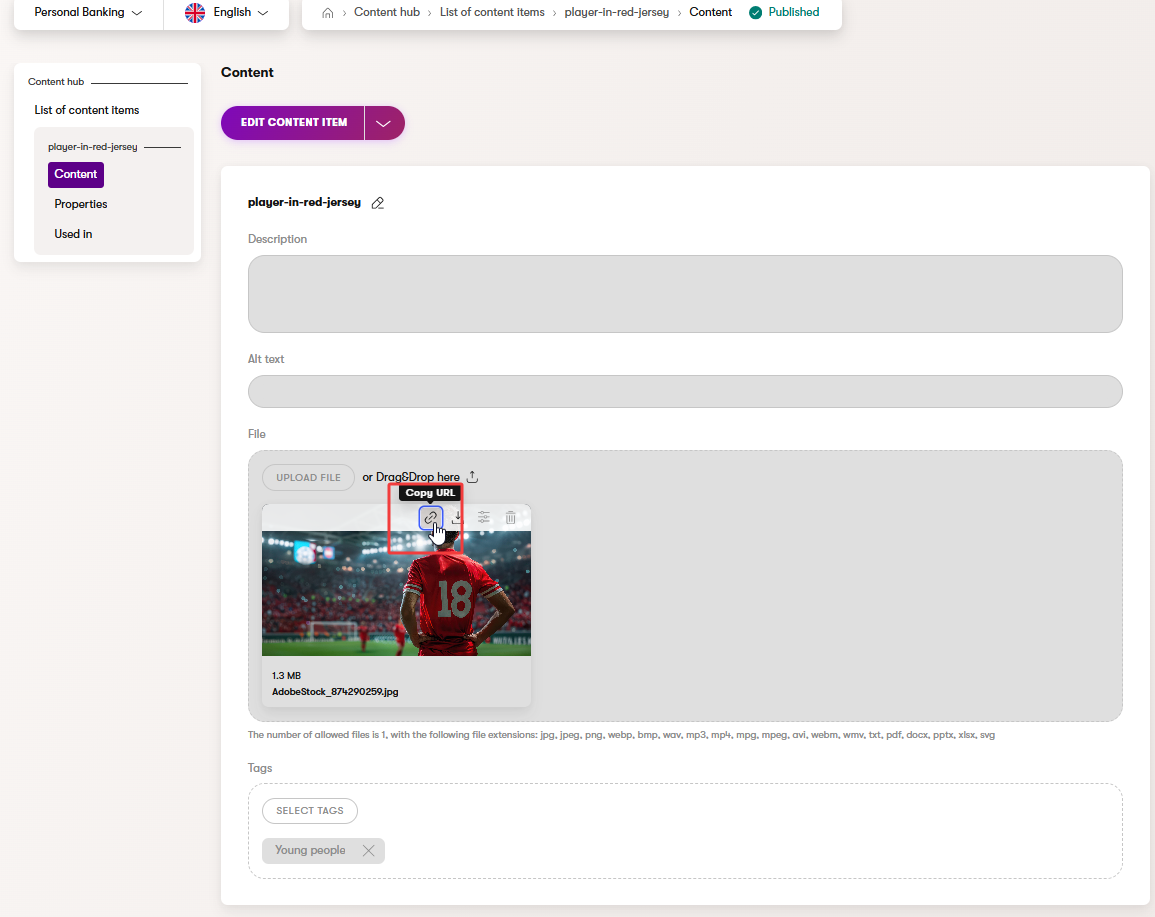
6. Share an image variant via URL
You updated the focal point and manually adjusted the image variants to your liking. Satisfied with your work, you want to share the asset outside Xperience, for example, on social media.
You can:
Copy the URL of the primary image, which is already optimized for online use.
Copy the URL of a specific variant, if you need a certain size or crop.
Or copy the URL of the whole asset.
Downloading the original uploaded image asset isn’t available yet, but watch our roadmap to stay updated on the latest refreshes.