
Installing Kentico
The following procedure describes how to install Kentico for the purpose of developing websites using the Portal Engine model.
Related pages
Click Next on the welcome screen of the installer.
Select your country. The installer automatically tries to pre-select the appropriate country based on your system’s locale.
Accept the license terms.
Click Next.
Click Custom installation.

Check if the installation location for the program files suits you (these are only the setup files, not the web project).
- Click the file system path if you wish to specify a custom location for the program files.
- When should I install only program files?
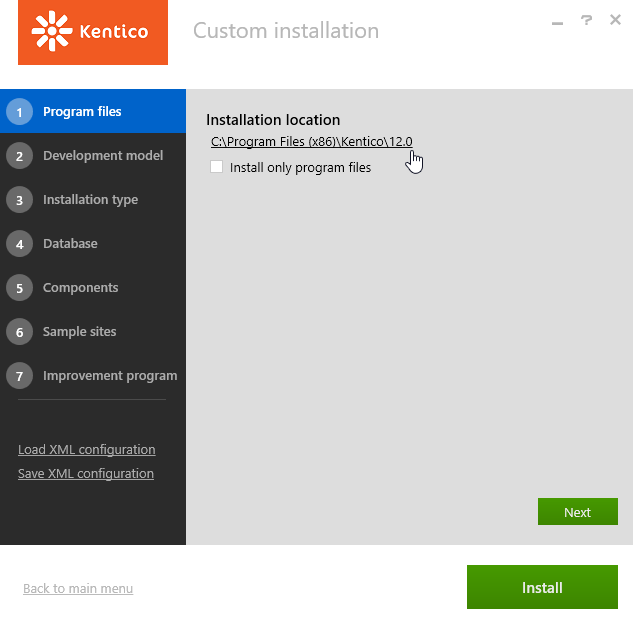
Click Next.
Select the Portal Engine development model and click Next.
If you wish to use the MVC development model, see Installing Kentico MVC projects.
Specify the installation location for your web project (the default path is C:\inetpub\wwwroot\Kentico12).
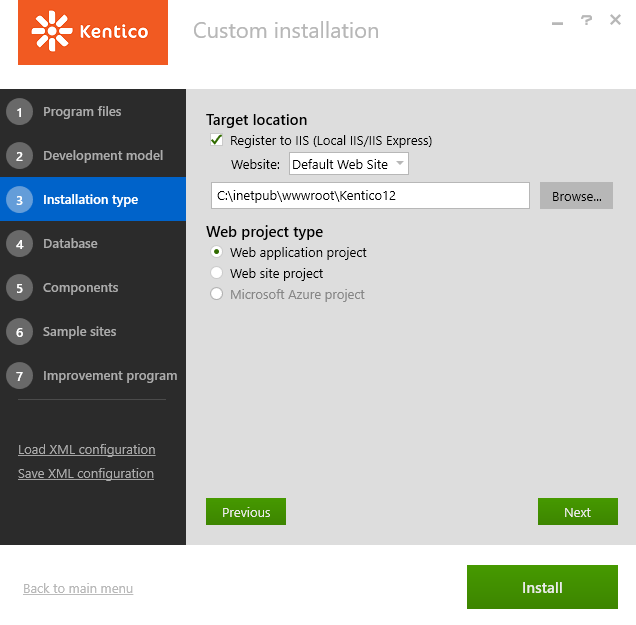
Choose your installation type configuration.
Register to IIS – if enabled, the installer registers the web project as an application in the local Internet Information Services server. If you do not have IIS installed, the utility automatically installs the simplified version, IIS Express.
Web project type
- You can read about the differences between the two project types in Web Application Projects versus Web Site Projects on MSDN.
- To install a Microsoft Azure project, you need to disable the Register to IIS option. See Installing Kentico Azure projects for Cloud Services for more information.
Click Next.
Select the I have access to SQL server option.
Specify the name of your SQL server.
Choose an authentication option for your SQL server.
If you choose the Integrated Windows authentication option, make sure that your Windows account exists as a user in the SQL server database, and has full permissions and the correct schema configured (the recommended database schema is dbo).
Click Establish connection.
Type the name of a new database for your web project.

Click Next.
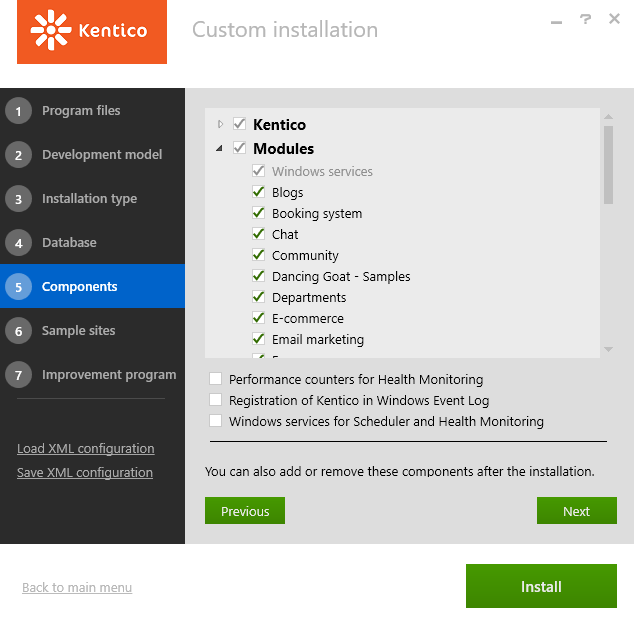
Choose which components you wish to install and click Next. We recommend leaving the default configuration with all components included).
- What are performance counters for Health Monitoring?
- What are Windows services for Scheduler and Health Monitoring?
Choose a starter site:
- Dancing Goat – a showcase of some of the Kentico Integrated Marketing Solution functionality and a responsive web design built within Kentico.
- E-commerce Site – a model of the Kentico e-commerce solution.
- Corporate Site – a showcase of most of Kentico’s capabilities.
- Blank Site – to begin the development of a new website from scratch.
License limitations for sample sites
Some of the sample sites use features that are only available in specific Kentico license editions. If you use a license edition lower than Kentico EMS, you may encounter problems when working with certain features (for example Content Personalization). The initial trial license is equivalent to an EMS license.
- Click Next.
- Decide whether to enable the Kentico improvement program for the installed instance (via the Send anonymous usage records to Kentico checkbox).
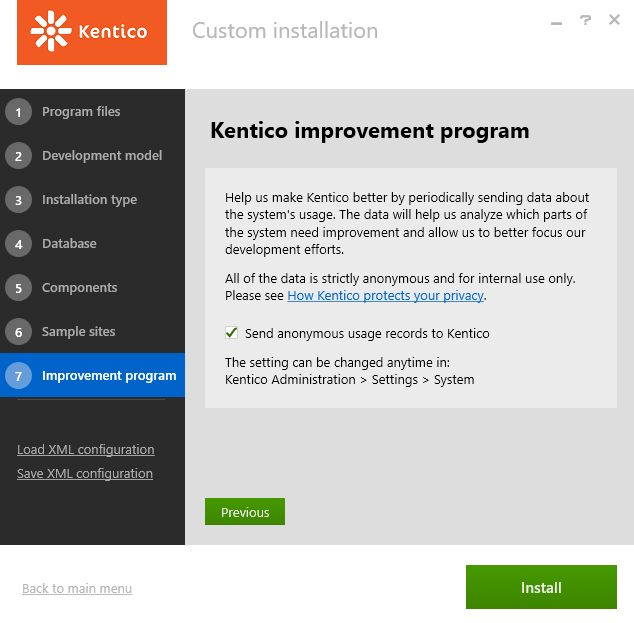
- Click Install.
After the installation is successfully finished, Kentico automatically opens in the default browser.
Default sign in credentials
To sign in to the administration interface after the installation, use the administrator username with a blank password. We strongly recommend setting a new password for the administrator account after the installation.